Painting Your Bathroom Tiles: A Step-by-Step Guide
Painting bathroom tiles offers a cost-effective and transformative alternative to full-scale tile replacement. It allows homeowners to update the aesthetic appeal of their bathrooms without the significant expense and disruption associated with demolition and re-tiling. This process, however, requires meticulous preparation, careful application, and the selection of appropriate materials to ensure a durable and visually pleasing outcome. This guide outlines the essential steps involved in successfully painting bathroom tiles.
Key Point 1: Thorough Preparation is Crucial for Adhesion and Longevity
The success of any paint project, particularly in a moisture-prone environment like a bathroom, hinges on the degree of preparation undertaken. Insufficient preparation will inevitably lead to paint failure, manifesting as peeling, chipping, or bubbling. This initial phase demands meticulous attention to detail.
Cleaning: The first step is a comprehensive cleaning of the tile surface. This involves removing all traces of soap scum, dirt, mildew, and any other contaminants. A strong alkaline cleaner, specifically designed for bathroom use, is recommended. Follow the manufacturer's instructions carefully, paying particular attention to ventilation. Allow the cleaner to dwell on the surface for the recommended time before scrubbing vigorously with a stiff brush or abrasive sponge. Rinse thoroughly with clean water to remove all residue. Multiple cleaning cycles may be necessary for heavily soiled tiles. Any remaining soap scum or mildew will compromise the paint's ability to adhere properly.
Repairing Damage: Before proceeding, inspect the tiles for any cracks, chips, or loose grout. Small cracks can be filled with epoxy-based tile filler. Apply the filler according to the manufacturer's instructions, ensuring it is flush with the surrounding tile surface. Allow ample drying time, typically 24-48 hours, before sanding smooth. Loose or missing grout should be replaced using a waterproof grout. Apply the grout carefully, packing it tightly into the joints. Remove any excess grout from the tile surface with a damp sponge. Allow the grout to cure completely before proceeding.
Sanding: Sanding the tile surface is essential for creating a mechanical bond between the tile and the primer. Use a fine-grit sandpaper (around 220-grit) and lightly sand the entire tile surface. The goal is not to remove the existing finish entirely, but rather to create a slightly roughened surface that the primer can grip onto. Pay particular attention to smooth, glossy tiles. After sanding, thoroughly remove all sanding dust with a tack cloth or a damp cloth. Ensure the surface is completely dry before proceeding to the next step.
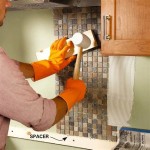
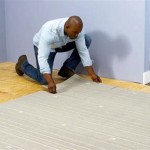
Masking: Protect surrounding surfaces, such as bathtubs, sinks, countertops, and trim, with painter's tape. Apply the tape carefully, ensuring a clean, straight line. Cover larger areas with plastic sheeting or drop cloths to prevent paint splatters. This step is crucial for achieving a professional-looking finish and minimizing cleanup after painting.
Key Point 2: Selecting the Right Primer and Paint: Formulation and Application
The choice of primer and paint is critical for achieving a durable and aesthetically pleasing finish on bathroom tiles. Not all primers and paints are created equal, and selecting products specifically formulated for tile surfaces and humid environments is essential. Investing in high-quality materials will ultimately save time and money in the long run by preventing premature paint failure.
Primer Selection: An epoxy-based or bonding primer is highly recommended for painting bathroom tiles. These primers are designed to adhere to slick, non-porous surfaces like tile and provide a solid base for the topcoat. Avoid using general-purpose primers, as they may not provide sufficient adhesion and can lead to peeling. Read the product label carefully to ensure the primer is suitable for use on tile and in high-humidity environments. Apply the primer in thin, even coats using a high-quality brush or roller. Allow the primer to dry completely according to the manufacturer's instructions. Multiple coats of primer may be necessary for porous tiles or to achieve optimal adhesion. Lightly sand the primed surface with fine-grit sandpaper before applying the topcoat to further enhance adhesion.
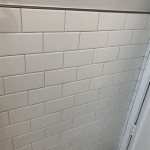
Paint Selection: Choose a high-quality epoxy or urethane-based paint specifically formulated for use in bathrooms. These paints are resistant to moisture, mildew, and stains. They also offer superior durability and scratch resistance compared to standard latex paints. Consider a semi-gloss or gloss finish, as these are easier to clean and more resistant to moisture damage. Avoid using matte finishes, as they can be more difficult to clean and may be more susceptible to mildew growth. When selecting a color, consider the overall aesthetic of the bathroom and choose a color that complements the existing fixtures and décor. It is advisable to test the paint in an inconspicuous area before applying it to the entire surface to ensure the desired color and finish are achieved.
Application Techniques: Proper application techniques are essential for achieving a smooth, even finish. Use a high-quality brush or roller designed for use with epoxy or urethane-based paints. Apply the paint in thin, even coats, avoiding drips and runs. Work in small sections, overlapping each stroke slightly to ensure complete coverage. Allow each coat to dry completely before applying the next coat. Multiple thin coats are preferable to one thick coat, as they will result in a more durable and less prone to chipping finish. If using a roller, back-brush the paint with a brush to eliminate any roller stipple and ensure a smooth, even surface. Pay particular attention to corners and edges, ensuring they are properly coated.
Key Point 3: Drying and Curing: Allowing for Proper Hardening
The drying and curing phase is often overlooked but is crucial for achieving a long-lasting and durable paint finish. Rushing this process can compromise the integrity of the paint and lead to premature failure. Adhering to the manufacturer's recommended drying and curing times is essential.
Drying Time: Each coat of primer and paint requires adequate drying time before the next coat can be applied. The drying time will vary depending on the type of paint, the humidity, and the temperature. Generally, allow at least 24 hours of drying time between coats. Consult the manufacturer's instructions for specific drying time recommendations. Avoid rushing the drying process by using fans or heaters, as this can cause the paint to dry unevenly and may lead to cracking or peeling. Ensure the bathroom is well-ventilated during the drying process to facilitate proper evaporation of solvents.
Curing Time: Curing refers to the complete hardening of the paint film. This process can take several days or even weeks, depending on the type of paint. During the curing period, the paint continues to harden and become more resistant to scratches, stains, and moisture. Avoid using the shower or tub during the curing period to prevent water damage to the paint. If water does come into contact with the painted surface, wipe it off immediately. Avoid using harsh cleaning chemicals on the painted surface during the curing period. A mild soap and water solution is recommended for cleaning. The longer the paint is allowed to cure, the more durable and long-lasting the finish will be.
Post-Painting Maintenance: After the paint has fully cured, regular cleaning and maintenance will help to prolong the life of the painted tiles. Clean the tiles regularly with a mild soap and water solution to remove soap scum and dirt. Avoid using abrasive cleaners or scouring pads, as these can scratch the paint surface. Inspect the painted surface periodically for any signs of chipping, peeling, or cracking. Repair any damage promptly to prevent further deterioration. Re-caulk around bathtubs, showers, and sinks as needed to prevent water from seeping behind the tiles. By following these maintenance tips, the painted bathroom tiles can maintain their appearance and durability for years to come.
By diligently following these steps, from meticulous preparation to careful paint selection and patient drying, individuals can successfully transform their bathroom tiles and achieve a fresh, updated look without the expense and hassle of complete tile replacement. The key to success lies in attention to detail and adherence to the manufacturer's instructions for each product used.

How To Paint Bathroom Tiles A Step By Guide Ideal Home

How To Paint Bathroom Tiles A Step By Guide Ideal Home

How To Paint Bathroom Tiles A Step By Guide Ideal Home

Learn How To Paint Tiles Rubi Blog Usa

How To Paint Shower Tile So It Won T L Porch Daydreamer

How To Paint Tile Floor Angela Marie Made

How To Paint A Bathroom 15 Steps With Pictures Wikihow

Painting Floor Tiles Revamping Your Space Ultratech Cement

How To Paint Tiles The Right Way Making Home

Can You Paint Bathroom Tile Yes But It S Complicated Taskrabbit
Related Posts