How To Remove Tile From a Wall In The Bathroom
Removing tile from a bathroom wall is a common home improvement project, often undertaken as part of a renovation or repair effort. While it can be a labor-intensive process, careful planning and execution can minimize damage to the underlying wall and facilitate a smoother transition to the next phase of the project. This article provides a comprehensive guide to the process, outlining the necessary tools, safety precautions, and step-by-step instructions.
Before initiating the removal process, it's crucial to understand the potential challenges involved. The age and type of adhesive used to install the tile significantly impact the difficulty of removal. Older adhesives can be particularly stubborn, requiring more aggressive techniques. Furthermore, the wall material beneath the tile, whether it's drywall, plaster, or cement board, will influence the choice of tools and methods to employ.
Proper preparation is paramount. This includes gathering the necessary tools and materials, protecting the surrounding areas from dust and debris, and ensuring personal safety through the use of appropriate protective gear.
Gathering Essential Tools and Materials
The success of tile removal hinges on having the right tools readily available. These tools are not only essential for efficiency but also for minimizing damage during the process. The specific tool requirements may vary slightly based on the tile type and the adhesive used, but the following list provides a comprehensive overview of the core items needed:
Safety Glasses: Protecting the eyes from flying debris is non-negotiable. Tile chips and adhesive particles can cause serious eye injuries.
Gloves: Sturdy work gloves protect hands from sharp edges and potential irritants in the adhesive.
Dust Mask or Respirator: Tile removal generates a significant amount of dust, which can be harmful to breathe. A dust mask is adequate for small projects, but a respirator is recommended for larger, more extensive removals, especially if dealing with potentially hazardous materials like asbestos (common in older homes - professional testing and remediation is required if asbestos is suspected).
Drop Cloths or Plastic Sheeting: Covering the floor, bathtub, and other bathroom fixtures prevents damage from falling tile and minimizes cleanup time. Securing the sheeting to walls and fixtures with painter's tape helps to create a barrier against dust.
Painter's Tape: Used to secure drop cloths and protect adjacent surfaces from damage.
Utility Knife: This is useful for scoring grout lines and cutting through caulk around the perimeter of the tiled area.
Grout Removal Tool: A manual grout saw or an oscillating multi-tool with a grout removal blade is necessary to remove the grout surrounding the tiles. This is a crucial step to weaken the bond between the tiles and the wall.
Hammer: A standard claw hammer is used in conjunction with the chisel for leveraging tiles off the wall.
Chisel: A narrow, pointed chisel is ideal for working behind the tiles and breaking the adhesive bond. A wider chisel can be used for larger tiles or when the adhesive is particularly stubborn. Consider purchasing a cold chisel or a masonry chisel for optimal performance.
Putty Knife or Scraper: These tools are used to scrape away remaining adhesive from the wall after the tiles have been removed. A flexible putty knife can be particularly helpful for working on uneven surfaces.
Trowel: A small trowel can be used to apply patching compound to repair any damage to the wall after tile removal.
Vacuum Cleaner: Essential for cleaning up dust and debris during and after the tile removal process. A wet/dry vacuum is particularly useful for cleaning up any residual moisture from the adhesive removal.
Bucket and Sponge: For cleaning the wall after adhesive removal and preparing it for any necessary repairs.
Patching Compound: Used to repair any holes or damage to the wall after the tile and adhesive have been removed. Choose a compound appropriate for the underlying wall material (drywall, plaster, or cement board).
Sandpaper or Sanding Block: For smoothing out patched areas and preparing the wall for further treatment.
Preparing the Work Area and Ensuring Safety
Before commencing any tile removal, it is imperative to thoroughly prepare the work area. This involves several key steps designed to minimize mess, prevent damage to surrounding fixtures, and ensure personal safety.
Clear the Bathroom: Remove any movable items from the bathroom, such as toiletries, shower curtains, and bath mats. This will provide ample working space and prevent these items from being damaged by falling tile or dust.
Protect Fixtures and Surfaces: Cover the bathtub, toilet, sink, and vanity with drop cloths or plastic sheeting. Secure the coverings with painter's tape to prevent them from shifting during the removal process. Pay particular attention to covering the floor, as it is the most vulnerable to damage from falling tile.
Ventilation: Ensure adequate ventilation in the bathroom. Open windows and doors to allow for airflow and minimize the buildup of dust. Consider using a fan to circulate the air and direct dust away from the work area.
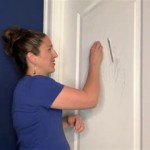
Personal Protective Equipment (PPE): Don safety glasses, gloves, and a dust mask or respirator. This is crucial for protecting your eyes, hands, and respiratory system from potential hazards. Double-check that the safety glasses fit snugly and provide adequate coverage. Ensure that the gloves are durable and provide a good grip. If using a respirator, make sure it is properly fitted to your face.
Inspect for Hazardous Materials: Before starting, if the house was built before the 1980's, consider testing for lead and asbestos. Asbestos was commonly used in tile adhesive and drywall joint compound, and lead can be present in older paint. If either substance is found, hire a professional abatement company to remove the materials safely.
Step-by-Step Tile Removal Process
Following a structured approach to tile removal maximizes efficiency and minimizes the risk of damaging the underlying wall surface. The following steps outline a systematic process for removing tile:
Remove Caulk: Use a utility knife to carefully score along the edges of the tile where it meets the bathtub, shower, or other adjacent surfaces. Remove all caulk with a caulk removal tool or by carefully scraping it away with the utility knife. Removing the caulk significantly weakens the bond between the tile and the surrounding surfaces.
Remove Grout: Utilize a grout removal tool (manual grout saw or oscillating multi-tool with a grout removal blade) to remove the grout surrounding the tiles. Work carefully to avoid damaging the adjacent tiles. The goal is to create space between the tiles and weaken the adhesive bond. If using an oscillating multi-tool, be mindful of the speed and pressure applied to prevent overheating the grout removal blade.
Choose a Starting Point: Select a starting point for tile removal. This is often a chipped or cracked tile, as it provides an easier entry point. If no such tile exists, you can create a starting point by drilling a small hole in the center of a tile. Be cautious when drilling to avoid damaging the underlying wall.
Position the Chisel: Place the chisel at a 45-degree angle to the wall, with the tip positioned behind the tile at the chosen starting point. Use the hammer to gently tap the chisel behind the tile. The objective is to break the adhesive bond without damaging the wall.
Apply Gentle Pressure: Gradually increase the pressure applied to the chisel, working it around the edges of the tile to loosen the adhesive. Avoid using excessive force, as this can damage the wall or cause the tile to shatter. If the tile is particularly stubborn, try applying heat with a heat gun to soften the adhesive.
Remove the Tile: Once the adhesive has been sufficiently loosened, carefully pry the tile away from the wall. Use the chisel as a lever to separate the tile from the adhesive. If the tile breaks, remove the remaining pieces carefully, avoiding any damage to the wall.
Repeat the Process: Continue removing the tiles one by one, working your way across the wall. Adjust your technique as needed, depending on the type of adhesive and the condition of the wall. Be patient and persistent, as some tiles may be more difficult to remove than others.
Remove Adhesive Residue: After all the tiles have been removed, use a putty knife or scraper to remove any remaining adhesive residue from the wall. Apply a moderate amount of pressure and work in small sections to avoid damaging the wall surface. If the adhesive is particularly stubborn, try using a solvent specifically designed for adhesive removal. Follow the manufacturer's instructions carefully when using solvents, and ensure adequate ventilation.
Clean the Wall: Once the adhesive has been removed, clean the wall with a sponge and water to remove any remaining dust and debris. Allow the wall to dry completely before proceeding with any repairs.
Repair Wall Damage: Inspect the wall for any holes, cracks, or other damage caused by the tile removal process. Use a patching compound appropriate for the wall material (drywall, plaster, or cement board) to fill any imperfections. Apply the patching compound with a trowel, following the manufacturer's instructions. Allow the compound to dry completely before sanding it smooth.
Sand the Wall: After the patching compound has dried, use sandpaper or a sanding block to smooth out the repaired areas and blend them seamlessly with the surrounding wall surface. Use a fine-grit sandpaper to avoid scratching the wall. Wipe away any dust with a damp cloth.
Vacuum and Clean: Vacuum the entire bathroom to remove any remaining dust and debris. Clean the floor and other surfaces with a damp cloth. Dispose of the removed tiles and adhesive debris properly.
By following these steps carefully, one can effectively remove tile from a bathroom wall while minimizing damage and preparing the surface for subsequent renovations.

How To Remove A Bathroom Wall Tile Today S Homeowner

How To Remove Bathtub Shower Wall Tiles

Edited Removing Tile From Bathroom Walls Hometalk

Diy Half Bathroom Demolition The Handyman S Daughter

How To Remove A Tile Backsplash Homeserve Usa

How To Demo Tile Mortar Metal Mesh In Bathroom Walls Young House Love

How To Remove Tiled Shower Walls The Floor Elf

How To Remove Wall Tiles 11 Steps With Pictures Wikihow

How To Remove Floor And Wall Tiles Without Breaking Them

How To Remove Tiled Shower Walls The Floor Elf
Related Posts