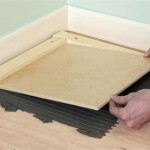
How To Tile A Shower Floor On A Concrete Slab
Tiling a shower floor directly onto a concrete slab requires meticulous preparation and execution to achieve a waterproof and long-lasting result. This process involves several key steps, beginning with assessing the existing concrete surface, establishing proper drainage, and applying the appropriate waterproofing measures before finally setting the tile. The success of the project hinges on adherence to best practices and utilizing quality materials.
Before commencing, gather all necessary tools and materials. These typically include: a level, measuring tape, pencil, safety glasses, gloves, dust mask, shop vacuum, cleaning solutions (such as TSP), concrete patching compound (if required), thin-set mortar, notched trowel (appropriate for the tile size), sponge, grout float, grout sponge, cleaning cloths, sealant, waterproofing membrane (liquid or sheet), drainage flange and clamping ring, and of course, the chosen tiles.
Preparing the Concrete Slab
The foundation for a successful tile installation is a clean, level, and structurally sound concrete slab. Proper preparation is paramount to prevent future cracking, water damage, and tile failure. This stage involves a thorough inspection, cleaning, and leveling of the existing concrete surface.
Begin with a visual inspection of the slab, looking for cracks, holes, or unevenness. Small cracks (hairline cracks) are common in concrete, but larger cracks, especially those that are actively moving or wider than 1/8 inch, require professional evaluation. These may indicate structural issues that need to be addressed before proceeding.
Clean the concrete surface thoroughly. Start by removing loose debris, dirt, and dust with a shop vacuum. For stubborn stains or residues, scrub the surface with a solution of trisodium phosphate (TSP) or a similar degreasing cleaner. Rinse the area thoroughly with clean water and allow it to dry completely. This step is crucial for ensuring proper adhesion of the waterproofing membrane and thin-set mortar.
Next, assess the levelness of the concrete slab. Use a long level (at least 4 feet) to check for any dips or high spots. Significant deviations from level can cause drainage problems and make tile installation difficult. If leveling is required, use a concrete patching compound or self-leveling underlayment specifically designed for concrete substrates. Follow the manufacturer's instructions carefully for mixing and application. Allow the leveling compound to cure completely before proceeding to the next step.
Address any minor cracks or surface imperfections with a concrete patching compound. Apply the compound according to the manufacturer's instructions, ensuring it is properly bonded to the existing concrete. Allow the patch to cure completely and sand it smooth to create a seamless surface.
The properly prepared surface should be clean, dust-free, level, and free of any contaminants that could interfere with adhesion. This foundational step is crucial for the long-term integrity and performance of the tiled shower floor.
Establishing Proper Drainage
Adequate drainage is essential for preventing water from pooling on the shower floor, which can lead to mold growth, mildew, and potential water damage. The shower floor should be sloped towards the drain at a consistent and appropriate angle. This slope, typically ¼ inch per foot (2% grade), ensures water flows efficiently into the drain.
Prior to waterproofing, ensure the drain assembly is properly installed and sealed. The drain flange should be securely attached to the drain pipe and flush with the finished floor height. Many drainage systems now utilize integrated waterproofing membranes, simplifying the sealing process. Consult the manufacturer’s instructions for specific installation details related to the selected drain system.
If the existing concrete slab does not have the required slope, creating the necessary slope can be achieved by using a mortar bed. This mortar bed will be applied after the waterproofing membrane is in place. The mortar is typically a mix of Portland cement and sand, referred to as a deck mud mix. This mixture is applied in a sloped fashion towards the drain. A screed board can be used as a guide to ensure consistent slope across the floor.
Thoroughly compact and smooth the mortar bed to achieve a consistent slope. Use a level and a measuring tape to verify the slope meets the required ¼ inch per foot standard. Allow the mortar bed to cure completely before proceeding to tile installation. Drying times can vary depending on humidity and temperature; always refer to the product’s instructions for specific curing guidelines.
Prior to installing the tile, conduct a water test to verify the effectiveness of the drainage system. Plug the drain and fill the shower floor with water. Observe the water level over a period of several hours to ensure there are no leaks and that the water drains properly when the plug is removed. Address any drainage issues before proceeding to the tiling stage.
Applying Waterproofing
Effective waterproofing is the most critical aspect of tiling a shower floor on a concrete slab. It prevents water from penetrating the substrate, which can cause structural damage, mold growth, and costly repairs. Several waterproofing methods are available, each with its own advantages and disadvantages.
Liquid waterproofing membranes are a popular choice for shower floors. These membranes are typically applied in multiple coats with a paint roller or brush. They create a seamless, flexible barrier that protects the concrete slab from water intrusion. Follow the manufacturer's instructions carefully regarding application thickness, drying time, and number of coats required. Ensure the membrane extends several inches up the shower walls to create a continuous waterproof barrier.
Sheet membrane waterproofing systems, such as chlorosulfonated polyethylene (CSPE) or modified bitumen, are another option. These membranes are applied in sheets and sealed at the seams with a special adhesive or heat-welding technique. Sheet membranes are typically more durable than liquid membranes, but they require more skill and precision to install properly.
Regardless of the waterproofing method chosen, pay particular attention to the corners, edges, and drain area. These are the most vulnerable areas for water leaks. Use reinforcing fabric or sealant to create a watertight seal in these areas. Ensure the waterproofing membrane is compatible with the thin-set mortar and grout you will be using for tile installation.
Once the waterproofing membrane has been applied and cured, it is essential to test its integrity. This can be done by plugging the drain and filling the shower floor with water for 24-48 hours. Carefully monitor the surrounding areas for any signs of leaks, such as dampness on the walls or ceiling below. If any leaks are detected, identify the source and repair the waterproofing membrane before proceeding further.
The waterproofing layer should create a continuous, watertight seal over the entire shower floor and extend up the walls to a height that exceeds the expected water contact. This ensures that water is effectively contained within the shower area, preventing damage to the surrounding structure.
Tiling the Shower Floor
With the concrete slab properly prepared, the drainage established, and the waterproofing in place, the tile installation can begin. This stage requires careful planning, precise cutting, and proper mortar application to achieve a professional and aesthetically pleasing result.
Before applying any mortar, dry-lay the tiles on the shower floor to determine the layout and spacing. This allows adjustments to be made to minimize cuts and ensure a balanced appearance. Start by finding the center point of the shower floor and laying out the tiles from the center outwards. Use tile spacers to maintain consistent grout lines between the tiles. Take into consideration the grout line with the dry lay. Adjust the dry lay if necessary to avoid slivers or very small cuts of tile in visible areas.
Mix the thin-set mortar according to the manufacturer's instructions. Use a clean bucket and a mixing paddle attached to a drill to achieve a smooth, consistent consistency. Avoid adding too much water, as this can weaken the mortar and affect its bonding ability.
Apply the thin-set mortar to the concrete slab using a notched trowel. The size of the notch should be appropriate for the size and type of tile being used. Apply the mortar evenly and in small sections, working one area at a time. Comb the mortar with the notched trowel to create ridges that will promote adhesion and avoid air pockets.
Carefully place the tiles onto the mortar bed, pressing them firmly into place. Use a slight twisting motion to ensure good contact with the mortar. Maintain consistent spacing between the tiles using tile spacers. Check the level of each tile with a level to ensure a flat and even surface. Use a rubber mallet to gently tap down any tiles that are not level.
When cutting tiles to fit around the drain or edges of the shower floor, use a wet saw for clean, precise cuts. Always wear safety glasses and gloves when operating a wet saw. If necessary, use a tile nipper to make small adjustments or irregular cuts.
After all the tiles have been installed, allow the thin-set mortar to cure completely according to the manufacturer's instructions. This typically takes 24-48 hours. Avoid walking on the tiled floor during the curing process.
Grouting and Sealing
Once the thin-set mortar has cured, remove the tile spacers and prepare for grouting. Grouting fills the spaces between the tiles, creating a watertight seal and enhancing the overall appearance of the shower floor. Select a grout color that complements the tiles and the overall design of the bathroom.
Mix the grout according to the manufacturer's instructions. Use a clean bucket and a mixing paddle to achieve a smooth, consistent consistency. Avoid adding too much water, as this can weaken the grout and cause it to crack.
Apply the grout to the tile surface using a grout float. Work the grout into the spaces between the tiles, using a diagonal motion to ensure complete coverage. Remove any excess grout from the tile surface with the grout float.
After the grout has had a chance to set up (typically 15-30 minutes), use a damp grout sponge to clean the tile surface. Rinse the sponge frequently in clean water. Remove any remaining grout residue from the tile surface with a clean, dry cloth.
Allow the grout to cure completely according to the manufacturer's instructions. This typically takes 24-72 hours. Once the grout is fully cured, apply a grout sealer to protect it from stains and water damage. Apply the sealer according to the manufacturer's instructions, using a brush or applicator pad. Allow the sealer to penetrate the grout for the recommended time, then wipe away any excess sealer with a clean cloth.
Finally, apply a bead of sealant along the perimeter of the shower floor where it meets the walls. This creates a watertight seal that prevents water from seeping behind the tiles. Use a high-quality sealant that is specifically designed for wet areas. Smooth the sealant with a finger or a sealant tool to create a clean, professional finish.
Shower Pan On A Slab Jlc

Shower Channel Concrete Slab Installation Flooring Supply Blog

Shower Channel Concrete Slab Installation Flooring Supply Blog

Designing Barrier Free Showers Page 2 Of 3 Construction

Here S How Install A New Shower Stall With Tile Floor

How To Use Concrete For Designing A Bathroom Shower Exchange

Build Curbless Walk In Shower On Concrete Floor Part 4 Waterproofing

Concrete Floor For Curbless Shower Basement Bath

How To Tile A Basement Shower The Home Depot

Build Curbless Walk In Shower On Concrete Floor Part 1 Tips To Make Pan
Related Posts


