Tiling around a tub is a great way to bring a touch of style to a bathroom. Tiling can bring a classic or modern look to a bathroom and make it a feature of the home. It is also a relatively simple task that can be completed with the right tools and materials.
The first step in tiling around a tub is to measure the area that needs to be tiled, including the edges. Once the area has been measured, it is important to purchase enough tile to cover the area, plus a few extra tiles in the case of breakages.
Before tiling, it is important to prepare the area. The walls should be scraped and sanded to create a smooth surface for the tile to adhere to. A waterproof sealing tape should also be applied along the edges of the tub to prevent water from seeping through.
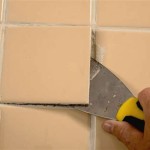
The next step is to apply a thin layer of mortar to the area to be tiled. This should be done in small sections to ensure the mortar doesn’t dry out too quickly. The tiles can then be placed on the mortar and lightly tapped into place. Once the tile is in place, it should be left to dry before grouting.
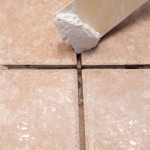
Finally, the grout should be applied to fill in the gaps between the tiles. Make sure to wipe away any excess grout before it dries. Once the grout has dried, the area should be wiped down with a damp cloth to remove any residue.
Tiling around a tub is a great way to give a bathroom a stylish and timeless look. With the right tools and materials, anyone can complete this task with ease. Just remember to measure the area, prepare the walls, apply a thin layer of mortar, place the tiles and grout, and wipe away any excess grout before it dries.


Related Posts


