Laying Porcelain Tile on Concrete Slab: A Comprehensive Guide
Laying porcelain tile on a concrete slab is a popular choice for homeowners seeking durable, stylish, and easy-to-clean flooring. Porcelain tile offers excellent resistance to moisture, stains, and scratches, making it ideal for high-traffic areas. Installing porcelain tile on a concrete slab requires careful preparation and meticulous execution to ensure a lasting and aesthetically pleasing result.
Preparing the Concrete Slab
The success of any tile installation hinges on the condition of the underlying surface. A properly prepared concrete slab provides a stable and even foundation for the tile. The following steps are crucial for achieving the desired outcome:
1. Clean the Slab Thoroughly: Remove all dirt, debris, grease, and loose materials using a stiff-bristled broom, a shop vacuum, and a cleaning solution specifically designed for concrete. This ensures a clean and adhesive surface for the mortar.
2. Repair Cracks and Unevenness: Fill any cracks or holes with a concrete patching compound. If the slab has significant unevenness, consider grinding it down or using a self-leveling compound to create a smooth and even surface.
3. Apply a Moisture Barrier: Concrete slabs can release moisture, which can negatively affect the adhesive and lead to tile movement or failure. A moisture barrier, commonly a sheet of polyethylene plastic, should be laid over the entire surface to prevent this issue.
4. Install a Waterproof Membrane (Optional): For areas prone to water damage, like bathrooms or kitchens, consider installing a waterproof membrane over the moisture barrier. This provides an additional layer of protection against water penetration.
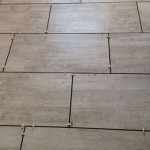
Laying the Porcelain Tile
Once the concrete slab is prepared, the tile installation process can begin. This step involves careful planning, accurate measurements, and precise execution to ensure a seamless and aesthetically pleasing finish. The following steps are vital:
1. Establish a Layout: Determine the layout of the tiles, factoring in the desired pattern, grout lines, and the location of any fixtures or appliances. This helps create a visually appealing and balanced design.
2. Set the Tile Placement: Using a chalk line and a level, mark the starting point for tile installation. This ensures a consistent and aligned grid for the tile layout.
3. Apply Thinset Mortar: Spread thinset mortar on the concrete slab using a notched trowel. The size and depth of the notches determine the thickness of the mortar bed, which influences the spacing and stability of the tiles.
4. Install the Porcelain Tiles: Place the tiles on the wet mortar, ensuring they are level and flush with each other. Use a tile spacer to maintain consistent grout lines. Gently press down on the tiles to ensure good contact with the mortar.
5. Clean and Allow to Cure: Wipe away any excess mortar from the tile surface and allow the thinset to cure according to the manufacturer's instructions. This process usually takes 24-48 hours.
Grouting and Finishing Touches
After the thinset mortar has cured, the final step involves grouting the tile and adding finishing touches to enhance the aesthetics and functionality of the installation. The following steps are essential:
1. Apply Grout: Apply grout to the tile joints using a rubber trowel. Ensure the grout is fully compacted and fills the entire joint space. Wipe away any excess grout with a damp sponge and allow it to cure according to the manufacturer's instructions.
2. Clean and Seal: Clean the grout lines thoroughly with a grout cleaner and apply a sealant to protect the grout against stains and moisture. This helps maintain the appearance and longevity of the tile installation.
3. Apply a Finishing Touch: For additional protection, apply a sealant or polish specifically designed for porcelain tile. This enhances the shine and provides a barrier against scratches and stains.
Installing porcelain tile on a concrete slab requires careful planning, meticulous execution, and attention to detail. By following these steps, homeowners can achieve a durable and beautiful tile installation that will enhance the aesthetics and functionality of their homes.

How To Tile Onto Concrete Floors Porcelain Super
:max_bytes(150000):strip_icc()/can-you-install-tile-directly-on-concrete-1822600-04-458f7bb6c78348c1835cf8054ef36553.jpg?strip=all "How To Install Tile Over Concrete")
How To Install Tile Over Concrete

How To Lay Floor Tiles On Concrete Welcome The Rubi Tools Blog

How To Lay Tile Over A Concrete Slab Fine Homebuilding

How To Lay Floor Tiles On Concrete Stonesuper

How To Install Ceramic Tiles On Concrete Floor Tile Installation

How To Lay Tile On Concrete With Pictures Wikihow

Can You Lay Outdoor Tiles Over Concrete Premier Porcelain

How To Install Ceramic Tiles On Concrete Floor Tile Installation

Can You Lay Tiles Onto Damp Concrete Atlas Ceramics
Related Posts