Laying Floating Floor Over Tiles In Bathroom: A Comprehensive Guide
Updating your bathroom floor can transform the entire space, adding both style and value to your home. If you're looking for a DIY-friendly flooring option that's both waterproof and easy to install, floating floors are an excellent choice. In this guide, we'll walk you through the essential steps of laying a floating floor over tiles in your bathroom, ensuring a professional-looking finish.
Materials You'll Need:
- Floating floor planks - Underlayment - Moisture barrier - Spacers - Pry bar - Tape measure - Utility knife - Saw or flooring cutter - Hammer or flooring mallet
Step 1: Prepare the Subfloor
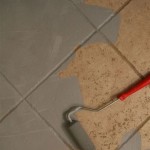
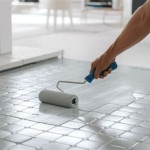
Start by thoroughly cleaning the tiled floor to remove any dirt or debris. Check for any loose or cracked tiles and repair them as necessary. Apply a moisture barrier to the subfloor to prevent moisture from seeping through and damaging your floating floor.
Step 2: Install the Underlayment
Roll out the underlayment over the moisture barrier, starting from one corner of the room. Overlap the seams slightly and tape them together to create a continuous layer of cushioning and sound absorption.
Step 3: Install the Floating Floor Planks
Begin laying the floating floor planks along the longest wall in the room. Use spacers to maintain a consistent gap between the planks and the wall. Interlock the planks together by angling the short end of one plank into the groove of the adjacent plank. Tap the planks into place using a hammer or flooring mallet.
Step 4: Cut Planks to Fit
As you reach the end of a row, measure and cut the last plank to fit. Use a utility knife or flooring cutter to make a straight cut. Apply adhesive to the groove of the last plank and interlock it into place.
Step 5: Continue Laying the Floor
Continue laying the floating floor planks, row by row, until you reach the opposite wall. Stagger the joints between the rows to create a more durable floor. Use spacers to maintain a consistent gap around the perimeter.
Step 6: Install Transition Strips
If your bathroom floor transitions to another flooring type, such as carpet or tile, you'll need to install transition strips to cover the gap. Measure and cut the transition strips to fit the width of the doorway. Apply adhesive to the underside of the strip and press it into place.
Step 7: Remove Spacers
Once the floating floor is fully installed, remove the spacers around the perimeter. This will allow the floor to expand and contract naturally with changes in temperature and humidity.
Tips for Success:
- Acclimate the floating floor planks to the room temperature for at least 24 hours before installation.
- Use a level to ensure that the subfloor is level before installing the underlayment and floating floor.
- Start laying the floating floor planks from the center of the room and work your way out to the edges.
- Avoid overtightening the planks, as this can damage the joints.
- Seal the gaps around the perimeter of the floor with caulk to prevent moisture from seeping through.
By following these steps and tips, you can successfully install a floating floor over tiles in your bathroom, creating a waterproof and stylish flooring that will enhance the beauty and functionality of your space for years to come.
How To Install A Floating Tile Floor

Installing Laminate Tile Over Ceramic Diy Floors Wonderhowto

Install Laminate Flooring Over Ceramic Tile

How To Install Vinyl Plank Flooring In A Bathroom Fixthisbuildthat

How To Install Vinyl Plank Floors In A Bathroom Over Tile

What Type Of Flooring Can You Install Over Ceramic Tile

Can You Put Laminate Flooring Over Tile Twenty Oak

Can You Lay A Floating Floor Over Vinyl Or Carpet Rolls

Lvt Flooring Over Existing Tile The Easy Way Vinyl Floor Installation Diy

Should You Install Vinyl Floor Over Tile
Related Posts