Installing Vinyl Plank Flooring Over Tile: A Comprehensive Guide
Updating a home's flooring can significantly enhance its aesthetic appeal and functionality. While complete tile removal is often considered the ideal solution, it can be a labor-intensive and costly process. Installing vinyl plank flooring directly over existing tile can be a viable alternative, offering a more affordable and less disruptive renovation option. This article provides a comprehensive guide to successfully installing vinyl plank flooring over tile, covering essential preparation steps, material selection, and installation techniques.
Assessing the Suitability of Your Existing Tile
Before commencing any installation, a thorough evaluation of the existing tile floor is paramount. The success of installing vinyl plank flooring over tile hinges heavily on the condition of the underlying surface. Several factors must be considered to determine if this method is suitable.
Tile Condition: The existing tile should be structurally sound and free from significant damage. Cracks, loose tiles, or uneven surfaces can compromise the integrity of the vinyl plank flooring and potentially lead to issues such as buckling or uneven wear. Any loose tiles must be re-secured or removed and the resulting gaps filled with a suitable patching compound that is flush with the surrounding tiles.
Substrate Stability: The substrate beneath the tile must also be stable and free from excessive movement or deflection. If the substrate is prone to shifting or flexing, it can cause the tile and subsequently the vinyl plank flooring to crack or separate. Identifying and addressing any substrate issues before installation is crucial.
Surface Levelness: A level surface is essential for a successful vinyl plank flooring installation. Significant variations in height between tiles or overall unevenness in the floor can create an unappealing and potentially hazardous surface. Minor imperfections can often be addressed with self-leveling compound, but more substantial discrepancies may necessitate more extensive leveling work.
Moisture Levels: Elevated moisture levels can lead to mold growth, adhesive failure, and warping of the vinyl plank flooring. It is essential to test the moisture levels in both the tile and the substrate before installation. Moisture meters can be used to assess the moisture content of the concrete slab or wood subfloor. Any identified moisture issues must be resolved before proceeding.
Preparing the Tile Surface
Proper surface preparation is critical for ensuring a strong and lasting bond between the tile and the vinyl plank flooring. This process involves several steps designed to create a clean, smooth, and receptive surface.
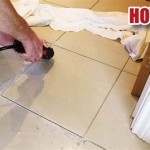
Cleaning: Thoroughly clean the existing tile surface to remove dirt, dust, grease, and any other contaminants that could interfere with adhesion. Use a powerful floor cleaner or degreaser and scrub the surface vigorously. Rinse thoroughly with clean water and allow the floor to dry completely.
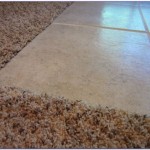
Filling Grout Lines: Grout lines can create an uneven surface that is visible through the vinyl plank flooring. To address this, fill the grout lines with a cement-based patching compound. Apply the compound according to the manufacturer's instructions, ensuring that it fills the grout lines completely and is flush with the surface of the tile. Allow the patching compound to dry and cure completely before proceeding.
Sanding (Optional): While not always necessary, lightly sanding the tile surface can help to improve adhesion by creating a slightly rougher texture. Use a fine-grit sandpaper and a sanding block or orbital sander to lightly scuff the surface of the tile. Be careful not to remove the glaze completely. After sanding, thoroughly remove any dust or debris with a vacuum cleaner and a tack cloth.
Priming (Optional): Depending on the type of vinyl plank flooring and the existing tile surface, applying a primer may be recommended. Primers can help to improve adhesion, seal the surface, and create a more uniform substrate for the adhesive. Choose a primer that is specifically designed for use with vinyl flooring and follow the manufacturer's instructions for application.
Self-Leveling Compound (If Necessary): If the tile surface is significantly uneven, applying a self-leveling compound may be necessary to create a smooth and level substrate. Follow the manufacturer's instructions for mixing and applying the self-leveling compound. Ensure that the compound is allowed to dry and cure completely before proceeding with the installation.
Selecting the Right Vinyl Plank Flooring
The choice of vinyl plank flooring is crucial for both aesthetic appeal and long-term performance. Several factors should be considered when selecting the appropriate product for installation over tile.
Thickness: The thickness of the vinyl plank flooring is an important consideration, especially when installing over tile. Thicker planks tend to be more durable and offer better sound insulation. Look for planks that are at least 4mm thick for optimal performance. Thicker planks also tend to bridge minor imperfections in the underlying tile surface more effectively.
Wear Layer: The wear layer is the top layer of the vinyl plank flooring that protects it from scratches, stains, and wear. A thicker wear layer will provide greater durability and extend the life of the flooring. For high-traffic areas, consider vinyl plank flooring with a wear layer of at least 20 mil (0.5 mm).
Water Resistance/Waterproof: Depending on the location of the installation, water resistance or waterproof properties may be essential. In bathrooms, kitchens, or basements, waterproof vinyl plank flooring is highly recommended to prevent water damage. Even in other areas of the home, waterproof flooring can provide added protection against spills and moisture.
Installation Method: Vinyl plank flooring is available in various installation methods, including glue-down, click-lock, and loose-lay. The best method for installing over tile will depend on the specific product and the condition of the tile surface. Glue-down flooring provides a permanent bond, while click-lock flooring is easier to install and can be floated over the tile surface. Loose-lay flooring is the easiest to install but may not be suitable for all applications.
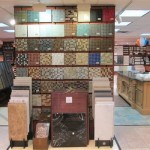
Aesthetic Considerations: Choose vinyl plank flooring that complements the overall style and décor of the home. Vinyl plank flooring is available in a wide range of colors, patterns, and textures, including realistic wood and stone looks. Consider the size and shape of the room when selecting the size and layout of the planks.
Installation Process
The installation process varies depending on the type of vinyl plank flooring selected. However, some general steps apply to most installations.
Acclimation: Allow the vinyl plank flooring to acclimate to the room temperature for at least 48 hours before installation. This helps the planks to expand or contract to their normal size, minimizing the risk of gaps or buckling after installation. Store the planks in the room where they will be installed, and ensure that the room is well-ventilated.
Layout: Plan the layout of the vinyl plank flooring to minimize waste and create a visually appealing pattern. Start by measuring the room and determining the center point. Dry-lay the planks to ensure a proper fit and to avoid any unexpected issues. Pay attention to the direction of the planks and consider staggering the seams for a more natural look.
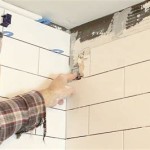
Cutting: Use a utility knife or a flooring cutter to cut the vinyl plank flooring to the required size and shape. For straight cuts, use a straight edge as a guide. For curved cuts, use a template or freehand the cut with a utility knife. Be careful to avoid damaging the flooring during cutting.
Adhesive Application (For Glue-Down): If using glue-down vinyl plank flooring, apply the adhesive to the back of the planks or to the subfloor using a notched trowel. Follow the manufacturer's instructions for the type of adhesive and the trowel size. Allow the adhesive to tack up before placing the planks on the floor. Work in small sections to prevent the adhesive from drying out.
Plank Placement: Carefully place the vinyl plank flooring onto the prepared surface, ensuring that it is properly aligned and tightly butted against the adjacent planks. Use a rubber mallet or a tapping block to gently tap the planks into place. For click-lock flooring, engage the locking mechanism by aligning the planks and clicking them together. For loose-lay flooring, simply place the planks onto the floor and ensure that they are properly aligned.
Rolling: After installing a section of vinyl plank flooring, use a floor roller to thoroughly roll the surface. This helps to ensure a strong bond between the flooring and the substrate and to remove any air bubbles. Roll the surface in both directions, applying even pressure.
Sealing (Optional): Some vinyl plank flooring may require sealing after installation to protect it from moisture and stains. Follow the manufacturer's instructions for the type of sealant and the application method. Allow the sealant to dry completely before using the floor.
Post-Installation Care
Proper post-installation care is essential for maintaining the beauty and longevity of the vinyl plank flooring.
Cleaning: Regularly clean the vinyl plank flooring with a damp mop and a mild detergent. Avoid using abrasive cleaners or harsh chemicals, as these can damage the surface. Sweep or vacuum the floor regularly to remove dirt and debris.
Protection: Protect the vinyl plank flooring from scratches and dents by using furniture pads under heavy furniture. Use doormats at entrances to prevent dirt and debris from being tracked onto the floor. Avoid wearing high heels on the floor, as these can damage the surface.
Maintenance: Periodically inspect the vinyl plank flooring for any signs of damage or wear. Repair any damaged planks promptly to prevent further damage. Reapply sealant as needed to maintain the integrity of the flooring.
By carefully following these steps, homeowners can successfully install vinyl plank flooring over existing tile, creating a beautiful and durable new floor without the hassle and expense of tile removal. Remember that consulting with a flooring professional can provide valuable guidance and ensure a successful installation.

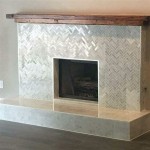
New Vinyl Plank Flooring Over Tile Table And Hearth

New Vinyl Plank Flooring Over Tile Table And Hearth

How To Install Vinyl Plank Flooring As A Beginner Home Renovation

How To Install Vinyl Plank Flooring As A Beginner Home Renovation

Can You Put Vinyl Plank Flooring Over Ceramic Tile Floors Blvd

Can You Put Laminate Or Vinyl Plank Flooring Over Tile

Can You Install Vinyl Plank Over Tile Flooring America

Laying Vinyl Planks Over Tiles Flooring Kitchen

Installing Vinyl Plank Flooring How To Fixthisbuildthat

How To Install L And Stick Vinyl Plank Flooring The Nifty Nester
Related Posts