Install Floating Wood Floor Over Tile: A Comprehensive Guide to Seamless Flooring
Installing a floating wood floor over tile can elevate your home's aesthetics and add warmth to any space. However, ensuring a successful installation requires careful planning and proper techniques. Here is a comprehensive guide to help you achieve a seamless and durable floating wood floor over your existing tiles:
1. Preparation: Assessing the Tile Surface
The first step is to assess the condition of your tile surface. Floating wood floors require a level and stable base, so any unevenness or cracks in the tiles must be addressed. Inspect for any protruding grout lines, chipped tiles, or loose tiles. If necessary, hire a professional to repair or level the tile surface before installing the floating wood floor.
2. Moisture Control: Ensuring a Dry Environment
Moisture is the nemesis of any flooring material, including floating wood floors. Tiles can trap moisture, which can lead to warping or buckling of the wood. To prevent moisture-related issues, ensure your tile surface is completely dry before installing the floating wood floor. Use a moisture meter to measure the moisture content of the tiles, and if necessary, use a dehumidifier to dry out the area.
3. Underlayment: Enhancing Stability and Sound Insulation
Underlayment is a thin, cushioned material placed between the tile and the floating wood floor. It serves multiple purposes, including providing a moisture barrier, enhancing stability, and reducing sound transmission. Choose an underlayment that is specifically designed for floating wood floors over tile. It should be thick enough to compensate for any minor irregularities in the tile surface.
4. Floating Wood Floor Selection: Choosing the Right Type
There are various types of floating wood floors available, each with its own unique characteristics and suitability for different applications. Engineered wood floors are a popular choice for installation over tile, as they are dimensionally stable and less prone to moisture expansion. Laminate flooring is another option, offering a wide range of styles and finishes. Consult with a flooring expert to determine the best type of floating wood floor for your specific needs and preferences.
5. Installation Process: Step-by-Step Guide
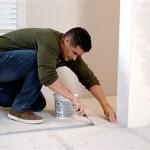
The installation process for a floating wood floor over tile is relatively straightforward. Start by laying out the underlayment and securing it with tape. Place the first row of floating wood planks along one wall, leaving a small expansion gap between the planks and the wall. Secure the planks together using the manufacturer's recommended locking mechanism. Continue installing subsequent rows, staggering the joints to ensure strength and stability.
6. Trim and Accessories: Finishing Touches
Once the floating wood floor is installed, you will need to install trim and accessories to complete the look. Baseboards will cover the expansion gap along the walls, providing a seamless transition. Quarter-round molding can be used to cover transitions between the floating wood floor and other flooring surfaces, such as tile in adjacent rooms.
7. Maintenance and Care: Ensuring Longevity
Proper maintenance is essential to extend the lifespan of your floating wood floor. Regular cleaning with a microfiber mop or soft broom will remove dust and debris. Use cleaning products specifically designed for floating wood floors to avoid damaging the finish. Avoid using harsh chemicals or abrasive cleaners. Avoid excessive moisture exposure, and if spills occur, clean them up immediately.
By following these comprehensive steps, you can successfully install a floating wood floor over tile, transforming your space with a stylish and durable flooring solution. Remember to seek professional assistance if necessary, and enjoy the beauty and warmth of your new flooring for years to come.

Can Timber Flooring Be Laid Over Tiles Cb Floors

Can You Install Wood Flooring Over Tiled Floors Havwoods

Can You Install Wood Flooring Over Tiled Floors Havwoods

Advantages Disadvantages Of Floating Floors Floorings

How To Install Floating Vinyl Flooring Over Old Floors Simply2moms

Can You Put Laminate Flooring Over Ceramic Tiles Mellowpine

Floating Floor Over Tile Laminate Wood Checkatrade

How To Install Floating Vinyl Flooring Over Old Floors Simply2moms

Can You Put Laminate Flooring Over Tile Twenty Oak

Discover How To Lay Wood Floors Over Tile Discount Flooring Depotdiscount Depot Blog
Related Posts


