How To Tile A Concrete Basement Floor
Tiling a concrete basement floor can be a great way to add style and value to your home. It's a relatively easy project that can be completed in a weekend with the right tools and materials.
Materials You'll Need:
- Tile
- Thin-set mortar
- Grout
- Notched trowel
- Tile spacers
- Grout float
- Sponge
- Bucket
- Measuring tape
- Level
Step 1: Prepare the Floor
The first step is to prepare the floor by cleaning it thoroughly. Remove any dirt, dust, or debris. If the floor is uneven, you may need to level it using self-leveling concrete.
Step 2: Lay Out the Tile
Once the floor is prepared, you can start laying out the tile. Start by measuring the floor and marking the center point. Then, snap a chalk line down the center of the floor. This will help you to keep the tiles straight.
Step 3: Apply Thin-Set Mortar
Next, you need to apply thin-set mortar to the floor. Use a notched trowel to spread the mortar evenly over the floor. Make sure to follow the manufacturer's instructions for mixing and applying the mortar.
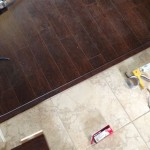
Step 4: Set the Tile
Once the thin-set mortar is applied, you can start setting the tile. Place the tiles on the floor and press them down firmly. Use tile spacers to ensure that the tiles are evenly spaced.
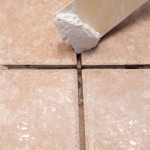
Step 5: Grout the Tile
Once the tile is set, you can grout the joints. Mix the grout according to the manufacturer's instructions and apply it to the joints using a grout float. Work the grout into the joints until they are completely filled.
Step 6: Clean the Tile
Once the grout has dried, you can clean the tile. Use a sponge and clean water to wipe down the tile and remove any excess grout.
Step 7: Seal the Tile
To protect the tile from stains and wear, you can seal it. Apply a tile sealer to the tile according to the manufacturer's instructions.
Tips for Tiling a Concrete Basement Floor
- Use a level to make sure that the floor is level before you start tiling.
- Follow the manufacturer's instructions for mixing and applying the thin-set mortar and grout.
- Work in small sections when tiling the floor. This will help to prevent the mortar from drying out before you can set the tile.
- Use a tile cutter to cut the tiles to fit. This will ensure that the tiles are the correct size and shape.
- Seal the tile to protect it from stains and wear.

How To Tile A Concrete Basement Floor The Grout Medic

Concrete Basement Floor Tiling Preparation
:max_bytes(150000):strip_icc()/can-you-install-tile-directly-on-concrete-1822600-04-458f7bb6c78348c1835cf8054ef36553.jpg?strip=all "How To Install Tile Over Concrete")
How To Install Tile Over Concrete

How To Install Tile In A Basement Washroom Floor On Concrete Like Pro Start Finish

How To Install Tiles On A Concrete Basement Floor Barana

How To Tile A Large Basement Floor Part 1 Installing Schluter Ditra

How To Tile Onto Concrete Floors Porcelain Super

Basement Flooring 101 Bob Vila

Thermaldry Basement Flooring Systems Waterproof

Finishing Basement Or Porch Put Tile On Concrete Molony Madison Wi Tiles
Related Posts