How To Take Out Bathroom Floor Tile
Removing bathroom floor tile, while a manageable do-it-yourself project, requires careful planning and execution to avoid damage to the subfloor and surrounding fixtures. The process involves breaking the bond between the tile and the subfloor, which can be achieved through various methods and tools. Prior to commencing the removal, understanding the type of tile, the adhesive used, and the construction of the floor is crucial for selecting the appropriate removal technique. Furthermore, safety precautions must be observed to protect oneself from dust, debris, and potential hazards.
The purpose of this article is to provide a comprehensive guide on how to effectively remove bathroom floor tile. It outlines the necessary tools and materials, explains the step-by-step procedure for tile removal, and offers tips for minimizing damage to the subfloor. It also emphasizes the importance of safety measures and proper disposal of debris. The information provided is intended for homeowners and individuals with basic DIY skills who are looking to undertake this project themselves, while promoting safe and effective tile removal practices.
Preparation and Safety Precautions
Prior to initiating any tile removal project, thorough preparation is paramount. This involves gathering the necessary tools and materials, assessing the work area, and implementing essential safety precautions. Neglecting these steps can lead to inefficiencies, potential injuries, and damage to the surrounding environment.
The following list details the essential tools and materials required for removing bathroom floor tile:
- Safety glasses
- Dust mask or respirator
- Work gloves
- Knee pads
- Chisel (cold chisel or grout removal chisel)
- Hammer or rubber mallet
- Scraper (floor scraper or putty knife)
- Pry bar
- Shop vacuum
- Trash bags or containers
- Optional: Tile removal tool (electric or manual)
- Optional: Heat gun or steamer (for softening adhesive)
Before starting the removal process, protect yourself from potential hazards. Safety glasses will shield the eyes from flying debris, while a dust mask or respirator will prevent the inhalation of harmful dust particles. Work gloves will protect the hands from cuts and abrasions, and knee pads will provide comfort and support during prolonged kneeling.
Furthermore, preparing the bathroom for the project involves removing all loose objects, such as rugs, toiletries, and shower curtains. Cover any fixtures that cannot be removed, such as the toilet or vanity, with plastic sheeting to protect them from dust and debris. Ensure adequate ventilation in the bathroom by opening windows or using a fan. This will help to dissipate dust and odors generated during the removal process. Finally, locate and shut off the water supply to the toilet if it is located near the work area. This precaution will prevent accidental flooding should the toilet be bumped or damaged during the removal process.
The Tile Removal Process: Step-by-Step Guide
The tile removal process involves a series of steps, each requiring careful attention and precision. The goal is to break the bond between the tile and the subfloor without causing excessive damage to the subfloor itself. The following steps outline the recommended procedure for removing bathroom floor tile:
1. Grout Removal: Begin by removing the grout surrounding the tiles. This can be achieved using a grout removal chisel and hammer. Carefully position the chisel along the grout lines and strike it with the hammer to break the grout. Alternatively, a manual or electric grout saw can be used to remove the grout more efficiently. Remove as much grout as possible to weaken the bond between the tiles and the subfloor. This step is crucial as it reduces the amount of force required to remove the tiles, minimizing the risk of damaging the subfloor.
2. Loosening Tiles: After removing the grout, attempt to loosen the tiles. Start by selecting a tile that appears to be loose or damaged. Using a chisel and hammer, carefully insert the chisel under the edge of the tile at a low angle. Gently tap the chisel with the hammer to lift the tile. Work around the edges of the tile, gradually increasing the leverage until the tile begins to loosen. The objective is to slowly break the bond between the tile and the subfloor without shattering the tile or damaging the underlying surface. If the tile is particularly stubborn, try using a heat gun or steamer to soften the adhesive before attempting to lift it. Apply heat or steam to the tile for a few minutes, then try lifting it again with the chisel.
3. Removing Tiles: Once the tile is sufficiently loosened, use a pry bar or scraper to lift it completely from the subfloor. Insert the pry bar under the tile and gently apply upward pressure to separate it from the adhesive. Avoid applying excessive force, as this can damage the subfloor. If the tile is still firmly attached, continue working around the edges with the chisel and hammer until it loosens completely. Once the tile is removed, carefully inspect the subfloor for any damage. Small cracks or imperfections can be repaired later, but significant damage may require more extensive repairs.
4. Repeat for Remaining Tiles: Repeat steps 2 and 3 for the remaining tiles. Work systematically across the bathroom floor, removing one tile at a time. Pay close attention to the condition of the subfloor as you proceed, and adjust your technique as needed to minimize damage. If you encounter any particularly difficult tiles, consider using a specialized tile removal tool. These tools are designed to provide greater leverage and control, making it easier to remove stubborn tiles without damaging the subfloor.
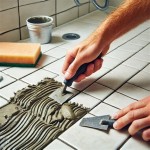
5. Adhesive Removal: Once all the tiles have been removed, the next step is to remove the remaining adhesive from the subfloor. This can be achieved using a scraper, putty knife, or specialized adhesive remover. The best approach will depend on the type of adhesive used and the condition of the subfloor. For thin-set mortar, a scraper and hammer may be sufficient to remove the bulk of the adhesive. For tougher adhesives, a chemical adhesive remover may be necessary. Apply the adhesive remover according to the manufacturer's instructions and allow it to sit for the recommended time. Then, use a scraper to remove the softened adhesive. Be careful not to damage the subfloor while scraping. If the adhesive is particularly difficult to remove, consider using a floor grinder with a diamond grinding wheel. This will effectively remove the adhesive and smooth out the subfloor.
6. Cleaning and Inspection: After removing the adhesive, thoroughly clean the subfloor with a shop vacuum to remove any remaining debris and dust. Inspect the subfloor for any cracks, holes, or other damage. Repair any damage before installing new flooring. Small cracks can be filled with a concrete patching compound, while larger holes may require more extensive repairs. Ensure that the subfloor is level and smooth before proceeding.
Tips for Minimizing Subfloor Damage and Proper Disposal
Maintaining the integrity of the subfloor is crucial when removing tile. Damaged subflooring can lead to uneven flooring, structural problems, and costly repairs. Implementing careful removal techniques and appropriate repair methods can significantly minimize the risk of subfloor damage.
Minimizing Subfloor Damage:
- Use the Right Tools: Employing the appropriate tools for the job is essential. A sharp chisel and a rubber mallet can provide greater control than a hammer, reducing the risk of impact damage to the subfloor.
- Work Slowly and Methodically: Rushing through the tile removal process can lead to mistakes and increased damage. Take the time to carefully loosen each tile and avoid using excessive force.
- Apply Heat or Steam: Applying heat or steam to the tiles can soften the adhesive, making it easier to remove them without damaging the subfloor.
- Protect the Subfloor: Consider using a thin sheet of plywood or cardboard to protect the subfloor while working. This will prevent scratches and dents from tools and debris.
- Avoid Excessive Moisture: Excessive moisture can damage certain types of subflooring, such as plywood or oriented strand board (OSB). Avoid using excessive water or steam during the tile removal process.
After the tiles and adhesive have been removed, proper disposal of the debris is essential for safety and environmental responsibility. Check local regulations regarding the disposal of construction waste. In many areas, construction debris must be disposed of at a designated landfill or recycling center.
Proper Disposal:
- Separate Waste: Separate the tile debris from other types of waste. This will make it easier to recycle or dispose of the materials properly.
- Use Proper Containers: Use sturdy trash bags or containers to collect the tile debris. This will prevent the debris from spilling and creating a mess.
- Dispose of Responsibly: Transport the tile debris to a designated landfill or recycling center. Follow all local regulations regarding the disposal of construction waste.
- Consider Recycling: Some recycling centers accept tile debris. Check with your local recycling center to see if they accept tile and if they have any specific requirements for disposal.
- Clean Up Thoroughly: After disposing of the tile debris, thoroughly clean the work area to remove any remaining dust and debris. This will prevent potential health hazards and ensure a safe working environment for the installation of new flooring.
By following these guidelines, the removal of bathroom floor tile can be accomplished safely and effectively while minimizing the risk of damage and ensuring proper disposal of waste. The success of the project hinges on meticulous preparation, careful execution, and adherence to safety precautions. Although the process can be time-consuming and physically demanding, the satisfaction of completing the project oneself and achieving a professionally finished result can be considerable.

How To Remove A Tile Floor

How To Tile Floors Walls Sincerely Sara D Home Decor Diy Projects

How To Clean Tiles With Stubborn Stains Bathroom Hardone Forums

Laying Floor Tiles In A Small Bathroom Houseful Of Handmade

Remove Bathroom Tile How To Your

How To Lay A Tile Floor

3 Best Ways To Get Rid Of Hard Water Stains From Bathroom Tiles Kent

Why Bathroom Floors Need To Move

Plank Tile Bathroom Flooring Happihomemade With Sammi Ricke

How To Cover Ugly Al Bathroom Floors With A Vinyl Mat The Homes I Have Made
Related Posts