How to Replace Shower Tile Walls: A Step-by-Step Guide
Replacing shower tile walls may seem like a daunting task, but with careful planning and a bit of DIY experience, it's a project that can be tackled by most homeowners. Here's a comprehensive guide to help you through the process:
Step 1: Preparation and Demolition
Before beginning, turn off the water supply and remove all fixtures, hardware, and trim pieces. Protect the surrounding areas with drop cloths and plastic sheeting. Use a crowbar to carefully pry off the old tiles, starting from the top and working your way down. Be cautious not to damage the drywall or backing material.
Step 2: Install Backer Board
Remove any old backer board or moisture barrier. Install new cement backer board over the drywall using screws specifically designed for backer board. Ensure it's level and overlaps all edges and corners. Allow the backer board to cure as per the manufacturer's instructions.
Step 3: Apply Mortar
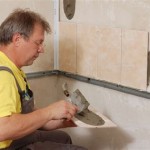
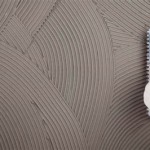
Mix thin-set mortar according to the manufacturer's directions. Using a notched trowel, spread the mortar evenly over the backer board. Work in small sections to prevent the mortar from drying prematurely.
Step 4: Set Tile
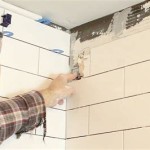
Start setting tiles from the bottom corner, working your way up. Press the tiles firmly into the mortar, ensuring they're level and spaced evenly. Use tile spacers to maintain consistent spacing.
Step 5: Grout
Once the tiles are set, let them cure for the recommended time. Mix grout according to the manufacturer's instructions. Using a rubber grout float, apply the grout to the spaces between the tiles, pressing it in firmly. Wipe away any excess grout with a damp sponge.
Step 6: Seal
After the grout has cured, seal the tiles and grout lines with a water-resistant sealant. Apply the sealant using a sponge or brush, ensuring all surfaces are coated. Allow the sealant to dry completely before using the shower.
Step 7: Reassemble
Once the sealant has dried, reassemble the fixtures, hardware, and trim pieces. Turn on the water supply and check for any leaks or issues. Enjoy your newly tiled shower!
Tips for Success:
- Use high-quality materials for durability and longevity.
- Ensure the backer board is securely installed and dried before setting tile.
- Spread the mortar evenly to prevent tiles from shifting.
- Use levelers to ensure the tiles are perfectly aligned.
- Allow ample time for curing before sealing.
- If you're not confident in your DIY skills, consider hiring a qualified contractor.

How To Tile A Shower At Home Diy Guide For Beginners

How To Tile A Shower Wall The Home Depot

How To Replace Shower Tiles Young House Love

Repair Fallen Tile Reinstall Shower With Simple Fix Re Install Bath No Grout

Tips On How To Remove Old Shower Tile Ugly Duckling House

How To Replace Shower Wall Tiles Art Tile Renovation

Water Damage Behind Shower Tiles

How To Replace Shower Wall Tiles Art Tile Renovation

How To Remove Replace One Bathroom Tile Ceramic Repair

How To Quickly Repair Bathroom Shower Tiles 6 Steps
Related Posts


