How to Replace Drop Ceiling Tiles in a Basement
Replacing drop ceiling tiles in a basement is a relatively straightforward DIY project that can enhance the appearance and feel of your basement. Whether you're dealing with damaged tiles, outdated styles, or simply want a fresh look, this guide will walk you through the process step by step.
Assessing the Situation
Before embarking on the replacement process, it's crucial to assess the situation and gather the necessary materials. Begin by identifying the tiles that need replacement. Note if any tiles are loose or damaged, and if the damaged tiles are easily accessible.
Next, determine the type of ceiling tiles you have. Are they standard mineral fiber tiles, acoustic tiles, or something else? Measure the dimensions of a single tile to ensure you purchase the correct size replacements. Also, take note of the pattern or design of the existing tiles. Some manufacturers offer various styles and colors to match your existing ceiling.
Gathering Supplies
To replace your drop ceiling tiles, you'll need the following tools and materials:
- New ceiling tiles
- Utility knife or drywall saw
- Screwdriver
- Safety glasses
- Work gloves
- Ladder
- Drop cloth or tarp
- Optional: Tin snips or a pair of strong scissors for trimming tiles
Ensure you have enough new tiles to replace all the damaged or outdated ones. Consider purchasing a few extra tiles in case you make any mistakes or need to replace additional tiles in the future.
Replacing the Tiles
Once you have all the necessary tools and materials, you're ready to replace the tiles. Follow these steps:
- Prepare the work area. Clear the area beneath the ceiling tiles to prevent damage or injury. Cover your belongings with a drop cloth or tarp.
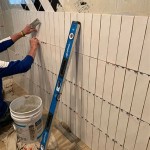
- Remove the old tiles. If the tiles are simply loose or damaged, gently pry them out of the grid using a screwdriver or utility knife. Be careful not to damage the surrounding tiles or the grid itself.
- Remove any debris or dust. Use a vacuum cleaner or a damp cloth to remove any dust or debris from the ceiling grid and surrounding area.
- Install the new tiles. Carefully lift the new tiles into the grid, ensuring they are properly aligned and flush with the surrounding tiles. If necessary, trim the tile to fit using tin snips or strong scissors.
If the tiles are held in place with clips or other attachments, carefully detach them from the ceiling grid. Ensure you understand how the original tiles were attached for proper installation of the new ones.
- Secure the new tiles. If the tiles are held in place with clips or other attachments, ensure they are properly secured to the ceiling grid.
Tips for Installing Drop Ceiling Tiles
Here are some additional tips to ensure a successful drop ceiling tile replacement:
- Measure twice, cut once. If you need to trim any of the tiles, double-check your measurements before making any cuts.
- Work in a well-ventilated area. Drop ceiling tile installation can produce dust. Ensure proper ventilation to avoid inhaling dust particles.
- Be patient and take your time. Replacing drop ceiling tiles is a straightforward process, but it takes time to get the job done right. Don't rush, and take your time to ensure all the new tiles are properly aligned and installed.
By following these steps and tips, you can easily replace your drop ceiling tiles and enjoy a fresh, updated look for your basement.

How To Install A Drop Ceiling

Replacing Drop Ceiling Tiles

How To Replace A Drop Ceiling The Lilypad Cottage

Replacing Drop Ceiling Tiles

Diy How To Update Old Ceiling Tile Pink Little Notebookpink Notebook

How To Install Drop Ceiling Tiles For A Bathroom Diy Danielle

How To Easily Update An Ugly Drop Ceiling

Basement Drop Ceiling Tiles Total Finishing

Drop Ceiling Tile Installation Acoustic Suspended

Update Your Drop Ceiling Dropped Basement Finishing
Related Posts