Essential Aspects of Removing Bathroom Tile Walls
Renovating bathrooms can be rejuvenating, and replacing outdated tile walls with modern selections is a transformative touch. However, removing existing tile requires meticulous preparation and execution to ensure a successful outcome. Here are the essential steps to expertly remove bathroom tile walls:
Safety First: Protect Yourself and Your Bathroom
Begin by addressing safety measures. Wear protective gear, including a dust mask, goggles, and gloves. Turn off the water supply to the bathroom to prevent accidental flooding. Remove any bathroom fixtures, such as mirrors, towel bars, or shelves, to avoid damage during the demolition process.
Prepare Your Workspace: Clear Obstacles and Protect Fixtures
Clear the bathroom of any items that could hinder your progress. Cover areas you wish to protect from dust or debris with drop cloths or plastic sheeting. Use painter's tape to seal the edges of protected surfaces for added protection.
Remove Grout: The Key to Tile Detachment
To successfully remove tiles, you must first remove the grout that holds them in place. Use a grout saw or an oscillating tool with a grout removal blade to carefully cut along the grout lines. Remove the loosened grout with a grout rake or a stiff-bristled brush.
Start Demolition: Detaching the Tiles
Equip yourself with a sturdy pry bar or a flathead screwdriver. Carefully insert the tool beneath the edge of a tile and gently pry it loose. Work slowly and evenly to avoid breaking the tiles or damaging the underlying wall surface. Continue prying off tiles one by one until the entire wall is cleared.
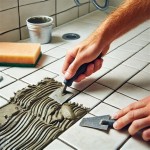
Remove Adhesive Residue: Smooth the Wall Surface
Once the tiles are removed, adhesive residue may remain on the wall. Use a scraper or a putty knife to remove the adhesive. If the adhesive is particularly stubborn, you can apply a commercial adhesive remover to soften it before scraping.
Inspect the Wall: Assess Damage and Prepare for Repairs
After removing the tiles, thoroughly inspect the wall surface for any damage or imperfections. Repair any holes or cracks using appropriate patching compounds. Once the repairs are complete, allow them to dry thoroughly before proceeding.
Cleanup: Restore Your Bathroom's Serenity
The final step is the cleanup process. Vacuum or sweep the bathroom to remove any remaining dust or debris. Wipe down all surfaces with a damp cloth to remove any lingering adhesive or grout residue. Allow the bathroom to air out and dry completely before re-installing fixtures or laying new tiles.
Additional Tips and Precautions
Wear a dust mask and goggles throughout the process to protect yourself from harmful dust particles. Use a wet saw or apply water to the cutting blade to minimize dust production and prevent inhalation. If you encounter stubborn tiles or extensive adhesive residue, consider renting professional tile removal equipment for optimal results.
Removing bathroom tile walls requires patience, attention to detail, and proper technique. By following these essential steps and taking necessary safety precautions, you can successfully prepare your bathroom for a stylish and functional transformation.

How To Remove Bathtub Shower Wall Tiles

How To Remove Tile From A Bathroom Wall Dustram

Easy Diy Guide On Removing Tiles From Walls Fantastic Handyman Au

Removing Bathroom Tiles

Tips On How To Remove Old Shower Tile Ugly Duckling House

How To Remove Tile An Easy Diy Guide Dumpsters Com

Diy Removing Your Old Tile Without Damaging The Tub

Diy Bathroom Demolition

How To Remove A Bathroom Wall Tile Today S Homeowner

How To Remove And Replace Tiles With Wickes
Related Posts