How To Lay Tile On Concrete Floor Outside
Laying tile on an outdoor concrete floor can enhance the aesthetic appeal and functionality of patios, walkways, and other exterior spaces. However, proper installation is crucial for longevity and durability, especially given the exposure to the elements. This article provides a comprehensive guide to laying tile on an outdoor concrete floor, covering essential steps from preparation to grouting.
Surface Preparation is Key
The concrete surface must be thoroughly cleaned and prepared before tile installation. Begin by removing any existing coatings, such as paint or sealant, using a suitable concrete stripper or grinder. Clean the surface with a high-pressure washer to remove dirt, debris, and loose particles. Repair any cracks or imperfections with a concrete patching compound, ensuring a smooth and level surface. Allow the patching compound to cure completely according to the manufacturer's instructions.
Proper drainage is critical for outdoor tile installations. Ensure the concrete slab has a slight slope (approximately 1/4 inch per foot) to facilitate water runoff and prevent pooling. If the existing slab lacks sufficient slope, consider adding a layer of mortar to create the necessary gradient before laying the tile.
Choosing the Right Materials
Selecting appropriate materials is essential for a successful outdoor tile installation. Porcelain tiles are generally recommended for exterior applications due to their low water absorption rate and high resistance to freeze-thaw cycles. Choose a tile adhesive specifically designed for outdoor use and compatible with porcelain tile. A modified thin-set mortar is a common choice. For grouting, opt for a polymer-modified sanded grout that is water-resistant and flexible to accommodate minor movements in the concrete slab.
It's also important to consider the climate and expected temperature fluctuations when selecting materials. In regions with significant temperature variations, using a crack isolation membrane between the concrete and tile is highly recommended. This membrane will absorb any movement in the concrete, preventing the tiles from cracking or debonding.
Laying the Tile
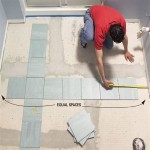
Begin by applying a layer of thin-set mortar to a small section of the prepared concrete surface, using a notched trowel to create ridges. This ensures proper adhesion and allows for adjustments during tile placement. Place the tiles firmly onto the mortar, ensuring full contact and proper spacing. Use tile spacers to maintain consistent grout lines. Periodically check the levelness of the tiles using a level and make adjustments as needed.
Continue laying the tiles in small sections, working your way across the surface. Cut tiles as needed to fit around edges and obstacles using a tile cutter or wet saw. Allow the thin-set mortar to cure completely according to the manufacturer's instructions before grouting.
Grouting and Sealing
After the thin-set has cured, remove the tile spacers and begin applying the grout. Use a grout float to press the grout into the joints, ensuring complete filling and removing any excess. After the grout has partially dried, use a damp sponge to clean the tile surface, removing any residual grout haze. Allow the grout to cure completely before sealing.
Applying a grout sealer is highly recommended for outdoor tile installations. The sealer helps protect the grout from moisture penetration, staining, and mildew growth. Choose a high-quality sealer specifically designed for outdoor use and apply it according to the manufacturer's instructions. Regularly resealing the grout, typically every one to two years, will maintain its protective properties and extend the life of the installation.
Expansion Joints are Necessary
Incorporate expansion joints every 8 to 12 feet in both directions to accommodate movement in the concrete slab due to temperature changes. These joints should also be placed around the perimeter of the tiled area and at any changes in plane, such as where the tile meets a wall. Fill the expansion joints with a flexible sealant designed for exterior use to prevent water infiltration.
By following these steps and paying attention to detail, a durable and aesthetically pleasing outdoor tile installation can be achieved, enhancing the beauty and functionality of any exterior space.

Can You Lay Outdoor Tiles Over Concrete Premier Porcelain

Concrete Patio Transformation 7 Steps To Diy A New Outdoor Oasis

Concrete Patio Transformation 7 Steps To Diy A New Outdoor Oasis

Concrete Patio Transformation 7 Steps To Diy A New Outdoor Oasis

Tiling Over A Ed Concrete Slab Fine Homebuilding
Prepping For Outdoor Patio Tile Installation Jlc

Covering Concrete Slab Installation Dektektile Luxury Tile Decking Material

Diy The Right Way To Fit Outdoor Tiles World Of

Outdoor Flooring Over Grass Or Dirt Interlocking Tiles

Leveling And Dry Fitting Tile In An Outdoor Area Patio Tiles Exterior Over Concrete
Related Posts

