How To Lay Tile In Bathroom Shower Floor
Tiling a bathroom shower floor is a great way to update the look of your bathroom and make it more stylish. It can also be a great way to add value to your home. If you're thinking about tiling your shower floor, there are a few things you'll need to do to get started.
1. Preparation
The first step is to prepare the surface of your shower floor. This means removing any old tile or flooring, and making sure that the surface is level and smooth. You'll also need to install a waterproofing membrane to protect the floor from water damage.
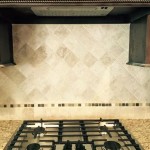
2. Layout
Once the surface is prepared, you can start laying out the tile. It's important to start in the center of the floor and work your way out. This will help ensure that the tiles are evenly spaced and that you don't run out of tile before you reach the end of the floor.
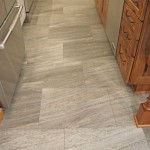
3. Setting the Tile
To set the tile, you'll need to apply a thin layer of mortar to the back of each tile. Then, press the tile into place and use a level to make sure that it's level. Once the tile is set, you'll need to let it dry for 24 hours.
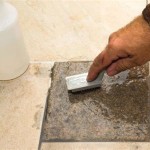
4. Grouting
Once the tile is dry, you can start grouting. Grout is a thin, cement-based material that is used to fill in the joints between the tiles. To apply grout, you'll need to mix it with water until it's the consistency of peanut butter. Then, apply the grout to the joints using a grout float.
5. Sealing
Once the grout is dry, you'll need to seal it. This will help protect the grout from water damage and staining. To seal the grout, you'll need to apply a penetrating sealer to the surface of the grout. Allow the sealer to dry for 24 hours before using the shower.
Tips for Laying Tile in a Bathroom Shower Floor
Here are a few tips to help you lay tile in a bathroom shower floor:
- Use a level to make sure that the surface of the floor is level and smooth.
- Start in the center of the floor and work your way out to ensure that the tiles are evenly spaced.
- Apply a thin layer of mortar to the back of each tile before setting it in place.
- Use a grout float to apply grout to the joints between the tiles.
- Allow the grout to dry for 24 hours before applying a penetrating sealer to protect it from water damage.

3 Shower Pan Choices For A Solid Tile Floor Installation Fine Homebuilding

How To Build A Shower Pan Install Tile Floor Homeadvisor

3 Shower Pan Choices For A Solid Tile Floor Installation Fine Homebuilding

8 Shower Floor Tile Ideas For The Modern Kiwi Home Space

How To Build A Shower Pan Install Tile Floor Homeadvisor

Laying Floor Tiles In A Small Bathroom Houseful Of Handmade

Bathroom Renovation Tiling The Shower From Bathtub To Walk In Remodelando La Casa

How To Build A Shower Pan Install Tile Floor Homeadvisor

Shower Pans Tile Vs Solid Surface Select Kitchen And Bath

How To Make A Tiled Shower Floor Less Slippery
Related Posts