How to Lay Porcelain Tile on Concrete Floor Outside of Your House
Laying porcelain tile on a concrete floor outside your house can be a rewarding DIY project. Porcelain tile is a durable, low-maintenance, and aesthetically pleasing material that can enhance the look and functionality of your outdoor space. However, proper installation is crucial to ensure a long-lasting and water-resistant surface. This article will guide you through the essential steps involved in laying porcelain tile on an outdoor concrete floor.
Preparing the Concrete Substrate
The success of your tile installation hinges on a well-prepared concrete substrate. A properly prepared surface is smooth, clean, and free of imperfections, allowing for even tile adhesion and minimizing potential problems later on.
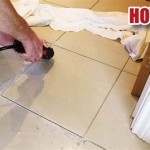
Begin by thoroughly cleaning the concrete surface using a pressure washer to remove dirt, debris, and loose particles. Allow the concrete to dry completely before proceeding. Next, inspect the surface for any cracks, uneven areas, or significant imperfections. Small cracks can be filled with a concrete patching compound, while larger areas may require additional work. For uneven surfaces, consider using a self-leveling compound to create a smooth and even foundation for the tile. Ensure the compound is compatible with concrete and suitable for outdoor applications.
After patching and leveling, prime the concrete surface with a penetrating sealer. Primers enhance adhesion and help prevent moisture from migrating through the concrete, which can cause problems with the tile installation. Allow the primer to dry according to the manufacturer's instructions before moving on to the next step.
Layout and Installation
With the substrate prepped, you can begin laying out the tiles. Proper layout ensures a visually appealing and symmetrical installation. Start by determining the center point of the floor area and mark it. From this center point, measure and mark the tile layout, ensuring even spacing between tiles. Use a pencil to mark the layout lines on the concrete.
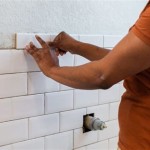
Next, mix the mortar according to the manufacturer's instructions. Apply a thin layer of mortar to the concrete surface using a notched trowel. The notches on the trowel create grooves that help distribute the mortar evenly and create a strong bond with the tile. Place the tile on the mortar bed, pressing down firmly and adjusting its position until it's level and aligned with the layout lines.
Use spacers to maintain consistent grout lines between the tiles. Continue laying tiles one at a time, working your way out from the center point and ensuring the grout lines are even and consistent. As you proceed, check that each tile is level and flush with the surrounding tiles. Consider using a rubber mallet to gently tap the tiles into place and achieve a level surface.
Grouting and Sealing
Once the tile installation is complete, allow the mortar to cure according to the manufacturer's instructions. This curing time is essential for the mortar to harden and achieve maximum strength. Once the mortar has cured, you can proceed with grouting.
Mix the grout according to the instructions and apply it to the grout lines between the tiles using a grout float. Push the grout firmly into the spaces, ensuring complete filling. Clean up any excess grout with a damp sponge. Allow the grout to set for the recommended time before sealing it.
Finally, seal the grout to protect it from stains and moisture. Apply a sealant to the grout lines using a brush or sponge, ensuring complete coverage. Follow the manufacturer's instructions for the drying time and allow the sealant to cure properly before applying any heavy loads or subjecting the tile to water.
Additional Tips
Consider using a tile saw to cut tiles to fit around obstacles or create custom shapes. A tile saw ensures clean and precise cuts. When working with porcelain tiles, always use a wet saw to prevent dust and debris from flying into the air.
Ensure the subfloor is adequately sloped to promote drainage and prevent water pooling. A slight slope towards a drain or away from the house is essential for proper drainage.
If you are installing the tiles in a shaded area, you may need to use a frost-resistant grout and sealant, which can withstand freezing and thawing cycles. This will further enhance the durability and longevity of your outdoor tile installation.
Conclusion
Laying porcelain tile on a concrete floor outside your house can be a rewarding DIY project. With careful preparation, proper installation techniques, and high-quality materials, you can achieve a beautiful and durable outdoor surface. By following these steps, you can create an attractive and functional outdoor space that will enhance the aesthetic appeal and enjoyment of your home for years to come.

Concrete Patio Transformation 7 Steps To Diy A New Outdoor Oasis

Concrete Patio Transformation 7 Steps To Diy A New Outdoor Oasis

Can You Lay Outdoor Tiles Over Concrete Premier Porcelain

Tiling Over A Ed Concrete Slab Fine Homebuilding

Concrete Patio Transformation 7 Steps To Diy A New Outdoor Oasis
:max_bytes(150000):strip_icc()/can-you-install-tile-directly-on-concrete-1822600-04-458f7bb6c78348c1835cf8054ef36553.jpg?strip=all)
How To Install Tile Over Concrete

Concrete Patio Transformation 7 Steps To Diy A New Outdoor Oasis

Laying Porcelain Tiles Outside Tools And Best Practices

Grouting Outdoor Tiles How To Grout External Patio

Creating Gorgeous Patios With Outdoor Porcelain Tile
Related Posts

