How To Install a Tile Shower Floor on Concrete
Installing a tile shower floor on concrete provides durability and aesthetic appeal to a bathroom space. The process requires careful planning, preparation, and execution to ensure long-lasting results. This article details the steps involved in correctly installing a tile shower floor on a concrete subfloor.
Key Point 1: Preparation and Assessment of the Concrete Subfloor
Before beginning any tiling project, thorough preparation of the concrete subfloor is paramount. The condition of the concrete significantly affects the adhesion and longevity of the tile installation.
Assessment of Levelness and Cracks: The concrete floor must be relatively level to allow for proper drainage and prevent uneven tile surfaces. Employ a level to identify any significant deviations. Small variations, less than ¼ inch over a 10-foot span, can often be accommodated with a thick-bed mortar or self-leveling compound. Cracks must also be addressed before proceeding. Minor hairline cracks can sometimes be covered with a crack isolation membrane, while larger, structural cracks require professional repair.
Cleaning and Surface Preparation: The concrete surface needs to be clean and free of any debris, including dust, dirt, grease, oil, paint, and old adhesive residues. A thorough sweeping followed by vacuuming is necessary to remove loose particles. For stubborn contaminants, a degreasing cleaner specifically designed for concrete should be used. After cleaning, rinse the surface thoroughly with clean water and allow it to dry completely. Furthermore, the surface should be lightly roughened to promote better adhesion. This can be achieved through mechanical abrasion methods, such as grinding or etching.
Moisture Testing: Concrete is porous and can hold moisture, which can compromise the tile installation. Performing a moisture test is crucial to determine if the moisture vapor emission rate (MVER) or relative humidity (RH) within the concrete is within acceptable limits for tiling. Several methods can be used, including the calcium chloride test (MVER) and the RH probe test. Consult the tile mortar manufacturer's specifications for the permissible moisture levels. If the moisture content exceeds the recommended limits, a moisture mitigation system may be required before tiling.
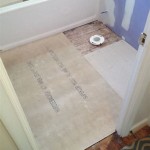
Installing a Pre-Slope (if necessary): Many concrete slabs are poured level. Since a shower floor needs to slope towards the drain, a pre-slope is often necessary. This is created using a mortar bed that gradually slopes from the edges of the shower towards the drain location. The slope should be a minimum of ¼ inch per foot to ensure proper water drainage. Carefully measure and mark the desired slope before applying the mortar. Use a screed to ensure a consistent and even slope across the entire shower floor area.
Key Point 2: Installation of Waterproofing System
A robust waterproofing system is essential to prevent water damage to the underlying concrete subfloor and surrounding structures. The choice of waterproofing method depends on individual preferences, project requirements, and local building codes.
Liquid Waterproofing Membranes: Liquid waterproofing membranes are applied directly to the prepared concrete surface using a brush, roller, or spray gun. These membranes form a seamless, waterproof barrier after curing. Several coats are typically required to achieve the desired thickness, as specified by the manufacturer. Apply the membrane according to the manufacturer's instructions, paying close attention to corners, edges, and penetrations, where leaks are most likely to occur. Reinforcement fabric is often embedded in the first coat of the membrane at these critical areas to provide added strength and durability.
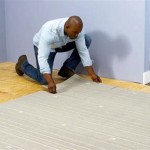
Sheet Membranes: Sheet membranes are pre-fabricated, flexible sheets of waterproofing material that are adhered to the concrete surface using a thin-set mortar. These membranes offer consistent thickness and are relatively easy to install. However, careful attention must be paid to overlapping seams and corners to ensure a watertight seal. Use a roller to firmly press the sheet membrane into the thin-set mortar, eliminating any air pockets or wrinkles. Seal the seams with a compatible sealant or seam tape, as recommended by the manufacturer.
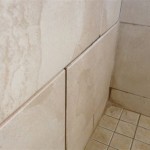
Shower Pan Liners: Shower pan liners are typically made of PVC or CPE and are installed beneath a mortar bed. They are a traditional method of waterproofing, particularly suitable for custom shower installations. The liner is installed over the prepared concrete subfloor, extending up the walls several inches to create a pan that catches any water that penetrates the tile and grout. The liner is folded at the corners and sealed with a compatible adhesive or sealant. A layer of mortar is then applied over the liner to create a level surface for tiling.
Drain Assembly: The shower drain assembly is a crucial component of the waterproofing system. Ensure that the drain is properly installed and sealed to prevent leaks. The drain flange should be flush with the finished tile surface. Use a compatible sealant to create a watertight seal between the drain flange and the waterproofing membrane. If using a clamping ring drain, ensure that the clamping ring is tightened securely to compress the waterproofing membrane against the drain body.
Key Point 3: Tiling and Grouting Techniques
The final step involves installing the tile and grouting the joints. Proper techniques are essential to achieve a professional-looking and durable shower floor.
Thin-Set Mortar Application: Choose a thin-set mortar specifically designed for shower floors and compatible with the chosen tile type. Mix the mortar according to the manufacturer's instructions, ensuring a smooth and consistent consistency. Using a notched trowel of the appropriate size, apply the thin-set mortar to the prepared waterproofing membrane. Comb the mortar in one direction, creating ridges that will provide a strong bond with the tile. Apply the mortar in small sections to prevent it from drying out before the tiles are set.
Tile Placement and Leveling: Carefully place the tiles onto the thin-set mortar, pressing them firmly into place. Use tile spacers to ensure consistent grout lines. Periodically check the levelness of the tiles using a level and make adjustments as needed. For larger tiles, consider using a leveling system to prevent lippage (uneven tile edges). Cut tiles to fit around the drain and at the edges of the shower floor. Allow the thin-set mortar to cure completely according to the manufacturer's instructions before proceeding to grouting.
Grouting: Choose a grout that is suitable for shower floors and resistant to moisture and mold. Mix the grout according to the manufacturer's instructions. Apply the grout to the tile joints using a grout float, pressing it firmly into the joints to ensure they are completely filled. Remove excess grout from the tile surface using a sponge and clean water. Rinse the sponge frequently to avoid leaving a haze on the tile. Allow the grout to dry according to the manufacturer's instructions before applying a grout sealer.
Sealing: After the grout has cured, apply a grout sealer to protect it from water damage and staining. Apply the sealer according to the manufacturer's instructions, using a brush or applicator. Allow the sealer to penetrate the grout for the recommended time before wiping off any excess. Sealing should be reapplied periodically to maintain the integrity of the grout.
Caulking: Apply a flexible sealant, such as silicone caulk, to all corners, edges, and penetrations where the shower floor meets the walls or other fixtures. This will create a watertight seal and prevent water from seeping behind the tiles. Choose a caulk that is mildew-resistant and specifically designed for wet environments. Apply the caulk smoothly and evenly, using a caulk smoothing tool to create a professional finish.
Final Inspection and Cleanup: After all of the tiling, grouting, sealing, and caulking is complete, carefully inspect the shower floor for any imperfections. Touch up any areas that need attention. Clean the tile surface thoroughly with a mild detergent and water to remove any remaining grout haze or residue. Allow the shower floor to dry completely before use. Following the manufacturer's recommendations for initial use and ongoing maintenance is crucial to prolong the life of the installation.
Proper planning, careful execution, and adherence to manufacturer's instructions are essential for a successful tile shower floor installation on concrete. The steps outlined above provide a comprehensive guide to ensure a durable and aesthetically pleasing result.

3 Shower Pan Choices For A Solid Tile Floor Installation Fine Homebuilding

Shower Pan On A Slab Jlc

How To Tile A Basement Shower The Home Depot

Here S How Install A New Shower Stall With Tile Floor

How To Build A Tile Shower Floor Pan Construction Diy

3 Shower Pan Choices For A Solid Tile Floor Installation Fine Homebuilding

How To Create A Shower Floor Part 4 The Elf

How To Build A Tile Shower Floor Pan Liner And Drain Diy

How To Build A Tile Shower Pan Icreatables Com

Installing Mortar Shower Pan
Related Posts