How to Install Luxury Vinyl Plank Flooring Over Ceramic Tile
Luxury Vinyl Plank (LVP) flooring has become a popular choice for homeowners due to its durability, water resistance, aesthetic appeal, and relative ease of installation. A common question arises when considering LVP installation: can it be installed directly over existing ceramic tile? The answer is generally yes, but careful preparation and adherence to specific techniques are crucial for a successful and long-lasting result. Installing LVP over ceramic tile can save considerable time and effort compared to removing the existing tile, making it an attractive option for renovation projects. This article provides a comprehensive guide on how to properly install LVP flooring over ceramic tile, ensuring a professional-looking and durable finished floor.
Key Considerations Before Installation
Before beginning the installation process, assessing the suitability of the existing ceramic tile surface is paramount. Several factors need to be considered to avoid potential problems down the line. Addressing these issues proactively will contribute significantly to the success of the LVP installation.
1. Tile Integrity: The existing ceramic tile floor must be structurally sound. Loose, cracked, or uneven tiles must be repaired or replaced before proceeding. Any movement in the underlying tile will eventually translate to issues with the LVP flooring, potentially leading to cracks, buckling, or separation of the planks. Carefully inspect each tile, paying close attention to grout lines. Tap each tile lightly with a solid object; a hollow sound indicates that the tile is not properly adhered to the subfloor. Loose tiles should be removed and the area filled with a suitable patching compound. Cracked tiles should also be replaced or repaired using epoxy-based crack fillers. Ensure the repair material is fully cured and level with the surrounding tiles before moving forward.
2. Surface Levelness: LVP flooring requires a relatively flat and even surface to prevent uneven wear and potential damage to the interlocking system. Minor imperfections can often be addressed during the preparation phase, but significant variations in height across the tile surface will need to be rectified. A general guideline is that the floor should be flat within 3/16 inch over a 10-foot span. Use a long level or straightedge to identify any high or low spots. High spots can be ground down using a concrete grinder or floor scraper. Low spots, including grout lines, will require filling with a self-leveling underlayment or patching compound. The choice between these two options depends on the extent of the unevenness. For minor grout lines, a thin skim coat of patching compound is usually sufficient. For larger variations, a self-leveling underlayment is recommended, as it provides a consistently smooth and level surface.
3. Moisture Content: Excessive moisture can compromise the adhesion and integrity of the LVP flooring. While LVP is generally water-resistant, moisture seeping from the subfloor can lead to mold growth and adhesive failure. It is essential to test the moisture content of the subfloor, especially in basements or areas prone to dampness. Use a moisture meter to measure the moisture levels in several locations across the floor. The acceptable moisture level will vary depending on the specific LVP product and the manufacturer's recommendations. If moisture levels are too high, address the source of the moisture before proceeding with the installation. This may involve repairing leaks, improving ventilation, or installing a moisture barrier.
Preparing the Ceramic Tile Surface
Proper preparation is the most critical step in ensuring a successful LVP installation over ceramic tile. This phase involves cleaning, leveling, and creating a suitable surface for the LVP adhesive or underlayment.
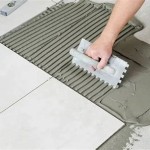
1. Thorough Cleaning: Begin by thoroughly cleaning the ceramic tile floor to remove any dirt, debris, grease, or waxes. Use a scrub brush and a strong degreasing cleaner to ensure that all contaminants are removed from the surface and grout lines. Rinse the floor thoroughly with clean water to remove any remaining residue from the cleaning solution. Allow the floor to dry completely before proceeding to the next step. This is crucial as any remaining moisture or residue can interfere with the adhesion of the patching compound or underlayment.
2. Filling Grout Lines and Imperfections: This step is essential to create a smooth and level surface for the LVP flooring. Use a cement-based patching compound or a self-leveling underlayment to fill in the grout lines and any other minor imperfections on the tile surface. For narrow grout lines, a patching compound applied with a wide trowel is typically sufficient. Apply the compound evenly, ensuring that all grout lines are completely filled. For wider grout lines or more significant imperfections, a self-leveling underlayment may be necessary. Follow the manufacturer's instructions regarding mixing and application. Pour the underlayment onto the floor and use a gauge rake or trowel to spread it evenly across the surface. Allow the patching compound or underlayment to dry completely according to the manufacturer's instructions. Once dry, lightly sand the surface to remove any ridges or imperfections and create a smooth, uniform surface.
3. Priming the Surface (Optional): Some LVP manufacturers recommend priming the prepared surface before installing the flooring. Priming can improve adhesion and prevent the patching compound or underlayment from absorbing moisture from the adhesive. Use a primer specifically designed for use with LVP flooring and follow the manufacturer's instructions for application. Apply the primer evenly with a roller or brush and allow it to dry completely before proceeding with the LVP installation.
Installing the Luxury Vinyl Plank Flooring
With the ceramic tile surface properly prepared, the final step is installing the LVP flooring. Accurate measurements, careful plank placement, and proper cutting techniques are essential for a professional-looking result.
1. Acclimation: Allow the LVP flooring to acclimate to the room's temperature and humidity for at least 48 to 72 hours before installation. This allows the planks to expand or contract slightly, minimizing the risk of gaps or buckling after installation. Store the planks horizontally in the room where they will be installed, ensuring they are not exposed to direct sunlight or extreme temperatures.
2. Planning the Layout: Before beginning the installation, plan the layout of the LVP flooring. Start by measuring the room and determining the direction in which the planks will be installed. Consider the room's shape, the location of doorways, and any other architectural features that may affect the layout. Aim to minimize the number of small pieces at the edges of the room and to create a balanced and visually appealing pattern. A general rule is to run the planks parallel to the longest wall in the room. To ensure a straight and consistent layout, establish a starting line using a chalk line. Snap a line parallel to the longest wall, ensuring that it is square to the room. This line will serve as a guide for the first row of planks.
3. Installing the Planks: Begin installing the LVP planks along the starting line, following the manufacturer's instructions for the specific product. Most LVP flooring uses a click-lock system, where the planks interlock with each other. Angle the first plank into the adjacent plank and press down firmly until it clicks into place. Continue installing the planks row by row, ensuring that each plank is properly aligned and securely locked. Use a tapping block and a rubber mallet to gently tap the planks together, ensuring a tight and seamless fit. For planks that need to be cut to fit around doorways or other obstacles, use a utility knife or a jigsaw. Measure carefully and mark the cutting line on the plank. Score the plank several times with the utility knife and then snap it along the score line. For more complex cuts, use a jigsaw with a fine-tooth blade. Ensure that the edges of the cut planks are clean and smooth before installing them. Leave a small expansion gap of approximately ¼ inch along the walls to allow for expansion and contraction. This gap will be covered by baseboards or trim after the flooring is installed.
4. Installing Transition Strips and Baseboards: Once the LVP flooring is installed, install transition strips where the flooring meets other types of flooring, such as carpet or tile. Transition strips provide a smooth and seamless transition between the different floor surfaces and help to protect the edges of the LVP flooring. Install baseboards or trim along the walls to cover the expansion gap and provide a finished look. Use a nail gun or construction adhesive to secure the baseboards to the walls. Caulk the top edge of the baseboards to seal any gaps and create a clean, professional finish.

New Vinyl Plank Flooring Over Tile Table And Hearth

New Vinyl Plank Flooring Over Tile Table And Hearth

New Vinyl Plank Flooring Over Tile Table And Hearth

Lvt Flooring Over Existing Tile The Easy Way Vinyl Floor Installation Diy

How To Install Luxury Vinyl Plank Over Tile Flooring

New Vinyl Plank Flooring Over Tile Table And Hearth

Lvt Flooring Over Existing Tile The Easy Way Vinyl Floor Installation Diy

New Vinyl Plank Flooring Over Tile Table And Hearth

Should You Install Vinyl Floor Over Tile

Can You Install Vinyl Plank Over Tile Flooring America
Related Posts