How to Install Hardie Board for Tile Floor
Hardie board, a cement-based composite material, is often used as a substrate for tile floors due to its stability, moisture resistance, and strength. It provides a smooth, even surface for tile installation and prevents cracking or movement, especially in areas prone to moisture or temperature fluctuations. Installing Hardie board requires careful preparation and execution to ensure a long-lasting and aesthetically pleasing finish. This article will guide you through the essential steps for installing Hardie board for tile flooring.
Prepare the Subfloor
Before installing Hardie board, it is crucial to ensure that the existing subfloor is level, clean, and structurally sound. This foundation will directly influence the final tile installation.
1.
Check for Level:
Use a level to assess the levelness of the subfloor. Any significant dips or humps should be addressed before proceeding. You can level the subfloor with self-leveling compound or shims as needed.2.
Remove Existing Flooring:
If there is any existing flooring, remove it completely. This includes any carpeting, hardwood, or vinyl flooring.3.
Clean the Subfloor:
Thoroughly clean the subfloor to remove any debris, dust, or loose particles. This will ensure proper adhesion between the Hardie board and the subfloor.4.
Inspect for Moisture:
Check for any signs of moisture or water damage. If detected, address these issues before installing the Hardie board. Moisture can lead to warping, delamination, and mold growth.5.
Address Subfloor Issues:
If the subfloor has any cracks, gaps, or damaged areas, repair them with appropriate materials like wood filler or epoxy.Install the Hardie Board
Once the subfloor is prepared, you can proceed with installing the Hardie board.
1.
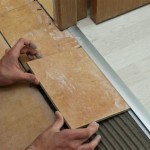
Measure and Cut:
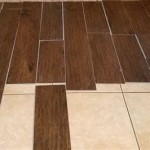
Measure the area to be covered and cut the Hardie board to size using a circular saw or a utility knife with a scoring tool. It is essential to ensure that the boards are cut precisely to maintain a flush and even surface.2.
Apply Adhesive:
Apply a layer of construction adhesive to the subfloor in a zigzag pattern. This will ensure a secure bond between the Hardie board and the subfloor.3.
Install First Layer:
Start by installing the first layer of Hardie board, ensuring that the edges are butted together tightly.4.
Fastening:
Secure the Hardie board to the subfloor using screws or nails. The fasteners should be driven through the Hardie board and into the subfloor at the correct depth.5.
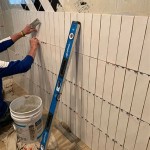
Stagger Joints:
To prevent movement or cracking, it is essential to stagger the joints between sheets of Hardie board. This means that the seams of adjacent boards should not align.6.
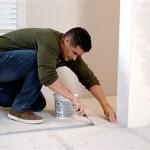
Apply Taping Compound:
Apply a layer of taping compound to the seams between the boards, ensuring a smooth, even transition. Allow the compound to dry completely before proceeding to the next step.7.
Sanding:
Sand the taping compound to smooth out any imperfections and create a level surface for the tile installation.8.
Prime:
Prime the Hardie board surface to promote better adhesion of the tile mortar. Allow the primer to dry completely before proceeding to the tile installation.Tile Installation
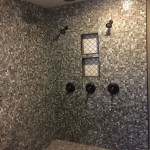
After the Hardie board is properly installed and prepared, you can proceed with the tile installation. This process involves several steps to ensure a successful and aesthetically pleasing result.
1.
Apply Mortar:
Apply a layer of thin-set mortar to the Hardie board using a notched trowel. Choose the notch size appropriate for the size of the tiles.2.
Position Tiles:
Carefully position the tiles on the mortar, ensuring that they are level and spaced evenly. Use tile spacers to maintain uniform spacing.3.
Grouting:
After the mortar has set, remove any excess mortar and apply grout to the spaces between the tiles. Choose a grout color that complements the tiles and the overall design.4.
Seal Grout:
Once the grout has dried, seal it to prevent staining and make cleaning easier.5.
Clean the Tiles:
After sealing the grout, clean the tiles thoroughly to remove any residue.It's crucial to follow the manufacturer's instructions and recommendations for both the Hardie board and the tile products used for the installation. Proper preparation, careful execution, and adherence to best practices will ensure a successful and durable tile installation.

How To Install Hardiebacker Cement Board On Floors James Hardie Pros

How To Install Cement Board The Home Depot

How To Install Cement Board The Home Depot

How To Install Cement Backer Board For Floor Tile Installation The Home Depot

How To Install Cement Board On A Floor Diy Family Handyman

How To Install Hardie Board For Floor Tile

How To Install Hardiebacker Cement Board On Floors

Hardiebacker Cement Board Tile Backer James Hardie

How To Install Cement Board The Home Depot

How To Install Cement Board In 3 Easy Ways Q2 2024 Infographic
Related Posts