Do You Have To Use Backer Board For Tile Backsplash?
When embarking on a kitchen or bathroom remodel, the backsplash is an opportunity to add both functionality and aesthetic appeal. A common question that arises during the planning phase is whether a backer board is necessary behind the tile. The answer is a resounding yes, in most cases. While exceptions may exist, the benefits of using a backer board vastly outweigh the potential drawbacks.
Benefits of Using Backer Board
Backer board, most commonly made of cement board or a similar material, serves as a stable and moisture-resistant substrate behind the tile. It provides numerous benefits that contribute to the longevity and integrity of the backsplash:
- Moisture Resistance: Backer board is designed to withstand moisture, preventing damage to the wall and the backsplash itself. This is particularly crucial in areas like kitchens and bathrooms where water is regularly present.
- Structural Support: Backer board provides a rigid surface for the tile to adhere to, reducing the risk of cracking or movement. It also helps distribute weight, preventing the tile from detaching from the wall over time.
- Fire Resistance: Backer board is typically fire-resistant, offering an additional layer of safety in the event of a kitchen fire.
- Protection from Mold and Mildew: The moisture-resistant nature of backer board inhibits the growth of mold and mildew, maintaining a hygienic environment.
Types of Backer Board
There are several types of backer board available, each with its own advantages and disadvantages. The most common are cement board and fiberglass-reinforced polymer board. Cement board is known for its durability and affordability, while fiberglass-reinforced polymer board offers greater moisture resistance and flexibility. The choice depends on the specific project requirements and budget.
When Can Backer Board Be Skipped?
While backer board is generally a good practice for tile backsplashes, there are instances where it may be omitted. These typically involve situations where the wall material itself offers sufficient moisture resistance and structural support:
- Solid Concrete or Masonry Walls: These surfaces are naturally resistant to moisture and provide adequate support for tile. However, it's important to ensure the wall is properly sealed before installing the tile.
- Thin-Set Mortar Over Existing Tile: If the existing tile is securely attached to the wall and in good condition, a layer of thin-set mortar over the existing tile can provide adequate adhesion and prevent water damage. However, this approach may not be suitable for high-traffic areas or where the existing tile is cracked or damaged.
Installation Considerations
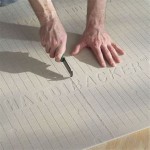
The installation of backer board is crucial to ensure its effectiveness. It must be properly secured to the wall, using screws or nails that are compatible with the material. Additionally, the joints between the backer board panels must be appropriately taped and sealed to prevent moisture from seeping in.
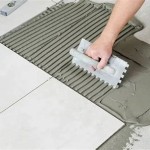
Once the backer board is in place, the thin-set mortar and tile can be installed according to manufacturer instructions. It's essential to use the appropriate thin-set mortar for the type of tile and backer board being used.
Conclusion
The decision of whether or not to use backer board behind a tile backsplash should be carefully considered. In most cases, the benefits of using a backer board, such as moisture resistance, structural support, and fire resistance, outweigh the potential drawbacks. However, there are exceptions where the wall material itself may provide sufficient protection. Regardless of the decision, proper installation is essential to ensure the long-term durability and integrity of the backsplash.

How To Install Kitchen Backsplash Tile Four Generations One Roof

How To Hang Cement Backer Board For A Wall Full Of Tile Young House Love

How To Hang Cement Backer Board For A Wall Full Of Tile Young House Love

Help Cement Board Sheetrock More Drywall For Tiling Kitchen Backsplash Hometalk

How To Hang Cement Backer Board For A Wall Full Of Tile Young House Love

Our Cement Board Siding Backsplash Thrifty Decor Diy And Organizing
How To Install Kitchen Backsplash Tile Four Generations One Roof

Help Cement Board Sheetrock More Drywall For Tiling Kitchen Backsplash Hometalk

Our Cement Board Siding Backsplash Thrifty Decor Diy And Organizing

How To Install Kitchen Backsplash Tile Four Generations One Roof
Related Posts


