Can You Tile Onto Breeze Block?
Breeze blocks, also known as concrete blocks, are a popular building material for walls and fences due to their affordability, durability, and aesthetic appeal. They offer a unique and rustic charm that complements various architectural styles. However, if you're considering tiling directly onto breeze blocks, it's crucial to understand the factors involved to ensure a successful and long-lasting installation.
Understanding the Challenges
Tiling onto breeze blocks presents specific challenges that require careful consideration and proper preparation. Breeze blocks are porous and often uneven, which can affect the adhesion of tile adhesive and lead to grout lines becoming uneven or the tiles detaching over time. The surface of breeze blocks can also be rough, requiring additional preparation to create a smooth and secure base for the tiles.
Preparing Breeze Blocks for Tiling
Before you start tiling, proper preparation of the breeze block surface is critical for a successful outcome. This involves several steps:
- Clean the surface thoroughly: Remove any dirt, dust, debris, or loose coatings using a stiff brush, wire brush, or pressure washer.
- Repair any cracks or holes: Use a suitable cement-based patching compound to fill any cracks or holes in the breeze blocks.
- Apply a bonding primer: A bonding primer helps to create a smooth and even surface, improves adhesion, and seals the porous surface of the breeze blocks. This step is essential to prevent the tile adhesive from soaking into the breeze block and weakening the bond.
- Apply a waterproofing membrane: If the tiled area is exposed to moisture, consider applying a waterproofing membrane to the breeze block surface. This will prevent water from penetrating the wall and causing damage.
Once the breeze blocks are cleaned, repaired, and primed, you can proceed with the tiling process.
Choosing the Right Tile Adhesive and Grout
Selecting the appropriate tile adhesive and grout is crucial for a durable and aesthetically pleasing tile installation. When choosing adhesive, consider the following factors:
- Adhesive type: Use a flexible, high-performance tile adhesive suitable for porous surfaces like breeze blocks. Avoid using standard cement-based adhesives, which may not provide adequate adhesion.
- Setting time: Choose an adhesive with a setting time that matches your working speed. This ensures you have enough time to adjust the tiles and allows for the adhesive to cure properly.
- Waterproof properties: Ensure the adhesive is waterproof if the tiled area is exposed to moisture. This will prevent water from entering the wall and damaging the tiles.
When selecting grout, consider the following:
- Grout type: Use a grout suitable for porous surfaces and the type of tile you're using. Some grouting options include epoxy grout, which is highly durable and stain-resistant, and sanded grout, which is more budget-friendly and suitable for wider tile gaps.
- Color: Choose a grout color that complements the tiles and the overall aesthetic of the space.
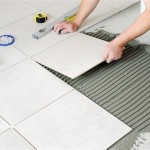
Tiling Onto Breeze Blocks
Once you have prepared the breeze block surface and selected the appropriate materials, you can start tiling. Follow these steps:
- Apply adhesive to the breeze block: Use a notched trowel to apply a thin, even layer of adhesive to the breeze block surface. The notch size will vary depending on the size of the tiles.
- Position the tiles securely: Press the tiles firmly onto the adhesive, ensuring they are level and aligned according to your desired pattern.
- Use spacers for even grout lines: Place spacers between the tiles to create even grout lines.
- Clean excess adhesive: Remove any excess adhesive from the tile surface with a damp cloth before it dries.
- Allow adhesive to cure: Allow the adhesive to cure completely according to the manufacturer's instructions.
- Apply grout: Once the adhesive has cured, apply grout to the gaps between the tiles, using a grout float to fill the spaces evenly.
- Clean excess grout: Remove any excess grout from the tile surface using a damp sponge.
- Allow grout to cure: Allow the grout to cure completely according to the manufacturer's instructions.
- Seal the grout: Apply a grout sealant to the grout lines to protect them from stains and moisture. This step is particularly important for areas that are exposed to frequent moisture.
Remember that these are general guidelines, and specific instructions may vary depending on the type of tiles, adhesive, and grout used. It's essential to consult the manufacturer's instructions for specific product details and application recommendations.

Tile Over Blockwork Mike Haduck

Painting Breeze Blocks What Next Page 1 Homes Gardens And Diy Pistonheads

Everything You Need To Know About Breeze Blocks Clay Imports

External Breeze Block Wall Board Or Plaster Diynot Forums

How To Prepare Uneven Walls And Floors Tile

Dreamin Breeze Block House Architectureau

Breeze Blocks Are Back Your Newest Diy Project Hardware Concepts

Breeze Block 75 Designs From 30 Companies Jan 2024 Update

How To Bond Plasterboard Breeze Block Ehow

What Fixings For A Heavy Cupboard On Breezeblock Wall Diynot Forums
Related Posts