Can You Install Vinyl Plank Flooring Over Ceramic Tile?
Installing new flooring can significantly enhance the aesthetic appeal and functionality of a space. When considering flooring options, vinyl plank flooring has emerged as a popular choice due to its durability, water resistance, and ease of installation. A common question arises for homeowners looking to renovate: can vinyl plank flooring be installed directly over existing ceramic tile? The answer is generally yes, but the success of such an installation hinges on several crucial factors. Skipping proper preparation can lead to issues with the new flooring, including uneven surfaces, compromised water resistance, and reduced lifespan.
This article explores the conditions under which installing vinyl plank flooring over ceramic tile is feasible and provides a comprehensive guide to the preparation processes and considerations necessary for a successful installation. It will address the evaluation of the existing tile surface, the required subfloor preparation, and the specific installation techniques that will ensure a long-lasting and visually appealing result. Careful attention to detail and adherence to best practices are essential for achieving a professional-grade finish.
Evaluating the Existing Ceramic Tile Surface
Before proceeding with any installation, a thorough assessment of the existing ceramic tile is paramount. This evaluation will determine the suitability of the tile as a subfloor and identify any potential issues that need to be addressed. The primary areas of focus during this evaluation include flatness, stability, and condition of the tile and grout.
Flatness: Vinyl plank flooring requires a relatively flat and even surface for proper installation. Significant variations in height or unevenness can lead to visible imperfections in the finished floor and potential damage to the vinyl planks over time. Use a long level (at least 6 feet) to check for any dips, humps, or warps across the tile surface. Small variations (typically less than 3/16 inch over a 10-foot span) may be acceptable, but larger deviations will need to be corrected. These corrections can be done through self-leveling compounds.
Stability: The existing ceramic tile must be firmly bonded to the subfloor underneath. Loose or cracked tiles will create unstable areas, which will compromise the integrity of the new vinyl plank flooring. Walk over the entire tile surface, paying close attention to any areas that sound hollow or exhibit movement. Individually tap each tile with a rubber mallet to identify any loose bonds. Any loose tiles must be removed and replaced, or the voids filled with a suitable patching compound before proceeding.
Condition of Tile and Grout: Examine the tile surface for cracks, chips, or other damage. Minor imperfections can often be filled with patching compounds, but extensive damage may necessitate more significant repairs. The condition of the grout is equally important. Crumbling or deteriorated grout lines can create unevenness and allow moisture to penetrate, potentially damaging the underlying subfloor. All loose grout must be removed and replaced with new grout that is flush with the tile surface. Consider applying a grout sealer to protect the grout from future moisture intrusion.
Furthermore, the type of ceramic tile can also influence the suitability for vinyl plank installation. Heavily textured or deeply grooved tiles may pose challenges in achieving a smooth and even surface. In such cases, it may be necessary to apply a leveling compound to fill the grooves and create a more suitable substrate. Proper evaluation of the existing tile surface is crucial for a successful and long-lasting vinyl plank flooring installation.
Preparing the Ceramic Tile Subfloor
Once the existing ceramic tile has been evaluated and any necessary repairs have been made, the next step is to prepare the surface for the installation of the vinyl plank flooring. This preparation involves cleaning, leveling, and creating a suitable bonding surface. A properly prepared subfloor is essential for ensuring the adhesion, stability, and overall performance of the new flooring.
Cleaning: Thoroughly clean the entire tile surface to remove any dirt, dust, grease, or other contaminants. Use a scrub brush and a suitable cleaning solution to remove stubborn stains or buildup. Rinse the surface thoroughly with clean water and allow it to dry completely. For areas with heavy grease or oil residue, a degreasing cleaner may be necessary. Ensure that all traces of the cleaning solution are removed before proceeding to the next step.
Leveling: Address any unevenness or height variations in the tile surface. Small imperfections can often be filled with a thin layer of patching compound. For larger areas or significant dips, a self-leveling compound may be required. Self-leveling compounds are designed to flow and create a smooth, level surface. Follow the manufacturer's instructions carefully when mixing and applying the compound. Allow the compound to cure completely before proceeding to the next step. If using a patching compound to fill grout lines, ensure that the compound is flush with the tile surface to prevent any telegraphing through the vinyl plank flooring.
Creating a Bonding Surface: While some vinyl plank flooring products can be installed directly over a clean and level tile surface, others may require the application of a primer or bonding agent to ensure proper adhesion. Check the manufacturer's instructions for the specific vinyl plank flooring being used. Primers help to improve the bond between the tile surface and the adhesive of the vinyl planks. Apply the primer evenly, following the manufacturer's recommendations for coverage and drying time. Some installers prefer to lightly roughen the tile surface with sandpaper to further enhance adhesion. However, care should be taken not to damage the tile or create excessive dust.
In addition to these core steps, consider the use of an underlayment. While not always necessary, an underlayment can provide additional benefits, such as increased sound insulation, improved cushioning, and enhanced moisture resistance. Choose an underlayment that is compatible with both the vinyl plank flooring and the existing tile surface. Carefully follow the manufacturer's instructions for installing the underlayment.
Proper preparation of the ceramic tile subfloor is a critical step in the vinyl plank flooring installation process. Taking the time to thoroughly clean, level, and prime the surface will result in a more durable, aesthetically pleasing, and long-lasting floor.
Installing Vinyl Plank Flooring Over Tile: Techniques and Considerations
With the ceramic tile subfloor properly prepared, the final step is the installation of the vinyl plank flooring. The specific installation techniques will vary depending on the type of vinyl plank flooring being used (e.g., click-lock, glue-down) and the manufacturer's instructions. However, some general principles and considerations apply to all installations.
Acclimation: Before beginning the installation, allow the vinyl plank flooring to acclimate to the room's temperature and humidity for at least 48 hours. This acclimation period allows the planks to expand or contract, preventing warping or buckling after installation. Store the planks in the room where they will be installed, ensuring that they are laid flat and not exposed to direct sunlight or excessive moisture.
Layout: Plan the layout of the vinyl plank flooring to minimize waste and create a visually appealing pattern. Consider the direction of the planks (e.g., parallel to the longest wall) and the placement of seams. Dry-lay a few rows of planks to visualize the layout and make any necessary adjustments. When working around obstacles such as pipes or doorways, use a jigsaw or utility knife to carefully cut the planks to fit. Leave a small expansion gap (typically 1/4 inch) around the perimeter of the room to allow for expansion and contraction.
Installation: Follow the manufacturer's instructions closely when installing the vinyl plank flooring. For click-lock planks, engage the interlocking edges and tap them together gently with a rubber mallet. Ensure that the planks are properly aligned and that the seams are tight. For glue-down planks, apply the adhesive evenly to the tile surface using a notched trowel. Place the planks onto the adhesive, pressing them firmly into place. Roll the floor with a heavy roller to ensure proper adhesion. Wipe away any excess adhesive immediately with a damp cloth.
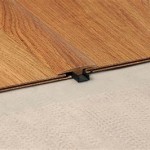
Transitions and Finishing: Install transition strips at doorways and where the vinyl plank flooring meets other flooring materials (e.g., carpet, hardwood). Transition strips provide a smooth and safe transition between different floor heights and surfaces. Install baseboards or quarter-round molding around the perimeter of the room to cover the expansion gap and provide a finished look. Clean the installed vinyl plank flooring with a suitable cleaner to remove any dust or debris. Avoid using harsh chemicals or abrasive cleaners that could damage the surface.
Selecting the right type of vinyl plank flooring is also critical. Thicker planks tend to be more forgiving of minor imperfections in the subfloor and offer better sound insulation. Products with a durable wear layer will resist scratches and scuffs, ensuring a long-lasting appearance. For areas prone to moisture, such as bathrooms and kitchens, choose a waterproof vinyl plank flooring product.
Installing vinyl plank flooring over ceramic tile can be a cost-effective and efficient way to update a space. By carefully evaluating the existing tile surface, properly preparing the subfloor, and following the manufacturer's installation instructions, homeowners can achieve a beautiful and durable new floor.

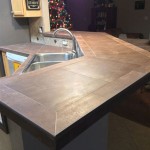
New Vinyl Plank Flooring Over Tile Table And Hearth

New Vinyl Plank Flooring Over Tile Table And Hearth

New Vinyl Plank Flooring Over Tile Table And Hearth

Can You Put Vinyl Plank Flooring Over Ceramic Tile Floors Blvd

Should You Install Vinyl Floor Over Tile

Lvt Flooring Over Existing Tile The Easy Way Vinyl Floor Installation Diy

Vinyl Plank Wood Directly Over Tile

New Vinyl Plank Flooring Over Tile Table And Hearth

Can You Install Vinyl Plank Over Tile Flooring America

New Vinyl Plank Flooring Over Tile Table And Hearth
Related Posts