Can You Put Tile Over Painted Cinder Block?
Tiling directly over painted cinder block walls presents specific challenges. While possible under certain circumstances, the success of such a project hinges on careful surface preparation and the selection of appropriate materials. Simply applying tile adhesive to painted cinder block often leads to adhesion failure, resulting in cracked grout and loosened tiles. This article explores the factors influencing tile installation over painted cinder blocks and outlines the necessary steps for increasing the likelihood of a durable, long-lasting finish.
Assessing the Painted Surface
Before considering tile installation, the existing paint layer requires thorough assessment. Several key factors determine the paint's compatibility with tile adhesive:
- Paint Type: Oil-based paints create a non-porous surface that prevents proper adhesion. Latex-based paints, while offering slightly better adhesion, still pose challenges. Identifying the paint type is crucial for determining the appropriate preparation method.
- Paint Condition: Peeling, flaking, or bubbling paint must be removed entirely. A stable, well-adhered paint layer provides a better substrate, though additional preparation steps are necessary.
- Surface Cleanliness: Dirt, grease, mildew, and other contaminants compromise adhesive bonding. Thorough cleaning is essential regardless of the paint type or condition.
Preparing the Cinder Block Surface
Proper surface preparation is the most critical factor in successfully tiling over painted cinder block. The following steps outline the recommended process:
- Cleaning: Use a heavy-duty cleaner specifically designed for removing grease and grime. A solution of trisodium phosphate (TSP) can also be effective. Thoroughly rinse the surface after cleaning and allow it to dry completely.
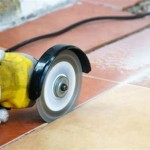
- Deglossing: Glossy paint surfaces inhibit adhesion. Sanding the surface with coarse-grit sandpaper (80-100 grit) creates a rougher texture that promotes bonding. Alternatively, a chemical deglosser can be used according to the manufacturer's instructions.
- Removing Loose Paint: Any loose or flaking paint must be scraped away using a paint scraper or putty knife. A wire brush can help remove stubborn residue.
- Repairing Imperfections: Fill any cracks, holes, or other imperfections in the cinder block with a suitable patching compound. Allow the compound to dry and cure completely before proceeding.
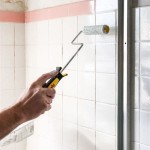
- Applying a Bonding Primer: After the surface is clean, dry, and properly prepared, apply a high-quality bonding primer specifically designed for masonry surfaces. This primer improves adhesion and creates a more uniform substrate for the tile adhesive.
Choosing the Right Materials
Selecting the appropriate materials is equally important for a successful tile installation. Consider the following:
- Thin-Set Mortar: Opt for a high-quality, polymer-modified thin-set mortar specifically designed for use over painted surfaces. These mortars offer superior bonding strength and flexibility.
- Tile Type: Porcelain and ceramic tiles are suitable for cinder block applications. Natural stone tiles may require additional considerations due to their porosity and sensitivity to moisture.
- Grout: Select a grout that is appropriate for the tile type and the expected environmental conditions. Sanded grout is typically recommended for wider grout lines.
Installation Techniques
Proper installation techniques are essential for a durable and aesthetically pleasing tile finish. Key considerations include:
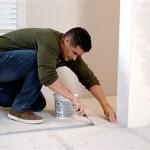
- Applying Thin-Set: Apply the thin-set mortar to the prepared cinder block surface using a notched trowel. The notch size should be appropriate for the tile size and type.
- Setting the Tile: Firmly press the tiles into the thin-set, ensuring full contact and proper alignment. Use spacers to maintain consistent grout lines.
- Cleaning Excess Thin-Set: Remove any excess thin-set from the tile surface and grout lines immediately. Allow the thin-set to cure completely before grouting.
- Grouting: Apply the grout using a grout float, working it into the joints and ensuring complete filling. Remove excess grout with a damp sponge.
- Sealing: After the grout has cured, apply a grout sealer to protect against staining and moisture penetration.
Alternative Approaches
In situations where the paint layer is particularly problematic, alternative approaches may be considered:
- Removing the Paint Entirely: While labor-intensive, completely removing the paint layer using methods such as sandblasting, grinding, or chemical strippers provides the most reliable surface for tile adhesion.
- Installing a Cement Backer Board: Attaching a cement backer board over the painted cinder block creates a stable and consistent substrate for tile installation. This method bypasses the challenges associated with direct adhesion to the painted surface.
Long-Term Maintenance
Regular maintenance helps preserve the integrity of tiled surfaces. Periodic cleaning with appropriate cleaners and prompt attention to any cracks or loose tiles are crucial for long-term performance.

Tile Over Blockwork Mike Haduck

Painting Cinder Block Walls In A Basement Or Re Paint Them

Cinderblock Planters Rust Oleum

Painted Cinderblock Wall 80 90s Tile Floor Cinder Block Walls Basement Laundry Room Makeover Concrete

Painting Cinder Block Walls In A Basement Or Re Paint Them

Painting Cinder Block Walls In A Basement Or Re Paint Them

How To Tile Over Existing Brepurposed

Painting Cinder Block Walls In A Basement Or Re Paint Them

Diy Hand Painted Talavera Tile Accent Wall Tiles

What To Do With Concrete Block Wall In Garage The Journal
Related Posts