Can You Put Ceramic Tile On Concrete? A Comprehensive Guide
Installing ceramic tile over concrete is a common and often successful flooring solution. Concrete provides a solid and stable subfloor, making it an ideal base for tile. However, the success of this installation hinges on proper preparation, the correct materials, and meticulous execution. This article will explore the critical factors involved in laying ceramic tile directly on concrete, ensuring a durable and aesthetically pleasing result.
Evaluating the Concrete Subfloor
Before commencing any tiling project, a thorough assessment of the concrete subfloor is paramount. This evaluation involves checking for several crucial elements that directly impact the adhesion and longevity of the tile installation. Addressing any issues discovered during this evaluation is essential before proceeding.
The first aspect to examine is the levelness of the concrete. Uneven surfaces can lead to cracked tiles and an unprofessional appearance. A long level or straightedge, combined with shims, can effectively identify high and low spots. Significant variations may require leveling compounds or grinding to create a uniform surface. Self-leveling underlayments are a common solution for larger areas with substantial irregularities. For smaller bumps and ridges, a concrete grinder equipped with a diamond grinding wheel can be used to smooth the surface.
Cleanliness is another vital factor. The concrete must be free of dust, dirt, grease, paint, sealers, and any other contaminants that can impede the bond between the tile adhesive (thin-set mortar) and the concrete. Thorough cleaning can be achieved through various methods. Sweeping and vacuuming are essential first steps. Following this, scrubbing with a degreasing cleaner is often necessary to remove stubborn residues. In some cases, acid etching might be required to roughen the surface and improve adhesion, but this should be done with caution and proper safety measures, including adequate ventilation and protective gear.
The presence of cracks in the concrete is a serious concern. While minor hairline cracks may not pose a significant problem, larger or structural cracks need to be addressed. These cracks can propagate through the tile layer, causing unsightly fractures. Repairing cracks typically involves filling them with a crack isolation membrane or a concrete patching compound designed for crack repair. For severe cases, consulting with a structural engineer is advisable to determine the underlying cause of the cracking and implement a more permanent solution.
Finally, moisture content needs to be carefully considered. Excessive moisture can weaken the bond between the tile and the concrete, leading to tile failure. Various methods can be used to test moisture levels, including calcium chloride tests or electronic moisture meters. If the moisture content is too high, mitigation strategies such as applying a moisture barrier membrane are necessary before tiling.
Selecting the Appropriate Materials
Choosing the right materials is as crucial as preparing the concrete subfloor. The type of ceramic tile, thin-set mortar, grout, and sealant must be carefully selected to ensure a long-lasting and aesthetically pleasing installation. The compatibility of these materials with the concrete subfloor is paramount.
Ceramic tiles come in a wide array of styles, sizes, and finishes. The selection should be based on the intended use of the space, the desired aesthetic, and the durability requirements. For high-traffic areas, choose tiles with a higher abrasion resistance rating (PEI rating). Larger tiles can create a more seamless look, but they require a flatter subfloor to avoid lippage (uneven tile edges). Smaller tiles are more forgiving on slightly uneven surfaces.
Thin-set mortar is the adhesive that bonds the tile to the concrete. Select a premium-grade, polymer-modified thin-set mortar specifically designed for use with ceramic tile and concrete. Polymer-modified thin-set mortars offer superior adhesion, flexibility, and water resistance compared to standard thin-set mortars. The type of thin-set mortar should also be chosen based on the size of the tile. Larger tiles may require a modified mortar with increased open time to allow for proper adjustment during installation.
Grout fills the spaces between the tiles, providing a finished look and preventing water from penetrating the tile layer. Cement-based grout is the most common type, but epoxy grout is an excellent option for areas prone to moisture or staining, such as bathrooms and kitchens. Epoxy grout is more expensive than cement-based grout, but it offers superior stain resistance, durability, and water resistance. Choose a grout color that complements the tile and the overall design of the space.
Sealant is applied to the grout lines to prevent water penetration and staining. A high-quality silicone sealant is recommended for areas exposed to moisture. The sealant should be applied after the grout has cured completely, following the manufacturer's instructions. Regular resealing is necessary to maintain the effectiveness of the sealant.
In addition to these primary materials, consider using crack isolation membranes. These membranes are applied directly to the concrete before tiling and are designed to prevent minor cracks in the concrete from transferring to the tile layer. They can significantly improve the longevity of the tile installation, particularly in areas prone to movement or vibration.
Proper Installation Techniques
Even with a properly prepared subfloor and high-quality materials, improper installation can lead to tile failure. Attention to detail and adherence to best practices are essential for a successful ceramic tile installation on concrete.
Begin by dry-laying the tiles to plan the layout. This allows for adjustments to minimize cuts and ensure a balanced appearance. Pay particular attention to corners and edges, where cuts are often necessary. Use tile spacers to maintain consistent grout lines. The size of the spacers should be chosen based on the desired grout line width and the size of the tiles.
When mixing the thin-set mortar, follow the manufacturer's instructions precisely. Avoid adding too much or too little water, as this can compromise the strength and adhesion of the mortar. Mix the mortar thoroughly until it has a smooth, creamy consistency. Let the mortar slake for the recommended time before applying it to the concrete.
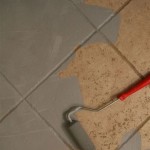
Apply the thin-set mortar to the concrete using a notched trowel. The size and shape of the notches should be chosen based on the size of the tiles and the type of thin-set mortar. Apply the mortar in small sections to prevent it from drying out before the tiles are set. Hold the trowel at a 45-degree angle to create ridges in the mortar. These ridges help to ensure proper adhesion and prevent air pockets.
Set the tiles firmly into the mortar with a slight twisting motion. This helps to embed the tiles and ensure good contact with the mortar. Check the levelness of each tile as you set it, using a level or a straightedge. Adjust the tiles as needed to ensure a flat and even surface. Remove any excess mortar from the grout lines immediately.
Allow the thin-set mortar to cure completely before grouting. The curing time will vary depending on the type of mortar and the ambient temperature and humidity. Typically, it takes at least 24-48 hours for the mortar to cure. Once the mortar has cured, remove the tile spacers and clean the grout lines.
Mix the grout according to the manufacturer's instructions. Apply the grout to the grout lines using a grout float. Work the grout into the joints, ensuring that they are completely filled. Remove excess grout from the tile surface with a damp sponge. Rinse the sponge frequently to avoid spreading grout haze.
After the grout has partially cured, polish the tile surface with a clean cloth to remove any remaining grout haze. Allow the grout to cure completely before sealing. The curing time will vary depending on the type of grout and the ambient temperature and humidity.
Finally, apply a sealant to the grout lines to protect them from water penetration and staining. Follow the manufacturer's instructions for applying the sealant. Regular resealing is necessary to maintain the effectiveness of the sealant.
Following these steps will significantly increase the likelihood of a successful and long-lasting ceramic tile installation over concrete. Remember to prioritize proper preparation, material selection, and installation techniques to achieve optimal results.
:max_bytes(150000):strip_icc()/can-you-install-tile-directly-on-concrete-1822600-04-458f7bb6c78348c1835cf8054ef36553.jpg?strip=all "How To Install Tile Over Concrete")
How To Install Tile Over Concrete

How To Tile Onto Concrete Floors Porcelain Super

Tiling Over A Ed Concrete Slab Fine Homebuilding

How To Install Ceramic Tiles On Concrete Floor Tile Installation

How To Lay Floor Tiles On Concrete Welcome The Rubi Tools Blog

How To Lay Floor Tiles On Concrete Stonesuper
:max_bytes(150000):strip_icc()/can-you-install-tile-directly-on-concrete-1822600-01-8a89ceab1a274fb8ac81890ab7fc6b1b.jpg?strip=all "How To Install Tile Over Concrete")
How To Install Tile Over Concrete

How To Install Ceramic Tiles On Concrete Floor Tile Installation

When Cementing Tile Why Do People Add Rows To The Cement Instead Of Just Leaving It Smooth Quora

How To Tile A Concrete Floor Howtospecialist Build Step By Diy Plans
Related Posts