How to Take Off Wall Tiles in a Bathroom: A Comprehensive Guide
Removing wall tiles in a bathroom is a common task undertaken during renovations or repairs. While it can be a labor-intensive process, understanding the correct techniques and utilizing the appropriate tools can streamline the job and minimize damage to the underlying wall structure. This article provides a detailed guide on how to safely and effectively remove wall tiles in a bathroom.
Preparation and Safety Measures
Prior to commencing any tile removal, thorough preparation is essential. This involves gathering the necessary tools and materials, as well as implementing safety precautions to protect yourself and the surrounding area.
The following tools are typically required for tile removal: * Safety glasses: Eye protection is paramount to prevent debris from entering the eyes. * Work gloves: Gloves protect hands from sharp tile edges and potential irritants. * Dust mask or respirator: Tile removal generates dust, which can be harmful to breathe. * Chisel: A cold chisel or similar tool is used to break the tile's bond with the wall. * Hammer: A hammer is used in conjunction with the chisel to apply force. * Putty knife or scraper: This is helpful for removing residual adhesive or grout. * Utility knife: Useful for scoring grout lines. * Grout saw or grout removal tool: Essential for removing grout before tile removal. * Pry bar: For prying off larger pieces or particularly stubborn tiles. * Bucket or trash bags: For collecting tile debris. * Drop cloths or plastic sheeting: To protect the floor and surrounding fixtures from damage and dust.
Before beginning the actual removal, it is crucial to prepare the bathroom. Clear the room of any movable objects, such as toiletries, shower curtains, and small furniture. Cover the floor and any remaining fixtures with drop cloths or plastic sheeting to protect them from falling debris and dust. Ensure adequate ventilation by opening windows and doors, or using a fan to circulate air. Turn off the electricity to any outlets or fixtures in the immediate area to prevent electrical shock. If water pipes are exposed, consider turning off the water supply to the bathroom as well, just in case of accidental damage to the pipes.
A critical aspect of preparation involves assessing the type of wall behind the tiles. Common wall types include drywall, cement board, and plaster. Understanding the wall type is crucial because different techniques may be required to minimize damage to the substrate. Drywall is more susceptible to damage than cement board, so greater care is needed when removing tiles from drywall. If the wall is plaster, special attention must be paid to the age and condition of the plaster, as older plaster can be brittle and prone to crumbling. Knowing the wall type allows for selecting the appropriate tools and techniques to minimize damage during the removal process.
Removing Grout and Tiles
The first step in removing tiles is to remove the grout surrounding them. This allows for easier tile removal and reduces the risk of damaging adjacent tiles or the underlying wall. There are several methods for grout removal, each with its own advantages and disadvantages.
A grout saw is a manual tool designed specifically for removing grout. It typically features a hardened blade that is used to scrape away the grout between the tiles. To use a grout saw, hold it at a slight angle to the grout line and apply firm, even pressure while moving it back and forth. Take care not to damage the edges of the tiles. It may be necessary to make multiple passes to completely remove the grout. A utility knife can also be used, but it generally requires more effort.
A grout removal tool, often electric, can significantly expedite the process of grout removal. These tools typically use a small, oscillating blade to cut through the grout. When using an electric grout removal tool, follow the manufacturer's instructions carefully. Wear safety glasses and a dust mask, and avoid applying excessive pressure, which could damage the tiles or the tool. Guide the tool along the grout lines in a steady and controlled manner.
Once the grout has been removed, the next step is to remove the tiles. The most common method involves using a chisel and hammer. Position the chisel at an angle along the edge of a tile, preferably at a corner. Gently tap the chisel with the hammer to break the tile's bond with the wall. Work your way around the tile, gradually loosening it from the wall. Avoid applying excessive force, as this can damage the wall.
For larger tiles or tiles that are particularly difficult to remove, a pry bar may be necessary. Insert the pry bar behind the tile and gently pry it away from the wall. Be careful not to apply too much force, as this can damage the wall or break the tile into sharp pieces. Start by prying at the corners and gradually work your way around the tile.
Some tiles may come loose relatively easily, while others may require more effort. If a tile is particularly stubborn, try using a heat gun to soften the adhesive. Apply heat to the tile for a few minutes, and then try removing it with the chisel and hammer or pry bar. Be careful not to overheat the tile or the surrounding wall, as this could cause damage.
As tiles are removed, immediately dispose of them in a bucket or trash bag to prevent accidents and keep the work area clean. Be mindful of sharp edges and potential hazards. Regularly sweep up any loose debris to maintain a safe working environment.
Addressing the Underlying Wall and Cleanup
After the tiles have been removed, the underlying wall will likely have residual adhesive, grout, or damaged areas. Addressing these issues is essential before installing new tiles or undertaking other renovations.
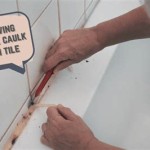
Use a putty knife or scraper to remove any remaining adhesive or grout from the wall. Apply firm, even pressure to scrape away the residue. For particularly stubborn adhesive, a chemical adhesive remover may be necessary. Follow the manufacturer's instructions carefully when using chemical removers, and ensure adequate ventilation. Protect your skin and eyes from contact with the chemicals.
Inspect the wall for any damage, such as cracks, holes, or loose plaster. Repair any damage before proceeding with further renovations. Small cracks can be filled with patching compound, while larger holes may require more extensive repairs, such as replacing sections of drywall or replastering. Allow the patching compound or plaster to dry completely before proceeding.
Depending on the condition of the wall, it may be necessary to apply a primer or sealer before installing new tiles. Primer helps to improve adhesion and prevent moisture from penetrating the wall. Choose a primer that is appropriate for the type of wall and the type of adhesive that will be used for the new tiles. Follow the manufacturer's instructions carefully when applying primer or sealer.
Once all repairs and preparations have been completed, thoroughly clean the area. Sweep or vacuum up any remaining debris, and wipe down the walls with a damp cloth to remove any dust or residue. Allow the walls to dry completely before proceeding with new tile installation or other renovations. Proper cleanup ensures a clean and stable surface for subsequent work.
Thorough cleanup extends beyond the immediate work area. Remove all drop cloths and plastic sheeting, and dispose of them properly. Clean all tools and equipment, and store them in a safe place. Ventilate the bathroom to remove any remaining dust or odors. A final inspection of the entire area ensures that all debris has been removed and the bathroom is safe for use.

Easy Diy Guide On Removing Tiles From Walls Fantastic Handyman Au

The Best Way To Remove Old Shower Tile

How To Remove A Bathroom Wall Tile Today S Homeowner

How To Remove A Tile Backsplash Homeserve Usa

Preparing Walls For Tiling Removing Old Tiles Bathroom Guru

Diy Half Bathroom Demolition The Handyman S Daughter

Tile Removal How To Remove From Wall

Remove Wall Tiles Without Damaging Plasterboard

How To Remove Bathtub Shower Wall Tiles

How To Remove A Tile Floor
Related Posts