How to Remove Bathroom Wall Tile Without Damaging Drywall
Removing bathroom wall tile without causing significant damage to the underlying drywall is a meticulous process that demands patience and the right tools. While completely preserving the drywall may be unrealistic in some instances, minimizing damage is certainly achievable. This article provides a detailed guide for effectively removing bathroom wall tile while mitigating drywall damage, focusing on preparation, technique, and repair strategies.
Preparation is Paramount
Prior to initiating the tile removal process, a thorough preparation stage is essential. This encompasses gathering the necessary tools, protecting the surrounding environment, and understanding the tile installation characteristics.
Gathering Necessary Tools: The required tools include a utility knife, a grout removal tool (manual or powered), a hammer, a chisel (preferably a thin, flexible one), a pry bar, safety glasses, gloves, a dust mask, a plastic drop cloth, and a shop vacuum. A heat gun can also be beneficial in softening the adhesive.
Protecting the Surrounding Environment: Cover the bathroom floor with a plastic drop cloth to protect it from falling debris and potential damage. Seal off the bathroom doorway with plastic sheeting to contain dust. Remove any fixtures or accessories in the immediate vicinity of the tile being removed, such as towel racks, soap dishes, or mirrors. Turn off the water supply to the toilet and sink if there is a possibility of water damage during the process.
Understanding the Tile Installation: Carefully inspect the grout lines and the edges of the tile. Determine the type of grout used (cement-based or epoxy) as this will influence the removal process. Also, assess the type of adhesive used to bond the tile to the drywall. Construction adhesive typically presents a greater challenge compared to thin-set mortar.
Begin by scoring the grout lines around the perimeter of the tile with a utility knife. This helps to weaken the grout bond and provides a clean edge for the chisel to work against. This initial scoring step is crucial for achieving a more controlled removal process.
The Tile Removal Process
The tile removal process requires a systematic approach, focusing on weakening the adhesive bonds and gently prying the tiles away from the drywall. Rushing this stage can result in irreparable damage to the underlying surface.
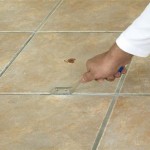
Grout Removal: Removing the grout is a critical step. Utilize a grout removal tool, either manual or powered, to carefully remove the grout surrounding each tile. A powered grout removal tool can expedite this process, but caution is required to avoid damaging the tile edges or the drywall. For cement-based grout, a grout saw or a triangular grout removal blade can be effective. Epoxy grout, being more resilient, may require a specialized epoxy grout removal tool or a multi-tool with a grout removal attachment. The goal is to remove as much grout as possible without gouging the surrounding tiles or the drywall underneath.
Softening the Adhesive (Optional): A heat gun can be used to soften the adhesive behind the tile. Apply heat to the tile surface in a sweeping motion, avoiding prolonged exposure to a single area, which could damage the tile or drywall. The heat helps to loosen the adhesive bond, making the tile removal process easier. Test a small area first to assess the effectiveness of the heat and ensure that it does not cause any adverse effects.
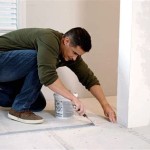
Prying the Tile: Insert the chisel at a 45-degree angle between the tile and the drywall, starting at an edge or corner. Gently tap the end of the chisel with a hammer. The objective is to create a small gap between the tile and the wall. Avoid applying excessive force, as this can result in the tile shattering or the drywall being gouged. Once a small gap is created, insert the pry bar and carefully lever the tile away from the wall. Apply steady pressure and avoid sudden jerking motions. Work around the tile, gradually increasing the gap until it is completely detached. If the tile is particularly stubborn, try working from a different angle or reapplying heat to the adhesive.
Addressing Difficult Tiles: Some tiles may prove more challenging to remove than others. If a tile is firmly bonded, avoid excessive force. Instead, try scoring the grout lines more deeply, applying more heat, or using a different type of chisel. For particularly stubborn tiles, it may be necessary to break the tile into smaller pieces using a hammer and chisel. Carefully remove the pieces, one at a time, to minimize damage to the drywall.
Dealing with Adhesive Residue: After removing the tiles, adhesive residue will likely remain on the drywall. This residue needs to be addressed before any subsequent repairs or installations can be performed. In some cases, the adhesive can be scraped off with a putty knife or a scraper. A heat gun can also be used to soften the adhesive, making it easier to remove. For stubborn adhesive residue, a chemical adhesive remover may be necessary. Always follow the manufacturer's instructions carefully when using chemical adhesive removers and ensure adequate ventilation.
Repairing Drywall Damage
Even with careful tile removal techniques, some damage to the drywall is often unavoidable. Addressing this damage is crucial for creating a smooth and stable surface for future tiling or painting.
Assessing the Damage: Thoroughly inspect the drywall for any holes, gouges, or tears. Minor damage, such as small holes or surface scratches, can be easily repaired with patching compound. More significant damage, such as large holes or areas where the drywall paper has been torn away, may require more extensive repairs.
Patching Small Holes and Gouges: For small holes and gouges, apply a thin coat of patching compound using a putty knife. Ensure that the compound fills the hole completely and is feathered out to blend seamlessly with the surrounding drywall. Allow the compound to dry completely according to the manufacturer's instructions. Sand the patched area smooth using fine-grit sandpaper. Repeat the process if necessary to achieve a smooth and even surface.
Repairing Larger Holes: For larger holes, a more robust repair method is required. Cut a piece of drywall that is slightly larger than the hole. Using a utility knife, score the back of the patch along the edges and snap off the excess drywall, leaving only the paper backing. Apply joint compound to the back of the paper backing and position the patch over the hole. Press firmly to ensure that the patch adheres to the surrounding drywall. Apply several thin coats of joint compound over the patch, feathering the edges to blend seamlessly with the surrounding drywall. Allow each coat to dry completely before applying the next. Sand the patched area smooth using fine-grit sandpaper.
Dealing with Torn Drywall Paper: If the drywall paper has been torn away, it is important to address this issue before applying patching compound. Apply a thin coat of joint compound to the damaged area and allow it to dry completely. This will help to stabilize the torn paper and provide a smooth surface for subsequent repairs. Alternatively, a drywall primer-sealer can be used to seal the torn paper and prevent it from peeling further. Once the primer-sealer is dry, apply patching compound to fill any remaining imperfections.
Priming and Painting: Once the drywall repairs are complete, prime the entire surface with a drywall primer. This will help to seal the patched areas, create a uniform surface for painting, and improve the adhesion of the paint. Allow the primer to dry completely according to the manufacturer's instructions. Apply two coats of paint, allowing each coat to dry completely before applying the next. Use a high-quality paint that is specifically designed for bathrooms to resist moisture and mildew.
The removal of bathroom wall tile without inflicting substantial drywall damage requires meticulousness and the appropriate tools. While complete preservation of the drywall may not always be possible, adhering to these guidelines will significantly minimize damage and facilitate the repair process.

Easy Diy Guide On Removing Tiles From Walls Fantastic Handyman Au

Diy How To Remove Ceramic Tiles Off Drywall

How To Remove Wall Tiles 11 Steps With Pictures Wikihow

How To Remove Wall Tiles

How To Remove Wall Tiles Without Breaking Them

How To Remove Tiles From Wall 5 Steps For Removing Without Damaging

How To Remove Tile From Wall

Tips On How To Remove Old Shower Tile Ugly Duckling House

Preparing Walls For Tiling Removing Old Tiles Bathroom Guru

Tips On How To Remove Old Shower Tile Ugly Duckling House
Related Posts