What Do You Use to Stick Tile to a Wall?
Tiling a wall is a great way to add a touch of style and sophistication to your home. But before you start, it's important to choose the right adhesive. The type of adhesive you use will depend on the type of tile you are using, and the surface you are tiling. In this article, we will discuss the different types of adhesives available and help you choose the right one for your project.
Types of Tile Adhesives
There are three main types of tile adhesives: thin-set mortar, mastic, and epoxy.
Thin-set mortar is a cement-based adhesive that is mixed with water to form a thick paste. It is the most common type of tile adhesive and is suitable for most types of tile. Thin-set mortar is strong and durable, but it can be difficult to work with, especially if you are new to tiling.
Mastic is a pre-mixed adhesive that is applied directly to the wall. It is easy to use, but it is not as strong as thin-set mortar. Mastic is suitable for small tiles and lightweight tiles, but it is not recommended for large tiles or heavy tiles.
Epoxy is a two-part adhesive that is mixed together before it is applied. It is the strongest type of tile adhesive and is suitable for all types of tile. Epoxy is waterproof and resistant to chemicals, making it ideal for use in wet areas, such as bathrooms and kitchens.
Choosing the Right Tile Adhesive
The type of tile adhesive you choose will depend on the following factors:
- The type of tile you are using
- The surface you are tiling
- The size of the tiles
- The weight of the tiles
- The environment in which the tiles will be used
Once you have considered all of these factors, you can choose the right tile adhesive for your project.
Applying Tile Adhesive
Once you have chosen the right tile adhesive, you can begin applying it to the wall. The following steps will guide you through the process:
- Prepare the wall by cleaning it and removing any dust or debris.
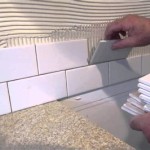
- Apply the tile adhesive to the wall using a trowel. Make sure to apply the adhesive evenly and to cover the entire surface of the wall.
- Place the tiles on the wall and press them into the adhesive. Make sure to align the tiles correctly and to leave a small gap between each tile.
- Allow the adhesive to set for the recommended amount of time. The setting time will vary depending on the type of adhesive you are using.
- Once the adhesive has set, you can grout the tiles. Grout is a cement-based material that is used to fill the gaps between the tiles and to seal them in place.
Conclusion
Tiling a wall is a relatively simple project that can be completed in a few hours. By following the steps outlined in this article, you can achieve professional-looking results. Just be sure to choose the right tile adhesive for your project and to apply it correctly. With a little care and attention to detail, you can create a beautiful and lasting tile installation.

L And Stick Tile How To Install On A Wall Porch Daydreamer

How To Prepare Uneven Walls And Floors Tile

How To Install Wall Tiles Important Tips Ultratech Cement

Why You Shouldn T Use L And Stick Shower Tile Stone Depot

How To Install L And Stick Tile Backsplash On A Wall Angela Marie Made

How To Install L And Stick Tile Backsplash The Diy Mommy

How To Add L And Stick Tile A Wall Drywall

How To Install L And Stick Tiles On A Wall My Uncommon Slice Of Suburbia

Why You Shouldn T Use L And Stick Shower Tile Stone Depot

How To Skim Coat Over Tile Adhesive
Related Posts


