What Do You Use To Put Tiles On A Wall?
Tiling a wall is a great way to add a touch of style and sophistication to your home. But before you get started, it's important to know what materials you'll need to get the job done right.
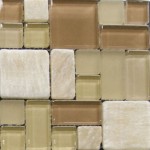
The most important material you'll need is, of course, the tiles themselves. Tiles come in a wide variety of materials, including ceramic, porcelain, glass, and stone. The type of tile you choose will depend on the look you want to achieve, as well as the durability and maintenance requirements of the space.
Once you've chosen your tiles, you'll need to gather the following materials:
- Thin-set mortar
- Grout
- A notched trowel
- A grout float
- A tile cutter
- A level
- A sponge
- A bucket
- Safety glasses
- Dust mask
Thin-set mortar is a type of adhesive that is used to bond the tiles to the wall. It is important to use the correct type of thin-set mortar for the type of tile you are using. Grout is a type of filler that is used to fill the joints between the tiles. It is available in a variety of colors, so you can choose one that matches your tiles.
A notched trowel is used to apply the thin-set mortar to the wall. The notches in the trowel will help to create a strong bond between the mortar and the tiles. A grout float is used to apply the grout to the joints between the tiles. It is important to use a grout float that is the correct size for the width of the joints.
A tile cutter is used to cut tiles to the desired size. A level is used to ensure that the tiles are level as they are being installed. A sponge is used to clean the tiles and remove any excess mortar or grout. A bucket is used to mix the thin-set mortar and grout. Safety glasses and a dust mask are used to protect you from dust and debris while you are working.
Once you have all of your materials gathered, you can begin tiling the wall. The first step is to prepare the wall by cleaning it and removing any dust or debris. Next, you will need to apply the thin-set mortar to the wall using the notched trowel. Be sure to apply the mortar evenly, and use a level to ensure that it is level.
Once the thin-set mortar has been applied, you can begin placing the tiles on the wall. Start by placing the tiles in the center of the wall, and work your way out to the edges. Use a level to ensure that each tile is level, and press down firmly on each tile to ensure that it is securely bonded to the wall.
Once all of the tiles have been placed, you can begin grouting the joints. To do this, mix the grout according to the manufacturer's instructions, and then apply it to the joints using the grout float. Be sure to press the grout firmly into the joints, and remove any excess grout using a sponge.
Allow the grout to dry completely, and then seal it using a grout sealer. This will help to protect the grout from stains and moisture.
Tiling a wall is a relatively simple project that can be completed in a weekend. By following these instructions, you can achieve professional-looking results.

How To Prepare Uneven Walls And Floors Tile

How To Install Ceramic Wall Tile 13 Steps With Pictures

How To Install Wall Tile Howtospecialist Build Step By Diy Plans

How To Tile A Bathroom Wall With Wickes

How To Tile Over Existing Brepurposed

Top Mistakes To Avoid When Installing Wall Tiles

Tile Popping What It Is And How To Fix Ultratech

Every Step You Need To Install Large Format Tiles On A New Walk In Shower Wall Tile Walls 101

Installing Large Format Wall Tile Rogue Engineer

Tips For Installing Large Format And Thin Tiles Mapei
Related Posts


