Essential Aspects of Tiling a Wall
Tiling a wall may appear to be a daunting task, but with careful preparation and the right techniques, it can be accomplished successfully. Whether you're embarking on a bathroom renovation or simply refreshing a kitchen backsplash, understanding the essential aspects of tiling will ensure a professional and lasting outcome.
1. Preparation:
Thoroughly cleaning the wall surface is crucial. Remove any dirt, grease, or debris that may compromise adhesion. Repair any cracks or holes with a suitable patching compound, ensuring the surface is smooth and level.
2. Layout and Planning:
Plan the tile layout to minimize cuts and ensure aesthetic appeal. Mark the center point of the wall and use a chalk line to create vertical and horizontal guide lines. This will guide the positioning of the tiles and help achieve a balanced and symmetrical appearance.
3. Adhesive Selection:
Choose the appropriate adhesive based on the type of tiles and wall surface. Thin-set mortar is commonly used for ceramic and porcelain tiles, while mastic adhesives are suitable for lighter tiles. Follow the manufacturer's instructions carefully for mixing and application.
4. Applying the Adhesive:
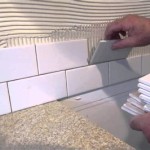
Using a notched trowel, apply a thin and even layer of adhesive to the wall surface. The ridges created by the trowel will help to bond the tiles. Start from the center of the wall and work outwards, ensuring the adhesive is evenly spread.
5. Tile Installation:
Gently press each tile into the adhesive, aligning it with the guide lines. Use tile spacers to maintain consistent spacing between tiles. Tap the tiles with a rubber mallet to ensure they are firmly seated in the adhesive.
6. Grouting:
Once the tiles are installed, allow sufficient time for the adhesive to set. Prepare the grout according to the manufacturer's instructions and apply it to the spaces between the tiles using a grout float. Remove any excess grout from the tile surfaces with a damp sponge.
7. Sealing and Finishing:
After the grout has dried, apply a sealant to protect the tiles and joints from moisture and stains. Sealants are available in various colors to match the tiles or add a contrasting accent. Use a damp cloth to wipe away any excess sealant from the tile surfaces.
Additional Tips:
- Wear appropriate safety gear, including safety glasses and gloves.
- Allow ample time for drying and curing between each step.
- Use a level to ensure the tiles are installed straight and at the desired angle.
- Practice cutting tiles on scrap material before working on the actual wall.
- Consider hiring a professional tiler if you are unsure or face complex tiling situations.
By following these essential aspects and paying attention to detail, you can confidently tile a wall and create a stunning and functional surface that will enhance the aesthetics of your space for years to come.

L And Stick Tile How To Install On A Wall Porch Daydreamer

How To Install L And Stick Tile Backsplash The Diy Mommy

L And Stick Tile How To Install On A Wall Porch Daydreamer

How To Add L And Stick Tile A Wall Drywall

How To Install L And Stick Tiles On A Wall My Uncommon Slice Of Suburbia

How To Prepare Uneven Walls And Floors Tile

How To Install L And Stick Tiles On A Wall My Uncommon Slice Of Suburbia

An Honest Review Of My L And Stick Tiles One Year Later

How To Install Wall Tiles Important Tips Ultratech Cement

How Do You Prepare A Wall For L And Stick Tiles
Related Posts


