What Board Do You Put Tile On? A Comprehensive Guide
Selecting the appropriate substrate for tile installation is a critical step in ensuring a long-lasting and aesthetically pleasing result. The underlying board, or substrate, provides the necessary support and bonding surface for the tile. Choosing the wrong board can lead to a variety of problems, including cracking, crumbling grout, and ultimately, complete tile failure. This article will delve into the various types of boards suitable for tiling, examining their properties, applications, and best practices for installation.
The choice of board depends on several factors, including the location (floor, wall, shower), the type of tile being used (ceramic, porcelain, natural stone), and the expected moisture levels in the area. Understanding these factors is essential for making an informed decision. Building codes often specify minimum requirements for substrates in wet areas, so consulting local regulations is also vital.
Understanding Common Substrate Options
Several types of boards are commonly employed as substrates for tile installations. Each offers distinct advantages and disadvantages depending on the specific application. This section will explore the most prevalent options, outlining their properties and suitability for various environments.
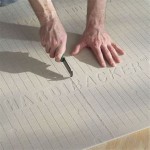
Cement Board: Cement board, also known as cement backer board or CBU (Cement Backer Unit), is a popular choice for tile installations, particularly in wet areas like bathrooms and showers. It is composed of cement reinforced with fiberglass mesh, making it highly resistant to water damage and mold growth. Cement board does not rot, warp, or delaminate when exposed to moisture, making it an ideal substrate for tile in demanding environments. It is available in various thicknesses and sizes to suit different applications.
Cement board requires proper installation, including the use of thin-set mortar to adhere it to the framing and screws specifically designed for cement board. Seams should be taped and mudded with thin-set mortar to create a waterproof barrier. When installing cement board, it is crucial to follow the manufacturer's instructions carefully to ensure optimal performance.
Plywood: Plywood is a wood-based panel product made by gluing thin layers of wood veneer together. While plywood can be used as a substrate for tile in some applications, it is generally not recommended for wet areas due to its susceptibility to moisture damage. Prolonged exposure to water can cause plywood to swell, warp, and delaminate, leading to tile failure. If plywood is used, it must be exterior-grade plywood, which is treated to resist moisture. However, even exterior-grade plywood is not as water-resistant as cement board or other specialized substrates.
When using plywood as a substrate, it is crucial to ensure that it is structurally sound and properly supported. Thicker plywood provides greater stability and reduces the risk of deflection. Plywood should be installed over solid framing with adequate spacing between framing members. A waterproofing membrane should be applied over the plywood before tiling to protect it from moisture penetration. It's important to note that many manufacturers of tile and setting materials void their warranties if plywood is used as a substrate in wet areas.
DensShield: DensShield is a tile backer board that features a moisture-resistant core coated with a waterproof acrylic facing. This integrated surface protection eliminates the need for a separate waterproofing membrane in many applications, making it a convenient and cost-effective option. DensShield is lighter than cement board, making it easier to handle and install. It is also resistant to mold and mildew growth.
DensShield is suitable for use in both wet and dry areas. Its waterproof facing provides excellent protection against moisture penetration, making it ideal for showers, bathrooms, and kitchens. Like cement board, DensShield requires proper installation, including the use of thin-set mortar and appropriate fasteners. Seams should be taped and mudded to ensure a watertight barrier. Cutting DensShield produces less dust than cement board, making it a cleaner alternative.
Extruded Polystyrene Foam Boards: Extruded polystyrene (XPS) foam boards are another option for tile substrates, particularly in shower installations. These boards are lightweight, waterproof, and provide excellent insulation. They are often used in conjunction with waterproofing membranes to create a highly effective moisture barrier. XPS foam boards are easy to cut and shape, making them suitable for creating custom shower designs.
XPS foam boards must be installed over a solid substrate, such as plywood or concrete. They are typically attached using thin-set mortar and mechanical fasteners. Seams should be sealed with a waterproof sealant to prevent water penetration. The lightweight nature of XPS foam boards can simplify installation, especially in difficult-to-reach areas.
Key Considerations for Selecting a Substrate
Choosing the right substrate for a tiling project requires careful consideration of several factors. These factors directly impact the longevity and performance of the tile installation. Addressing these key considerations during the planning phase helps prevent costly problems down the line.
Moisture Exposure: The level of moisture exposure is arguably the most critical factor in substrate selection. Wet areas, such as showers and bathrooms, require substrates that are highly resistant to water damage. Cement board, DensShield, and XPS foam boards are all excellent choices for these environments. Dry areas, such as living rooms and bedrooms, may allow for the use of plywood, provided it is properly installed and protected.
Understanding the potential for water penetration is crucial. Even in seemingly dry areas, leaks or spills can occur, potentially damaging a moisture-sensitive substrate like plywood. When in doubt, opting for a more water-resistant substrate is generally the safest approach.
Tile Type and Weight: The type and weight of tile being used also influence substrate selection. Larger and heavier tiles require a more rigid and stable substrate to prevent cracking or deflection. Natural stone tiles, such as marble or granite, are typically heavier than ceramic or porcelain tiles and therefore require a stronger substrate. Cement board is often preferred for heavy tile installations due to its strength and durability. Plywood may not be suitable for heavy tiles, especially on walls.
The substrate must be able to support the combined weight of the tile and the setting materials without sagging or deflecting. Failure to provide adequate support can lead to tile cracking and grout failure. Consulting with a tile professional or engineer is recommended for installations involving very large or heavy tiles.
Structural Integrity: The structural integrity of the underlying framing is essential for a successful tile installation. The framing must be strong and stable enough to support the weight of the substrate, tile, and setting materials. Weak or inadequate framing can lead to deflection and cracking. Before installing any substrate, it is crucial to inspect the framing and make any necessary repairs or reinforcements.
Framing members should be properly spaced and securely fastened. Adding additional framing members can increase the rigidity of the structure and improve its ability to support the tile installation. In some cases, it may be necessary to consult with a structural engineer to ensure that the framing is adequate.
Proper Installation Techniques
Even with the correct substrate, proper installation techniques are paramount for a successful and durable tile installation. Adhering to best practices ensures that the substrate is securely attached, waterproofed, and ready to receive the tile.
Fastening and Securing the Substrate: The substrate must be securely fastened to the framing using appropriate fasteners. Screws specifically designed for cement board or other substrates should be used. The spacing of the fasteners should comply with the manufacturer's recommendations. Over-driving the screws can damage the substrate, while under-driving them can compromise the connection. It is important to ensure that the fasteners are properly seated and flush with the surface of the substrate.
In addition to screws, thin-set mortar should be used to adhere the substrate to the framing. This provides additional support and helps to fill any gaps or voids between the substrate and the framing. Applying a layer of thin-set mortar to the back of the substrate before fastening it to the framing can significantly improve its stability and reduce the risk of deflection.
Seam Treatment and Waterproofing: Seams between substrate panels must be properly treated to prevent water penetration. A fiberglass mesh tape should be applied to the seams and then covered with thin-set mortar. This creates a continuous waterproof barrier that prevents water from seeping behind the substrate. Multiple coats of thin-set mortar may be required to create a smooth and even surface.
In wet areas, a waterproofing membrane should be applied over the entire substrate surface. This provides an additional layer of protection against moisture damage. There are various types of waterproofing membranes available, including liquid-applied membranes and sheet membranes. The choice of membrane depends on the specific application and the installer's preference. Following the manufacturer's instructions carefully is essential for ensuring that the waterproofing membrane is properly installed.
Surface Preparation: Before installing tile, the substrate surface must be clean, dry, and free of any loose debris or contaminants. Any dust, dirt, or grease can interfere with the bond between the tile and the substrate. The substrate should be wiped down with a damp cloth or sponge to remove any surface contaminants. In some cases, it may be necessary to prime the substrate before tiling to improve adhesion. A suitable primer will help to create a stronger bond between the tile and the substrate.
Choosing the correct board for tile installation is a multifaceted decision that requires careful consideration of various factors. By understanding the properties of different substrate options, assessing moisture exposure levels, and adhering to proper installation techniques, achieving a long-lasting and visually appealing tile installation becomes significantly more attainable.

How To Install Cement Board On A Floor Diy Family Handyman

Tiling On Wooden Floors Part 4 Overboarding Bathroom Guru

Easily Install Cement Board To Prep For Tile Installation

Tiling On Wooden Floors Part 4 Overboarding Bathroom Guru

How To Install Cement Backer Board For Floor Tile Installation The Home Depot

Can You Tile Over Drywall Master Building Materials Blog

Easily Install Cement Board To Prep For Tile Installation

How To Tile Onto Foil Backed Underfloor Heating Boards A Complete Guide

Waterproofing How Do I Correctly Install Ceramic Floor Tile Home Improvement Stack Exchange

How To Lay Tile Install A Ceramic Floor In The Bathroom Diy
Related Posts


