Transform Your Tiles With Ceramic Tile Painting Techniques
Ceramic tile, renowned for its durability and aesthetic versatility, is a staple in residential and commercial spaces. However, outdated colors, worn surfaces, or simply a desire for a fresh look can prompt a renovation. Instead of a costly and disruptive tile replacement, painting ceramic tiles provides a cost-effective and efficient solution. This article explores various ceramic tile painting techniques, equipping individuals with the knowledge necessary to undertake this transformative project successfully.
The process of painting ceramic tiles involves careful preparation, selection of appropriate materials, and precise application techniques. A successful outcome hinges on adherence to these crucial steps. Improper preparation or the use of unsuitable paints can lead to peeling, chipping, and an ultimately unsatisfactory finish. Conversely, a well-executed paint job can dramatically alter the appearance of a space, breathing new life into tired and dated tiles.
Essential Preparation for Ceramic Tile Painting
The foundation of any successful ceramic tile painting project lies in meticulous preparation. This stage ensures proper paint adhesion and a long-lasting, durable finish. Neglecting this crucial step invariably leads to premature paint failure and the need for re-application.
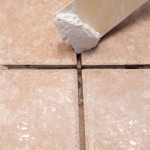
The first step involves a thorough cleaning of the tile surface. This removes dirt, grease, mildew, and any other contaminants that could impede paint adhesion. Begin by sweeping or vacuuming the area to remove loose debris. Subsequently, use a strong degreasing cleaner specifically designed for tile surfaces. Apply the cleaner according to the manufacturer's instructions, paying close attention to grout lines where grime tends to accumulate. A stiff-bristled brush can be used to scrub the grout lines effectively. After cleaning, rinse the tiles thoroughly with clean water to remove any residual cleaner. Allow the tiles to dry completely before proceeding to the next step.
Once the tiles are clean and dry, inspect them for any cracks, chips, or other imperfections. These flaws must be addressed before painting to ensure a smooth and uniform finish. Small cracks can be filled with a tile repair compound or epoxy filler. Apply the filler according to the manufacturer's instructions, ensuring that it is level with the surrounding tile surface. Allow the filler to dry completely before sanding it smooth. Larger chips or damaged tiles may require replacement before painting.
After repairing any imperfections, the next critical step is sanding the tile surface. Sanding creates a slightly rough surface that enhances paint adhesion. Use a fine-grit sandpaper (around 220-grit) and lightly sand the entire tile surface. Focus on areas that may be particularly smooth or glossy, as these areas tend to resist paint adhesion. After sanding, thoroughly remove all sanding dust with a tack cloth or a damp cloth. Ensure the surface is completely clean and dry before proceeding to the priming stage.
Priming is an indispensable step in ceramic tile painting. A primer acts as a bonding agent between the tile surface and the paint, promoting adhesion and preventing peeling. Choose a high-quality epoxy-based primer specifically designed for use on ceramic tile. Apply the primer in thin, even coats, following the manufacturer's instructions. Allow the primer to dry completely before applying the paint. Multiple coats of primer may be necessary for optimal adhesion, particularly on glossy or previously sealed tiles.
Selecting the Right Paint and Application Techniques
Choosing the appropriate paint is paramount for achieving a durable and aesthetically pleasing finish on ceramic tiles. Not all paints are created equal, and selecting the wrong type can lead to disappointment. Similarly, mastering the correct application techniques is critical for achieving a smooth, even, and professional-looking result.
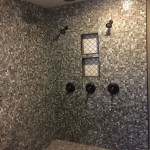
Epoxy-based paints and specialized tile paints are the preferred choices for painting ceramic tiles. Epoxy paint is known for its exceptional durability, resistance to moisture, and strong adhesion properties. This makes it ideal for high-traffic areas such as bathrooms and kitchens. Tile paints are specifically formulated to bond to ceramic surfaces and provide a long-lasting finish. These paints often contain additives that enhance their resistance to chipping, scratching, and fading.
Oil-based paints were traditionally used for tile painting, but they have largely been superseded by epoxy and tile paints due to their extended drying times, strong odors, and potential environmental concerns. Latex paints, while easier to work with and clean up, typically lack the durability and adhesion required for ceramic tile surfaces. Therefore, it is generally advisable to avoid using latex paints for this type of project.
The application technique significantly impacts the final appearance of the painted tiles. Before starting, protect surrounding surfaces with drop cloths and painter's tape. Use a high-quality brush, roller, or paint sprayer to apply the paint. When using a brush, choose one with synthetic bristles, as natural bristles tend to absorb water and become limp, affecting the paint application. For rollers, opt for a short-nap roller designed for smooth surfaces. A paint sprayer can provide the most even and consistent finish, but it requires careful masking and ventilation.
Apply the paint in thin, even coats, allowing each coat to dry completely before applying the next. Avoid applying thick coats, as this can lead to drips, runs, and uneven drying. Two to three thin coats are typically sufficient to achieve full coverage. Lightly sand between coats with a fine-grit sandpaper (around 320-grit) to remove any imperfections and create a smooth surface for the next coat. After applying the final coat, allow the paint to cure completely according to the manufacturer's instructions. Curing times can vary, but typically range from several days to a week. During the curing period, avoid using the painted surface or exposing it to moisture.
Maintaining and Protecting Painted Ceramic Tiles
While painting ceramic tiles offers a cost-effective and visually appealing transformation, proper maintenance and protection are essential for preserving the longevity and appearance of the painted surface. Regular cleaning and preventive measures can significantly extend the lifespan of the painted tiles and prevent premature wear and tear.
Regular cleaning is crucial for maintaining the appearance of painted ceramic tiles. Use a mild, non-abrasive cleaner and a soft cloth or sponge to clean the tiles regularly. Avoid using harsh chemicals, abrasive cleaners, or scouring pads, as these can scratch or damage the painted surface. For stubborn stains, try a mixture of baking soda and water or vinegar and water. Always test any cleaning solution in an inconspicuous area first to ensure it does not damage the paint.
Protecting the painted tiles from excessive moisture and humidity is particularly important in bathrooms and kitchens. Ensure adequate ventilation in these areas to prevent the build-up of moisture, which can lead to mold and mildew growth. Consider applying a sealant specifically designed for painted surfaces to provide an extra layer of protection against moisture. Reapply the sealant periodically as needed, following the manufacturer's instructions.
In high-traffic areas, consider placing rugs or mats to protect the painted tiles from scratches and wear. Avoid dragging heavy objects across the painted surface, as this can also cause scratches. If you need to move furniture or appliances, use furniture sliders or protective pads to prevent damage to the tiles. Regularly inspect the painted surface for any signs of chipping, peeling, or cracking. Address any issues promptly to prevent them from worsening. Small chips can be touched up with the same paint used for the original application.
By adhering to these maintenance and protection guidelines, individuals can ensure that their painted ceramic tiles retain their beauty and durability for years to come. The initial effort invested in proper preparation, paint selection, and application techniques will be rewarded with a long-lasting and visually appealing result.

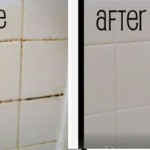
Transform Your Floor Diy Painted Tile Makeover How To Paint A Before After

How To Paint Tile Floors So They Last Pine And Poplar

How To Paint A Tile Floor Steps For Success Artsy Rule

Diy Master Bathroom Makeover How To Paint Your Tile Floors On A Budget Arts And Classy

How To Paint Tiles Transform Dated On A Budget

How To Paint Tile Floor Angela Marie Made

Painting Tile Floor And Grout Lines A Success

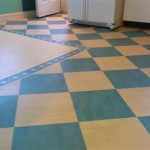
Painting Floor Tiles Revamping Your Space Ultratech Cement

Painting My Ugly Kitchen Tile Floor With Rust Oleum Rocksolid Home Paint Tutorial

Painted Ceramic Tile Floors Plus A 1 Year Update The Beauty Revival
Related Posts