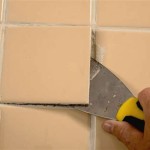
A tile backsplash can add a lot of character and beauty to your kitchen. Not only does it provide protection from splashes and stains, but it can be a great way to give your kitchen an entirely new look. Installing a tile backsplash isn’t as difficult as you might think. All it takes is a few materials, a little bit of time, and some patience.
The first step in installing a tile backsplash is to measure the area that you want to cover. You’ll need to know the total width, length, and height of the space in order to purchase the correct amount of tile. Once you have these measurements, you can begin to select the type of tiles you’d like to use.
Next, you’ll need to prepare the wall for the tile. This involves cleaning the wall, making sure it is level, and covering any electrical outlets or switches with a cover plate. Once the wall is prepared, you can begin laying the tiles. Start in the corner and work your way out. Make sure to use a level to ensure the tiles are straight.
Once the tiles are laid, it’s time to grout. Use a premixed grout and apply it with a rubber trowel. Work the grout into the gaps between the tiles. Once you’ve finished, wipe away any excess grout and allow it to dry.
Finally, you’ll need to seal the grout. Sealing the grout will help protect it from stains and moisture. Apply a sealer with a brush or roller and allow it to dry completely. With the sealer applied, your tile backsplash is complete and ready to be enjoyed.


Related Posts


