Tiling your kitchen backsplash can make a dramatic improvement to the look and feel of your kitchen. Subway tile is a classic choice that never goes out of style. Installing a subway tile backsplash can seem intimidating, but with the right tools and materials, it’s actually quite simple.
The first step is to plan the layout of the tile. Decide the size of the tile and the pattern you’d like to use. Measure the area to be tiled, and calculate the number of tiles you’ll need to complete the job.
Next, you’ll need to gather the necessary tools and materials. You’ll need tile adhesive, grout, a tile cutter, a wet saw, a notched trowel, a rubber float, a sponge, and a sealer.
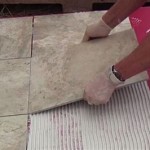
Now you’re ready to begin tiling. Apply the adhesive to the wall with the notched trowel, then press the tiles into the adhesive. Make sure to use spacers between the tiles to ensure even spacing. Use the wet saw to cut any tiles that need to be trimmed to fit.
Once all of the tiles are in place, let the adhesive dry. Once the adhesive is dry, mix the grout and apply it with a rubber float. Use a sponge to wipe off any excess grout, then let the grout dry completely. Once the grout is dry, seal it with a sealant.
Your subway tile backsplash is now complete. With just a few simple steps and the right materials, you’ve created a beautiful, timeless backsplash that will last for years.


Related Posts


