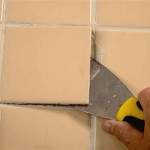
Replacing the tile in your shower can be a daunting task, but with the right tools and a little bit of know-how, it can be a manageable project. From prepping the area and removing the old tile to laying the new tile and grouting, this guide will take you through the steps of replacing your shower tile.
Before you begin, you’ll need to make sure you have all of the necessary supplies. This includes a variety of tools, such as a utility knife, chisel, hammer, tile saw, grout float, and a sponge. You’ll also need to purchase the new tile, as well as grout, adhesive, and waterproofing materials. Make sure you have enough of each of these materials to complete your project.
Once you have all of your supplies, you can begin prepping the area. This includes turning off the water, removing all fixtures, and removing any existing tile or grout. Use a utility knife or chisel to remove the tile, and use a hammer to break up the grout. Once you’ve removed all of the old tile and grout, you can begin preparing the surface for the new tile.
Now you can begin laying the new tile. Start in the corner and work your way out. Apply the adhesive to the back of the tile, and press it into place. Make sure the pieces are level and even, and use spacers to keep the tiles evenly spaced. Once all of the tiles are in place, you can begin grouting.
Use a grout float to press the grout into the spaces between the tiles. Make sure the grout is completely filled in, and use a damp sponge to wipe away any excess. Allow the grout to dry for at least 24 hours, then apply the necessary waterproofing materials. Once the waterproofing is complete, you can replace any fixtures and turn the water back on. Your shower tile is now ready for use!
Replacing shower tile can be a daunting task, but with the right tools and a little bit of know-how, it can be a manageable project. With this step-by-step guide, you should have no problem replacing your shower tile with ease.


Related Posts


