When it comes to refreshing the look of your bathroom, replacing the shower wall tile is a great project to undertake. Replacing shower wall tile isn’t overly difficult, but it does require patience and attention to detail. To get started, you’ll need a few simple materials and equipment, as well as a basic understanding of how to work with tiles. Here’s a step-by-step guide to help you get the job done.
First, you’ll need to remove the old tile. To do this, you’ll need to use a chisel and hammer to carefully remove the grout and old tile from the shower wall. Be sure to wear safety glasses and protective gloves when doing this, as there is a possibility of the tile breaking and the pieces flying around. Once you’ve removed the tile, you’ll need to clean the walls to remove any remaining dirt or grout. You can do this with a sponge and warm soapy water.
Next, you’ll need to measure the area where the new tile will be placed. You’ll want to make sure you have enough tile to cover the area, and that the tiles fit together properly. You’ll also need to purchase the necessary adhesive or mortar to attach the tiles to the wall. Be sure to buy the right type of adhesive or mortar for the type of tile you are using.
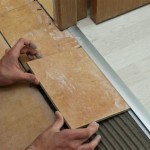
Once you have your materials ready, you can begin laying the tiles. It is important to remember to leave a small gap between each tile to allow for expansion. You’ll also want to make sure the tiles are level and even. Once all of the tiles are in place, you can grout them to finish the job.
Finally, you’ll need to seal the tiles after grouting. This will help protect them from moisture and other elements. You can use a sealant specifically designed for shower walls, or you can use a general sealant. It’s important to follow the manufacturer’s instructions when applying the sealant. Now you have a beautiful new shower wall and you can enjoy the results of your hard work.


Related Posts


