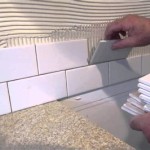
Removing wall tile can be a daunting task, but if done properly, it can be a relatively straightforward process. There are a few steps to take before beginning, and the right tools and preparation are essential for success. In this article, we’ll cover the basics of how to remove wall tile.
The first step in removing wall tile is to gather the necessary supplies. You’ll need a putty knife, a hammer, tile adhesive remover, a utility knife, a wet/dry vacuum, and safety goggles. Additionally, depending on the type of tile you’re removing, you may need sandpaper, a chisel, and a grout saw.
Once you have the necessary supplies, it’s time to begin. Start by turning off the electricity and water to the area you’ll be working in. Then, use the putty knife to gently pry up one corner of the tile and take a look at the back. If you can see adhesive, use the utility knife to cut a line around the adhesive. If the adhesive is too tough to cut, you may need to use a chisel to break it up.
Next, use the hammer to gently tap around the edges of the tile to loosen it from the wall. If the tile doesn’t come up easily, you may need to use the tile adhesive remover to get it off. Once the tile is loosened, you can pull it off with your hands or use the putty knife to help. If any adhesive remains, use the wet/dry vacuum to suck it up.
Finally, if the tile had grout around it, you’ll need to remove that as well. Use the grout saw to carefully remove the grout and then use the sandpaper to smooth any remaining jagged edges. Once you’ve finished, you should have a clean wall ready for your new tile.


Related Posts


