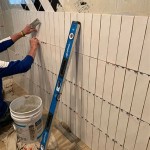
Tiling is a great way to give any room an eye-catching update. Whether you’re laying floor tile for a bathroom, kitchen, or any other area of your home, the process requires a few specialized tools and some patience. To help you get great results, here are the steps for laying floor tile like a pro.
The first step is to make sure the subfloor is in good condition. If it isn’t, the tile won’t adhere correctly and the project won’t look its best. Use a level to check for any low spots and fill them in with a leveling compound. Make sure the surface is free of debris and dust, and then you’re ready to begin.
The next step is to plan the layout. Start by measuring the area and marking the center point of the floor with a chalk line. Then decide on the pattern you’d like to use. From there, measure and mark the tile placement with a pencil. It’s always a good idea to take a photo of the layout before you begin so you can refer to it if you forget.
Once the tile placement is marked, you’re ready to start laying the tiles. Spread a thin layer of mortar over the floor, and then use a notched trowel to evenly spread it out. Start laying the tiles in the center and work your way out to the edges. Use spacers between each tile to ensure even spacing. When you’re finished laying the tiles, leave the mortar to dry overnight.
The final step is to grout the tiles. Mix the grout according to the instructions and use a rubber grout float to spread it evenly between the tiles. Work it into the spaces with a circular motion and use a damp sponge to wipe away any excess grout. Finally, use a dry cloth to buff the tiles and remove any remaining grout residue. With a few simple steps, you can lay tile like a pro and create stunning results.


/LayingCeramicFloorTile-5b75cedc46e0fb00507045bd.jpg)

/184592313-56a49cea3df78cf7728342d1.jpg)


Related Posts


