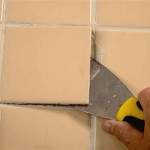
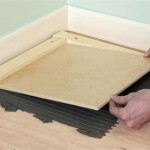
Laying ceramic tile is a great way to update the look of any room in your home. With the right tools and a little experience, anyone can lay ceramic tile like a pro. This guide will give you a step-by-step look at the process of laying ceramic tile.
The first step is to prepare the surface for the tile. This means removing any old tile and ensuring the surface is even and level. If the surface is uneven, you may need to use a levelling compound to make it even. Once the surface is prepared, you can start laying the tiles. Start in the center of the room and work your way outwards.
When laying the tiles, make sure to use a level to ensure they are laid correctly. Always use a tile saw or tile cutter to cut the tiles to the right size. A wet saw is the best option for cutting the tiles as it will give you a clean, precise cut. Once the tiles are laid, use a grout float to spread the grout evenly across the tiles. Make sure to wipe off any excess grout with a damp sponge.
The last step is to seal the grout. This will help to protect the grout from staining and will also make it easier to clean. Use a grout sealer and follow the directions on the package. Once the sealer is applied, your ceramic tile is ready for use.
Laying ceramic tile is an easy process that can be completed by anyone with a little experience. With the right tools and a bit of patience, you can create a beautiful surface in any room of your home. Follow this guide and you will be able to lay ceramic tile like a pro.


/LayingCeramicFloorTile-5b75cedc46e0fb00507045bd.jpg)


Related Posts


