Installing Tile Like A Professional: A Comprehensive Guide
Transforming your home with elegant and durable tile flooring is a rewarding project that requires meticulous planning and execution. Whether you're a seasoned DIY enthusiast or embarking on your first tiling adventure, this guide will provide you with the essential aspects to ensure a flawless installation.
1. Plan and Prepare
Before commencing the installation, it's crucial to plan the layout and gather the necessary materials. Determine the surface area to be tiled, and sketch a layout to optimize tile placement and minimize waste. Procure high-quality tiles, thin-set mortar, grout, spacers, a notched trowel, a level, and a tile cutter.
2. Prepare the Substrate
The substrate (the surface on which the tiles will be installed) must be clean, level, and structurally sound. Remove any existing flooring, debris, or old adhesive. Use a leveling compound to address any unevenness or slope. Ensure the substrate is completely dry before proceeding.
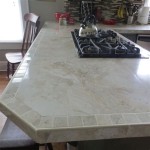
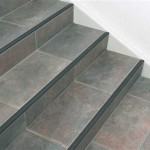
3. Install the Tiles
Apply a layer of thin-set mortar onto the substrate using a notched trowel. Carefully place the tiles onto the mortar, pressing them firmly to ensure good adhesion. Use spacers to maintain consistent spacing between tiles. Check the level regularly to ensure a flat surface.
4. Grout the Joints
Once the tiles are firmly set (typically 24 hours later), it's time to grout the joints. Mix the grout according to the manufacturer's instructions and apply it to the spaces between tiles using a grout float. Work diagonally to fill the joints evenly. Remove any excess grout with a damp sponge.
5. Seal the Grout
Allow the grout to fully cure (usually 2-3 days) before sealing it. Apply a grout sealer to protect the grout from stains and moisture. Use a brush or sponge to apply the sealer in thin, even coats. Allow it to dry completely before using the tiled surface.
6. Finishing Touches
Once the installation is complete, add the finishing touches. Remove any remaining spacers or temporary supports. Install baseboards or moldings around the perimeter of the tiled area for a polished look. Clean the tiles thoroughly to remove any residue or dust.
Tips for a Professional Finish
- Use a laser level to ensure the tiles are perfectly level.
- Set spacers between tiles on all sides to maintain consistent spacing.
- Mix thin-set mortar in small batches to prevent it from drying out.
- Avoid walking on the tiles during installation to prevent disturbing them.
- Seal the grout and tiles regularly to protect them from moisture and stains.

Installing Wood Look Tile Tips From A Pro Brepurposed

Tile Tips The Right Way To Install Tiles At Home

Installing Wood Look Tile Tips From A Pro Brepurposed

Transform Your Home With Professional Tile Installation Union Skills Corp

How To Install Tile Like A Professional

Porcelain Tile Installation Over A Concrete Floor Like Pro Matrixgc

How To Install Tile Flooring Forbes Home

How To Install Ceramic Tile Floors Like A Pro

Perform Like A Pro Installing Tile Backsplash

Top 10 Tile Installation Tips For A Professional Finish Garden Home
Related Posts