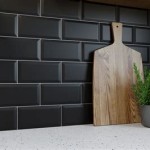
Installing a subway tile backsplash is a great way to add a touch of elegance to your kitchen. It can also be a great way to protect the walls from cooking splashes, and it can even help to reduce the amount of time it takes to clean up kitchen messes. Here’s a guide to help you get the job done right.
Before you begin, make sure you have the right materials. You’ll need tile adhesive, grout, a trowel, a rubber float, and a wet saw. You’ll also need a few tools like a tile cutter, a measuring tape, and a level. A sponge and a bucket of warm water are also helpful.
Once you have all the materials, you’re ready to begin. Start by measuring the wall and marking the area where you’ll be installing the tiles. Then, use the wet saw to cut the tiles to size. It’s important to get the cuts as accurate as possible to make sure your tiles fit together properly.
Once you have the tiles cut, it’s time to apply the adhesive. Spread the adhesive onto the wall using the trowel and apply the tiles one by one. Make sure to press the tiles firmly against the wall to make sure they adhere properly.
The last step is to grout the tiles. Use the rubber float to apply the grout between the tiles and let it sit for a few minutes. Then, wipe away the excess grout with a damp sponge and let the tiles dry for 24 hours. After that, you’re done!
Installing a subway tile backsplash may seem like a daunting task, but with the right materials and a little bit of patience, you can do it yourself. With a few simple steps, you can easily transform your kitchen and add a touch of elegance and style.


Related Posts


