Porcelain tile is an excellent choice for many home renovation projects. It is easy to install and offers a sleek, long-lasting finish. It is also one of the most popular materials for flooring, backsplashes, countertops, and more. Here are the steps for installing porcelain tile to ensure a successful project.
First, make sure you have the right tools. You will need a wet saw, tile spacers, grout float, notched trowel, and rubber grout float. You may also need a tile cutter and tile adhesive, depending on your project. Also, make sure you have plenty of tile spacers on hand to ensure even spacings between tiles.
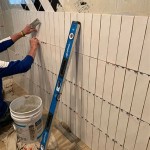
Once you have the supplies, you can start the installation process. Begin by preparing the surface area where you will be laying the tile. Make sure the surface is clean and free of dirt, dust, and debris. For concrete floors, use a concrete grinder to even out any bumps or unevenness. Once the surface is ready, spread the tile adhesive with a notched trowel.
Next, begin laying the tiles. Use the tile spacers to ensure even spacing between the tiles. Make sure to wipe away any excess adhesive. Once the tiles are laid, you can start grouting. Mix the grout according to the manufacturer’s instructions and spread it with a rubber grout float. Use a damp sponge to wipe away any excess grout.
Finally, you can seal the grout to protect it. Use a sealant specifically designed for grout and apply it with a brush or roller. Let the sealant dry for 24 hours before walking on the tile. With these simple steps, you can easily install porcelain tile for a beautiful and durable finish.


Related Posts


