Installing Floating Floor Over Tiles: A Comprehensive Guide
Transforming your home with a new floating floor is an accessible DIY project that can instantly elevate its aesthetics and functionality. While installing floating floors over existing tiles may seem like a daunting task, with careful preparation and these step-by-step instructions, you can achieve professional-looking results.
Materials and Tools
- Floating floor planks
- Underlayment (vapor barrier)
- Spacers
- Tapping block
- Pull bar
- Utility knife
- Tape measure
- Pencil
Step 1: Preparing the Tile Surface
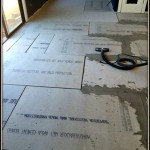
Thoroughly clean the tile surface to remove any dirt, dust, or debris that could affect adhesion. Inspect the tiles for any loose or cracked grout and repair them as necessary. Ensure that the tiles are flat and level using a level or straightedge.
Step 2: Installing the Underlayment
Roll out the underlayment over the prepared tile surface, overlapping the seams slightly. Use tape to secure the underlayment in place. This layer provides additional soundproofing, moisture resistance, and leveling for the floating floor.
Step 3: Laying the First Row
Starting from a corner of the room, insert spacers along the wall to create a consistent expansion gap. Place the first plank parallel to the longest wall and tap it into the adjacent plank using a tapping block and hammer. Continue laying the first row, using the spacers to maintain the expansion gap.
Step 4: Installing Subsequent Rows
Angle the end of the next plank at a 20-30 degree angle to the previous row and slide it into the pre-installed locking mechanism. Gently tap the plank down using the tapping block and hammer. Repeat this process, interlocking the rows until you reach the opposite wall.
Step 5: Cutting Planks to Size
Measure the distance between the last plank and the wall. Use a utility knife to score and snap the plank to the desired length. Insert spacers along the wall and tap the cut plank into place, using the pull bar to gently pry the last row into position.
Step 6: Installing Transition Pieces
If necessary, install transition pieces at doorways or other areas where the floating floor meets different flooring materials. Measure and cut the transition pieces accordingly and secure them using nails or adhesive.
Step 7: Finishing Touches
Remove the spacers and install baseboards or moldings to conceal the expansion gap around the perimeter of the room. This will give your floating floor a professional, finished look.
Tips for Success
- Use a moisture meter to verify that the tile surface is dry before installing the floating floor.
- Acclimate the floating floor planks to the room temperature for at least 24 hours before installation.
- Follow the manufacturer's instructions for the specific type of floating floor and underlayment you are using.
- Work with a partner for easier plank installation and alignment.
- Allow the floating floor to settle for a few days before placing heavy furniture or appliances on it.

Can Timber Flooring Be Laid Over Tiles Cb Floors

How To Install A Floating Tile Floor

Can You Put Laminate Flooring Over Tile Twenty Oak

Can You Lay Hybrid Flooring Over Tiles The Guys

Floating Vs Glue Down Elaborate Floors

Can You Install Wood Flooring Over Tiled Floors Havwoods

How To Install Laminate Flooring Over A Tile Floor 2024 Today S Homeowner

How To Install A Floating Tile Floor

Laminate Flooring In Basement Install A Floating Floor Over Existing Tile The Money Pit

Installing Laminate Tile Over Ceramic Diy Floors Wonderhowto
Related Posts


