Installing Ceramic Tile On a Concrete Basement Floor
Installing ceramic tile on a concrete basement floor offers numerous benefits, including enhanced aesthetics, increased durability, and improved resistance to moisture and stains. However, a successful installation requires careful preparation, proper techniques, and the right materials. This article provides a comprehensive guide to installing ceramic tile on a concrete basement floor, covering everything from assessment and preparation to tile layout and grouting.
Assessing and Preparing the Concrete Subfloor
The success of any tiling project hinges on the condition of the subfloor. A concrete basement floor requires thorough inspection and preparation before the first tile is laid. Identifying and addressing any issues early on will prevent problems that can compromise the integrity and longevity of the finished tile surface.
Moisture Testing: Basements are inherently prone to moisture. Before beginning any installation, it's critical to test the concrete slab for moisture content. Excessive moisture can weaken the bond between the tile and the adhesive, leading to tile cracking or detachment. Several methods can be used to test for moisture, including:
* Calcium Chloride Test: This test involves placing a measured amount of anhydrous calcium chloride under a sealed dome on the concrete surface. After a specified period (typically 72 hours), the calcium chloride is weighed again. The weight gain indicates the amount of moisture absorbed by the salt, which is then used to calculate the moisture emission rate. This test is considered one of the most accurate but requires specific equipment and a controlled environment.
* Plastic Sheet Test: A simple and inexpensive test involves taping a square of clear plastic sheeting (approximately 18 inches by 18 inches) to the concrete floor. Seal all edges with tape. After 24-72 hours, inspect the plastic for condensation. If condensation is present, or if the concrete underneath the plastic is darkened, it indicates excessive moisture.
* Electronic Moisture Meter: Electronic moisture meters provide a quick and non-destructive way to estimate moisture levels in concrete. These meters use electrical impedance or capacitance to measure the amount of moisture near the surface. While not as accurate as the calcium chloride test, they can provide a useful indication of potential moisture problems.
If moisture tests reveal excessive levels, mitigation measures are necessary. These may include installing a vapor barrier underlayment, applying a waterproofing membrane directly to the concrete slab, or addressing the source of the moisture intrusion, such as leaky pipes or poor exterior drainage. Allowing the concrete to dry adequately, possibly using dehumidifiers, is crucial before proceeding.
Surface Preparation: After addressing any moisture concerns, the next step is to prepare the concrete surface to ensure proper adhesion of the tile. This involves cleaning, leveling, and profiling the concrete.
* Cleaning: Thoroughly clean the concrete floor to remove any dirt, dust, grease, oil, paint, or other contaminants. Use a stiff-bristled brush and a suitable cleaning solution. For stubborn stains, consider using a concrete degreaser or etcher. After cleaning, rinse the floor thoroughly with clean water and allow it to dry completely.
* Leveling: Inspect the concrete floor for any cracks, unevenness, or low spots. Cracks wider than 1/8 inch should be filled with a concrete crack filler or patching compound. Low spots can be filled with a self-leveling underlayment, which is a cement-based mixture that flows easily and levels itself out. Follow the manufacturer's instructions for mixing and application. Allow the leveling compound to cure completely before proceeding.
* Profiling: Concrete surfaces often have a smooth, dense surface that can inhibit proper adhesion. Profiling the surface creates a slightly rough texture that promotes a strong bond between the concrete and the tile adhesive. This can be achieved through several methods:
* Acid Etching: This involves applying a diluted solution of muriatic acid to the concrete surface. The acid reacts with the concrete, creating a slightly etched surface. Follow the manufacturer's instructions carefully and wear appropriate safety gear, including gloves, eye protection, and a respirator. Rinse the floor thoroughly with clean water after etching to remove all traces of acid.
* Mechanical Grinding: Using a concrete grinder with a diamond grinding wheel is another effective way to profile the surface. This method removes a thin layer of concrete, creating a rough texture. Wear appropriate safety gear, including a dust mask and eye protection. A vacuum attachment is recommended to minimize dust.
Once the concrete floor is clean, level, and properly profiled, it is ready for tiling. A properly prepared subfloor is the foundation for a successful and long-lasting tile installation.
Choosing the Right Materials and Tools
Selecting the appropriate materials and tools is critical for a successful ceramic tile installation. Using the wrong adhesive, grout, or tools can lead to problems such as tile cracking, grout discoloration, or installation difficulties. A careful assessment of the project requirements and a thorough understanding of the available products is essential.
Choosing the Right Tile: The type of ceramic tile chosen will impact the durability and aesthetics of the finished floor. Consider factors such as the tile's intended use (residential, commercial), the amount of foot traffic, and the desired aesthetic. Some common types of ceramic tile include:
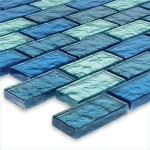
* Glazed Ceramic Tile: Glazed ceramic tile has a protective coating that makes it resistant to stains, scratches, and moisture. It is a popular choice for basement floors due to its durability and easy maintenance. Available in a wide range of colors, patterns, and sizes.
* Porcelain Tile: Porcelain tile is denser and more durable than standard ceramic tile. It is also more water-resistant, making it an excellent choice for basements that are prone to moisture. Porcelain tile is available in a variety of styles, including those that mimic natural stone or wood.
* Quarry Tile: Quarry tile is a type of unglazed ceramic tile that is known for its durability and slip resistance. It is often used in commercial kitchens and bathrooms, but can also be a suitable choice for basements.
When selecting tile, consider the PEI (Porcelain Enamel Institute) rating, which indicates the tile's resistance to abrasion. A higher PEI rating indicates greater durability. For basement floors, a PEI rating of 3 or higher is generally recommended.
Selecting Thin-Set Mortar (Adhesive): Thin-set mortar is the adhesive used to bond the tile to the concrete subfloor. Choosing the right thin-set mortar is crucial for ensuring a strong and durable bond. Consider the following factors when selecting thin-set mortar:
* Type of Tile: Different types of tile require different types of thin-set mortar. For example, some thin-set mortars are specifically formulated for use with porcelain tile, while others are better suited for ceramic tile.
* Substrate: The type of substrate (concrete) will also influence the choice of thin-set mortar. Some thin-set mortars are specifically designed for use over concrete substrates.
* Environmental Conditions: Consider the environmental conditions in the basement. If the basement is prone to moisture, choose a thin-set mortar that is water-resistant or waterproof.
* Modified vs. Unmodified: Modified thin-set mortars contain polymers that improve their adhesion and flexibility. These are generally recommended for basement floors, as they can better accommodate movement in the concrete slab. Unmodified thin-set mortars are typically used for smaller tile installations and are less flexible.
Choosing Grout: Grout fills the spaces between the tiles and helps to seal the floor. Selecting the right grout is important for preventing water damage and maintaining the aesthetics of the floor. Consider the following factors when selecting grout:
* Type of Tile: The type of tile will influence the choice of grout. For example, some types of tile are more porous than others and may require a specific type of grout to prevent staining.
* Grout Joint Size: The size of the grout joints will also influence the choice of grout. Wider grout joints typically require a sanded grout, while narrower grout joints can be filled with an unsanded grout.
* Color: Choose a grout color that complements the tile and the overall design of the room.
* Type: Epoxy grout is more resistant to stains, chemicals, and water than cement-based grout. However, it is also more difficult to install and more expensive. Cement-based grout is a more common and affordable option.
Essential Tools: Having the right tools on hand will make the installation process easier and more efficient. Essential tools include:
* Notched Trowel: Used to apply thin-set mortar to the concrete subfloor. The size and shape of the notches will depend on the size and type of tile being installed.
* Tile Cutter: Used to cut tiles to size. A manual tile cutter is sufficient for smaller projects, while a wet saw is recommended for larger projects or for cutting porcelain tile.
* Rubber Mallet: Used to gently tap the tiles into place and ensure proper adhesion.
* Spacers: Used to maintain consistent grout joint widths.
* Grout Float: Used to apply grout to the tile joints.
* Grout Sponge: Used to clean excess grout from the tile surface.
* Level: Used to ensure that the tiles are level.
* Measuring Tape and Pencil: Used for measuring and marking the layout.
Investing in quality materials and tools will pay off in the long run by ensuring a professional-looking and durable tile installation. It is crucial to read and follow the manufacturer's instructions for all materials used.
Proper Tile Layout and Installation Techniques
A well-planned tile layout and the application of proper installation techniques are essential for a professional and aesthetically pleasing result. Careful planning minimizes waste, ensures symmetry, and avoids awkward cuts in prominent areas. Adhering to best practices during the installation process guarantees a strong bond and a level surface, contributing to the longevity and beauty of the tiled floor.
Planning the Layout: Before applying any thin-set mortar, it's crucial to plan the tile layout. This involves determining the starting point, the direction of the tile, and the placement of any cuts. A well-planned layout can minimize waste, ensure symmetry, and avoid awkward cuts in prominent areas.
* Finding the Center: Locate the center of the room by measuring the length and width of the room and marking the midpoint of each side. Snap chalk lines connecting the midpoints of opposite sides. The intersection of these lines marks the center of the room.
* Dry Laying the Tile: Before applying any thin-set mortar, dry lay the tiles along the chalk lines to visualize the layout and identify any potential problems. Adjust the layout as needed to minimize cuts and ensure symmetry. If possible, avoid placing small slivers of tile along the edges of the room.
* Accounting for Doorways and Obstacles: Consider the placement of doorways, pipes, or other obstacles. If possible, position full tiles at doorways and around obstacles. Cut tiles should be placed in less visible areas.
Mixing and Applying Thin-Set Mortar: Thin-set mortar should be mixed according to the manufacturer's instructions. Add water gradually while mixing with a drill and mixing paddle until the mortar reaches a smooth, creamy consistency. Allow the mortar to slake (rest) for the recommended time before using.
* Applying the Mortar: Use the notched trowel to apply a thin, even layer of thin-set mortar to the concrete subfloor. Hold the trowel at a 45-degree angle and apply enough pressure to create ridges in the mortar. The size and shape of the notches will depend on the size and type of tile being installed. Apply mortar to a small area at a time (typically 2-3 square feet) to prevent it from drying out before the tiles are set.
Setting the Tiles: Once the thin-set mortar has been applied, carefully place the tiles on the mortar bed. Press each tile firmly into the mortar and use a rubber mallet to gently tap it into place. Use spacers to maintain consistent grout joint widths. Ensure that the tiles are level using a level.
* Cutting Tiles: When cutting tiles, use a tile cutter or a wet saw. For straight cuts, a manual tile cutter is usually sufficient. For more complex cuts or for cutting porcelain tile, a wet saw is recommended. Always wear eye protection when cutting tiles.
* Maintaining Alignment: After setting each tile, use a level to check its alignment with adjacent tiles. Make any necessary adjustments before the mortar sets. Periodically check the overall level of the floor to ensure that it is flat and even.
Curing the Mortar: After all the tiles have been set, allow the thin-set mortar to cure for the recommended time (typically 24-72 hours) before grouting. Avoid walking on the tiles during this time.
Grouting the Tile: Once the thin-set mortar has cured, the tile can be grouted. Remove the spacers and clean out any debris from the grout joints. Mix the grout according to the manufacturer's instructions. Apply the grout to the tile joints using a grout float, working it into the joints at a 45-degree angle. Remove excess grout from the tile surface using the grout float. After the grout has partially dried (typically 15-30 minutes), use a damp grout sponge to clean the tile surface. Rinse the sponge frequently in clean water. Repeat this process several times until the tile surface is clean and free of grout haze.
Sealing the Grout: After the grout has cured completely (typically 72 hours), seal the grout lines with a grout sealer. This will help to protect the grout from stains, water damage, and mildew. Apply the sealer according to the manufacturer's instructions. Allow the sealer to dry completely before using the floor.
By following these guidelines for tile layout and installation techniques, a professional and long-lasting ceramic tile floor will be achieved. Always refer to the specific manufacturer's instructions for the materials being used.
:max_bytes(150000):strip_icc()/can-you-install-tile-directly-on-concrete-1822600-04-458f7bb6c78348c1835cf8054ef36553.jpg?strip=all "How To Install Tile Over Concrete")
How To Install Tile Over Concrete

How To Tile A Concrete Basement Floor The Grout Medic

Concrete Basement Floor Tiling Preparation

How To Tile Onto Concrete Floors Porcelain Super

Tiling Over A Ed Concrete Slab Fine Homebuilding

How To Install Tiles On A Concrete Basement Floor Barana

Concrete Basement Floor Tiling Preparation

How To Tile A Concrete Floor Howtospecialist Build Step By Diy Plans

What Are The Best Flooring Options For A Concrete Substrate And Design

Basement Flooring 101 Bob Vila
Related Posts