Installing Ceiling Tiles To Create A Lay In Revit Family
Ceiling tiles are a great way to add a finished look to a room, and they can also help to improve the acoustics and insulation. Installing ceiling tiles is a relatively simple process, but there are a few things you need to keep in mind to ensure a professional-looking finish.
Here are the essential steps for installing ceiling tiles to create a lay-in Revit family:
1. Choose the right ceiling tiles
There are many different types of ceiling tiles available, so it is important to choose the right ones for your needs. Consider the size of the room, the amount of light you want to let in, and the style of the room.
2. Prepare the ceiling
Before you can install the ceiling tiles, you need to prepare the ceiling. This involves removing any existing ceiling tiles, cleaning the ceiling, and making sure that the ceiling is level.
3. Install the grid
The grid is what will support the ceiling tiles. It is important to install the grid correctly, so that the ceiling tiles are level and secure.
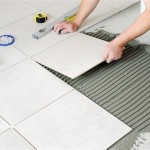
4. Install the ceiling tiles
Once the grid is installed, you can start installing the ceiling tiles. Start by placing a ceiling tile in the corner of the room. Then, work your way across the room, installing the ceiling tiles one at a time.
5. Finishing touches
Once all of the ceiling tiles are installed, you can add the finishing touches. This may include adding molding around the edges of the ceiling or installing a light fixture.
Here are some additional tips for installing ceiling tiles:
- Wear gloves when handling ceiling tiles, as the edges can be sharp.
- Use a level to make sure that the ceiling tiles are installed level.
- Be careful not to damage the ceiling tiles when installing them.
- If you are installing ceiling tiles in a large room, it may be helpful to use a chalk line to mark the location of the grid.
- Once the ceiling tiles are installed, you can clean them with a damp cloth.
Installing ceiling tiles is a relatively simple process, but it is important to take your time and do it right. By following these steps, you can create a professional-looking finish that will improve the look and feel of your room.

How To Do Realistic Ceiling Tiles Without A Surface Pattern Autodesk Community Revit S

How To Do Realistic Ceiling Tiles Without A Surface Pattern Autodesk Community Revit S

Make Ceiling Grids Actual And Not Part Of The Material Autodesk Community

Solved Create A Custom Ceiling Autodesk Community Revit S

Ceiling In Revit Tutorial Smart Suspended

Make Ceiling Grids Actual And Not Part Of The Material Autodesk Community

Revit Custom Ceiling Grids Micrographics

Solved Angular Tilted Ceiling Panel Autodesk Community Revit S

Solved Creating 3d Roof Tiles Autodesk Community Revit S

Ceiling With Construction In Revit Tutorial
Related Posts