Installing Ceiling Tiles for a Smoother, More Refined Ambiance
Ceiling tiles represent a versatile solution for enhancing the aesthetic appeal and acoustic properties of interior spaces. They offer a significant upgrade over exposed joists or damaged drywall, providing a finished and often more visually appealing surface. This article details the process of installing ceiling tiles, focusing on the necessary tools, preparation steps, and installation techniques that ensure a professional-looking and durable result.
Before embarking on the installation process, it is crucial to assess the existing ceiling structure. This assessment will determine the best installation method and the type of tiles most suitable for the specific application. Factors to consider include the existing ceiling material (drywall, plaster, or open joists), the presence of any obstructions such as pipes or ductwork, and the desired level of sound absorption or fire resistance.
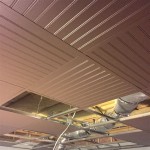
The two primary methods for installing ceiling tiles are direct application and suspended grid systems. Direct application involves adhering the tiles directly to the existing ceiling surface. This method is generally suitable for smooth, level surfaces that are free of significant imperfections. Suspended grid systems, also known as drop ceilings, utilize a metal framework suspended from the existing ceiling to support the tiles. This method is advantageous for concealing imperfections, accessing utilities above the ceiling, and improving sound insulation.
Key Point 1: Preparation and Material Acquisition
Proper preparation is paramount to a successful ceiling tile installation. This stage involves gathering the necessary tools and materials, preparing the existing ceiling surface, and accurately measuring the space to determine the required quantity of tiles. The tools required will vary depending on the chosen installation method.
For direct application, essential tools include a measuring tape, pencil, utility knife, straight edge, notched trowel (for adhesive application), safety glasses, a dust mask, and potentially a ladder or scaffolding for reaching higher areas. For suspended grid systems, the tool list expands to include a level, plumb bob, drill, screw gun, metal snips, and potentially specialized grid-cutting tools.
Material selection extends beyond the ceiling tiles themselves. For direct application, the appropriate adhesive is crucial. Ensure the adhesive is compatible with both the tile material and the existing ceiling surface. Consult the adhesive manufacturer's instructions for specific application guidelines. For suspended grid systems, the necessary materials include the grid components (main runners, cross tees, and wall angles), suspension wire, fasteners, and potentially insulation for added soundproofing and thermal performance.
Accurate measurement is essential for minimizing waste and ensuring a professional finish. Measure the length and width of the ceiling area carefully, paying attention to any irregularities or obstructions. Use these measurements to calculate the total square footage and determine the number of tiles required. It is generally advisable to order slightly more tiles than calculated to account for cuts and potential breakage.
Preparing the existing ceiling surface is critical for direct application. Ensure the surface is clean, dry, and free of loose paint, debris, or mold. Repair any cracks or holes with patching compound and sand smooth. For suspended grid systems, the preparation focuses on identifying and addressing any structural issues that may compromise the stability of the hanging system. Locating joists and other supporting members is key for ensuring the grid is properly anchored.
Key Point 2: Direct Application of Ceiling Tiles
Direct application involves adhering the tiles directly to the prepared ceiling surface. This method is most effective on smooth, level surfaces and requires careful execution to ensure proper adhesion and alignment.
Begin by applying the adhesive to the back of the first tile using a notched trowel. Follow the adhesive manufacturer's instructions regarding the amount and pattern of adhesive application. Position the tile carefully against the ceiling surface, applying firm and even pressure to ensure good contact. Maintain consistent spacing between tiles using spacers if necessary. Check the alignment of each tile with a level to prevent sagging or unevenness.
When cutting tiles to fit around edges or obstructions, use a utility knife and straight edge to score the tile along the desired cut line. Break the tile along the scored line, or use a saw for more intricate cuts. Apply adhesive to the cut edge and position the tile against the ceiling, ensuring a tight fit.
For ceilings with complex shapes or numerous obstructions, consider creating a template to guide the cutting process. This can help to minimize errors and ensure a professional-looking result. Regularly clean any excess adhesive from the tile surfaces with a damp cloth to prevent staining.
Pay particular attention to the edges of the ceiling. Neat and even edges are essential for a finished appearance. Consider using trim or molding to conceal any gaps or imperfections along the perimeter of the ceiling. Allow the adhesive to fully cure according to the manufacturer's instructions before applying any additional finishes or treatments to the tiles.
Key Point 3: Installing a Suspended Grid System
A suspended grid system offers a versatile solution for ceilings with uneven surfaces, complex layouts, or the need to conceal utilities. This method involves suspending a metal framework from the existing ceiling and installing the tiles within the grid.
Begin by determining the desired height of the suspended ceiling. Use a level and plumb bob to establish a consistent horizontal plane around the perimeter of the room. Mark this plane on the walls to serve as a reference line for installing the wall angles.
Attach the wall angles to the walls along the reference line using screws or nails. Ensure the angles are securely fastened and level. Next, install the main runners, which are the primary supporting members of the grid. Suspend the main runners from the existing ceiling using suspension wire and fasteners. Space the main runners according to the tile manufacturer's specifications.
Install the cross tees, which connect the main runners and create the grid pattern for the tiles. Ensure the cross tees are perpendicular to the main runners and securely fastened. Use metal snips to cut the cross tees to the appropriate length as needed. Adjust the suspension wire to ensure the grid is level and properly aligned.
Once the grid is complete, carefully install the ceiling tiles into the grid openings. Lift each tile into place and gently lower it onto the grid. Ensure the tiles are seated securely and flush with the grid. When cutting tiles to fit around edges or obstructions, use a utility knife or specialized tile cutter. Place the cut edges against the wall or obstruction to conceal any imperfections.
Consider incorporating lighting fixtures, air vents, or other accessories into the suspended ceiling. These can be easily integrated into the grid system by using compatible mounting brackets and accessories. Ensure all electrical connections are made by a qualified electrician.
Finally, inspect the completed ceiling to ensure all tiles are properly installed and aligned. Make any necessary adjustments to ensure a consistent and professional-looking finish. Periodically inspect the suspension system and tiles for any signs of damage or wear.
Choosing the correct type of ceiling tile is also important. Different tiles offer varying levels of sound absorption, fire resistance, and moisture resistance. Mineral fiber tiles are known for their excellent sound absorption properties, while fiberglass tiles offer superior fire resistance. Moisture-resistant tiles are ideal for bathrooms and kitchens. Consider these factors when selecting the tiles for your specific application.
The aesthetic options for ceiling tiles are vast. They are available in a range of colors, textures, and patterns, allowing you to customize the look of your ceiling to complement your interior design. Some tiles even mimic the look of wood or metal, providing a unique and sophisticated aesthetic.
Proper maintenance is essential for preserving the appearance and performance of ceiling tiles. Regularly dust the tiles with a soft brush or vacuum cleaner attachment. Avoid using harsh chemicals or abrasive cleaners, as these can damage the tile surface. Replace any damaged or stained tiles promptly to prevent further deterioration.

Ceiling Tile Installation Comparing Your Options Ceilings Armstrong Residential

How To Tile A Ceiling Tips And Guidelines Howstuffworks

Ceilings Armstrong Residential

A Drop Ceiling That Looks Better Than Drywall How To Install In Basement Diy

Diy Beadboard Ceiling Tutorial Easy And Inexpensive Custom Treatment
Tile And Panel Installation Rockfon

Installing Wall And Ceiling Panels In Your Kitchen Or Bathroom

Basement Ceiling Ideas Installation

Prolite Decorative Grid Strips Pack Of 25

How To Create A Coffered Ceiling Decorative Tiles Inc
Related Posts


