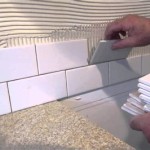
Installing a tile backsplash in your kitchen is an easy and affordable way to modernize the look of your home. Not only will it add a touch of sophistication to your kitchen, but it will also provide a layer of protection to walls from food grease and other liquids.
Before starting your project, it’s important to plan out the type of tile you will be using. If you’re looking for durability, ceramic tile is the way to go. If you’re looking to add a hint of color, you may want to consider glass tile. Once you’ve decided on the type of tile you’d like to use, it’s time to measure the area of the wall that you’d like to cover.
When measuring, be sure to leave at least a half-inch gap between the tile and the countertop. This will allow for a grout line between the two. Once you’ve measured the area, you can begin to prepare the wall. Start by cleaning the wall with a mild detergent and water. Be sure to remove any stickers or residue that may be on the wall.
Next, you will need to apply a layer of mortar to the wall. This will help the tiles adhere to the wall and provide a clean surface for the tiles to rest on. Start by applying a thin layer of mortar to the wall and then use a trowel to spread it evenly. Once the mortar is applied, you can begin to lay the tile.
Start at the top of the wall and work your way down. Use a level to ensure that the tiles are straight and even. Once all of the tiles are in place, you will need to grout the lines between them. Use a grout float to press the grout into the lines and then use a sponge to wipe away any excess grout. Once the grout has had a chance to dry, you can use a sealant to protect the grout from water and stains.
Installing a tile backsplash is an easy and affordable way to spruce up your kitchen. With a few simple tools and materials, you can create a look that is sure to impress your friends and family. Follow the steps above, and you will soon have a kitchen that looks as if it was designed by a professional.


Related Posts


