Installing Hardie Board for Tile Flooring: A Comprehensive Guide
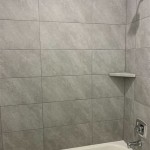
Hardie board, a popular cement board material, provides a stable and durable surface for tile flooring installations. Due to its resistance to moisture and temperature fluctuations, it is an ideal choice for bathrooms, kitchens, and other moisture-prone areas.
Materials Required:
- Hardie board panels
- Thinset mortar
- Backer board screws
- Screw gun
- Level
- Tile spacers
- Grout
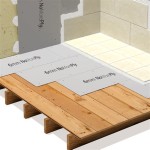
Step 1: Prepare the Subfloor
Ensure that the subfloor is clean, dry, and level. If necessary, install a layer of plywood or other underlayment to create a smooth, even surface.
Step 2: Cut the Hardie Board
Measure and cut the Hardie board panels to fit the size of the flooring area. Use a circular saw or a utility knife to make clean, straight cuts.
Step 3: Spread Thinset Mortar
Apply a thin layer of thinset mortar to the subfloor using a notched trowel. Ensure that the mortar is evenly distributed and forms small ridges.
Step 4: Install the Hardie Board
Place the Hardie board panels onto the thinset mortar and press them firmly into place. Use a level to ensure that the panels are level and even.
Step 5: Secure the Hardie Board
Drive backer board screws through the Hardie board and into the subfloor at every stud. Space the screws approximately 6 inches apart.
Step 6: Fill the Joints
Apply thinset mortar to the joints between the Hardie board panels. Use a taping knife or a trowel to fill the gaps and smooth the surface.
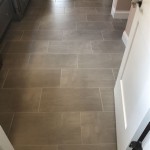
Step 7: Install the Tile
Once the Hardie board is installed and the thinset has cured, you can install the tile flooring according to the manufacturer's instructions.
Step 8: Grout the Tile
After the tile is installed, fill the joints between the tiles with grout. Use a grout float or a sponge to apply the grout and remove any excess.
Tips for Success:
- Wear safety glasses and gloves when working with Hardie board.
- Use a moisture-resistant thinset mortar for areas that are prone to moisture.
- Allow the thinset mortar to dry completely before installing the tiles.
- Seal the grout joints to prevent moisture penetration.
- Consider installing a waterproof membrane beneath the Hardie board for added protection against moisture damage.

How To Install Hardie Backer Cement Board On Floors James Pros

How To Install Hardie Board For Floor Tile

How To Install Cement Backer Board For Floor Tile Installation The Home Depot

How To Install Cement Board On A Floor Diy Family Handyman

Easily Install Cement Board To Prep For Tile Installation

Install 1 4 Hardie Backer Board In Bathroom Remodel Diy Boomers

Hardie Backer Boards Everything You Need To Know Walls And Floors

How To Install Cement Board The Home Depot

How To Install Cement Board In 3 Easy Ways Q1 2025 Infographic

Hardiebacker Installation
Related Posts