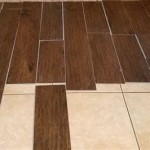
Adding a tiled backsplash to your kitchen is a great way to create a unique, custom look. It’s a relatively simple project that can help to elevate the aesthetic and create a sense of cohesion with the rest of the room. With so many options to choose from, you can find a tile that fits both your style and budget. Here’s how to tile a kitchen backsplash to get the look you want.
The first step is to choose the tile you want to use. There are a wide range of materials and colors to choose from, including ceramic, porcelain, and glass. You can also choose from a variety of shapes, such as subway tiles, hexagons, and mosaics. Once you have chosen the tile, you can begin to plan out the layout of the backsplash.
The next step is to measure the area you want to tile. Be sure to measure twice and cut once. To ensure an even look, mark out a grid pattern on the wall and use it as a guide for laying the tiles. You can use a level to ensure the tiles are perfectly aligned. Once the tiles are laid, use a tile cutter to trim any excess pieces.
Once the tiles are cut, it’s time to apply the adhesive. You can use a variety of different adhesives, but make sure to follow the instructions on the package. After the adhesive is applied to the back of the tile, place it on the wall and press it into place. Make sure to use a grout float to fill in any gaps between the tiles.
Finally, you can grout the tiles. Again, follow the instructions on the package and make sure to use a grout sealer to protect the grout from staining. Allow the grout to dry completely before applying any sealer. Once the sealer is dry, you can enjoy your new tiled kitchen backsplash!


Related Posts


