How to Tile a Fireplace Like a Pro
A fireplace is a focal point in any room, and a tile installation can elevate its aesthetic appeal and enhance its functionality. Whether you are installing new tiles over existing ones or replacing them entirely, the process involves careful planning and execution. This guide provides a comprehensive overview, covering the key steps and considerations for achieving a professional finish.
1. Preparation is Key
The success of your tile project hinges on meticulous preparation. Begin by assessing the fireplace's existing condition and identifying any potential issues. This may involve removing any old tiles, mortar, or debris. If you are working with an existing firebox, ensure it is safe and functional. Check for cracks, damage, or rust, and address any concerns before starting the installation.
Once the surface is clear, you need to prepare the substrate. This may involve applying a bonding agent or a moisture barrier, depending on the material of your fireplace. Additionally, you may need to use a leveling compound to ensure a smooth and even surface for your tile installation. Remember to consult with a professional if you encounter any structural issues or have concerns about the integrity of your fireplace.
2. Planning the Layout
Before you begin laying tiles, it is essential to plan your layout. This involves considering factors such as tile size, desired pattern, and the overall design of the fireplace. Measure the area accurately and create a diagram to visualize the tile arrangement. You can use a pencil and paper or a digital drawing program.
Consider the grout lines and the spacing between tiles. You can use spacers to maintain consistent spacing and ensure a neat and professional finish. It is also important to consider the placement of any decorative elements, such as a fireplace surround or a mantel. Always check your plan for any potential issues or adjustments before moving on to the next step.
3. Tile Installation
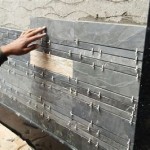
Once you have created your layout, you can begin installing the tiles. Start by spreading a thin layer of mortar on the prepared substrate, using a notched trowel to ensure even coverage. The notches in the trowel create grooves that allow the mortar to bond with the back of the tiles. Position the tiles carefully, ensuring they are level and aligned with your layout plan. Use a rubber mallet to gently tap the tiles into place.
Remember to use spacers between tiles to maintain consistent grout lines and prevent unevenness. As you install the tiles, make sure to clean up any excess mortar before it dries. Work in sections to ensure a steady pace and prevent the mortar from drying too quickly. If you are working with a large fireplace, it may be necessary to use a level to ensure that the tiles are evenly installed.
4. Grouting and Finishing Touches
After the mortar has dried, you can begin grouting. This involves filling the spaces between the tiles with grout. Apply the grout using a rubber float, working it into the joints and ensuring that they are completely filled. Allow the grout to dry before wiping away any excess using a damp sponge.
Once the grout has dried, you can apply a sealant to protect the tiles and the grout from stains and moisture. This step ensures that the fireplace remains durable and maintains its aesthetic appeal. Finally, you can install any trim or decorative elements, such as a mantel or a surround. Take your time and ensure that everything is properly secured and aligned.

Er Friendly Fireplace Makeover With L Stick Tiles The Homes I Have Made

Er Friendly Fireplace Makeover With L Stick Tiles The Homes I Have Made

Er Friendly Fireplace Makeover With L Stick Tiles The Homes I Have Made

Er Friendly Fireplace Makeover With L Stick Tiles The Homes I Have Made

A Step By Guide To Fireplace Refacing Diy Family Handyman

A Step By Guide To Fireplace Refacing Diy Family Handyman

5 Easy Diy Fireplace Makeover Ideas Do It Best

Fireplace Tile Ideas Designs To Inspire You

Fireplace Tile Ideas Designs To Inspire You

Er Friendly Fireplace Makeover With L Stick Tiles The Homes I Have Made
Related Posts

