How To Tile A Cement Basement Floor Shower
Tiling a cement basement floor shower requires careful planning and execution to ensure a watertight and durable result. This process involves several key steps, from preparing the substrate to grouting and sealing.
Assessing and Preparing the Cement Floor
The existing cement floor must be sound, level, and free of cracks or defects. Any cracks should be repaired using an appropriate concrete patching compound. Significant unevenness may require the application of a self-leveling underlayment to create a smooth surface for tiling.
Ensure proper sloping towards the drain. This slope, typically ¼ inch per foot, is crucial for efficient water drainage and prevents pooling. If the existing slope is inadequate, a mortar bed can be used to adjust the floor level and achieve the correct pitch.
Thoroughly clean the cement floor to remove any dust, debris, or contaminants that could interfere with the bonding of the waterproofing membrane and tile adhesive. A stiff brush and a suitable cleaning solution are recommended for this task.
Waterproofing is Paramount
Waterproofing is the most critical aspect of tiling a basement shower floor. A properly installed waterproof membrane prevents water from seeping into the concrete and causing damage. This step should not be overlooked.
Apply a waterproof membrane designed for shower applications. Common options include liquid-applied membranes and sheet membranes. Liquid membranes are rolled or brushed onto the floor, while sheet membranes are adhered to the surface. Follow the manufacturer's instructions carefully for proper application.
Extend the waterproofing membrane up the shower walls at least 6 inches above the curb to create a complete watertight seal. This overlap prevents water from penetrating the wall-floor junction, a common area for leaks.
Perform a flood test after the waterproofing membrane has cured. This involves plugging the drain and filling the shower pan with water to check for leaks. Leave the water for 24 hours and inspect the surrounding area for any signs of moisture.
Mortar Bed and Tile Installation
Once the waterproofing membrane is fully cured and tested, a mortar bed is typically installed. This layer provides a stable and level surface for tile adhesion.
Mix a dry-set mortar according to the manufacturer's instructions. Apply the mortar to the shower floor, ensuring an even thickness and maintaining the correct slope towards the drain. Use a notched trowel to create ridges in the mortar, which will improve the bond with the tiles.
Begin laying the tiles from the center of the shower floor, working outwards towards the walls. Use spacers to maintain consistent grout lines. Ensure the tiles are firmly embedded in the mortar.
Cut tiles as needed to fit around the drain and edges of the shower floor. Use a tile cutter or wet saw for accurate and clean cuts.
Grouting and Sealing
After the tile adhesive has cured, apply grout to fill the spaces between the tiles. Choose a grout that is suitable for wet areas and offers mildew resistance.
Mix the grout according to the manufacturer’s instructions and apply it using a grout float, pressing it firmly into the joints. Remove excess grout with a damp sponge.
Allow the grout to cure completely, then apply a grout sealer to protect it from moisture and staining. This step helps to maintain the appearance and integrity of the grout lines over time.
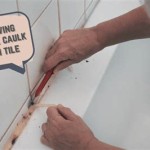
Caulk around the perimeter of the shower floor where it meets the walls and around fixtures to create a watertight seal. This prevents water from seeping behind the tiles and causing damage.
Final Considerations
Allow ample curing time for all materials, including the mortar, tile adhesive, grout, and sealant, before using the shower. Follow the manufacturer's recommendations for curing times.
Regular cleaning and maintenance are essential to prolong the life of the tiled shower floor. Use a mild cleaning solution and avoid abrasive cleaners that can damage the tiles and grout.
Inspect the shower floor periodically for any signs of damage or leaks. Address any issues promptly to prevent further problems.

How To Tile A Basement Shower The Home Depot

How To Use Concrete For Designing A Bathroom Shower Exchange

3 Shower Pan Choices For A Solid Tile Floor Installation Fine Homebuilding
Shower Drain Flush With Concrete Floor Help Ceramic Tile Advice Forums John Bridge
Shower Pan On A Slab Jlc

How To Tile A Basement Shower The Creative Mom

How To Build A Tile Shower Pan Icreatables Com
Shower Drain Flush With Concrete Floor Help Ceramic Tile Advice Forums John Bridge

Installing Mortar Shower Pan

Concrete Mix For Shower Pans Types Mixes And Comparisons
Related Posts

